Want to display your images in a stylish way? Image galleries are the ideal solution; they’re a great way to showcase your work, products, and other images on your WordPress website. They can also be used for displaying images for sale, event photos, and more.
You can create image galleries using the default WordPress settings or with a plugin. In this article, we’ll compare both methods and discuss why using a plugin like FooGallery is the better option.
Why Should You Use an Image Gallery on Your WordPress Website?
There are 3 clear benefits to using a photo or media gallery, rather than just standalone images:
1. You can display lots of images neatly.
WordPress galleries help you display large amounts of images in an organized manner which makes it easy for users to browse through them. Galleries often include predesigned templates or layouts, so you can find a gallery style that matches your website’s look and feel.
You can often add additional features, such as filtering or a gallery search, to improve the user experience even further. Whether you’re a photographer showcasing your portfolio or a business showcasing product photos, your website will look much more professional if you use an image gallery as opposed to having lots of photos scattered throughout your pages.
2. It can increase conversions.
You can use image galleries to showcase your artistic work or your eCommerce products, which makes it a lot easier for site visitors to compare their options and decide what works, or which items they’re interested in. Some plugins will make it possible for you to link images to product pages, or add Buy Now buttons directly in the gallery.
3. It improves SEO
Image galleries are also very useful for SEO as you’ll often be able to add metadata, tags, and captions, all of which give more context to search engine crawlers as they analyze your content. You’ll also be able to add image galleries to sitemaps to ensure they get crawled and indexed.
How to Add an Image Gallery in WordPress Without a Plugin
In WordPress you can create galleries straight away. You don’t need any additional plugins. However, the WordPress gallery function is quite limited, meaning you don’t have as much versatility or as many styling options.
To create your gallery using the basic WordPress functionality, simply search for the insert gallery block in the WordPress editor and click on it.

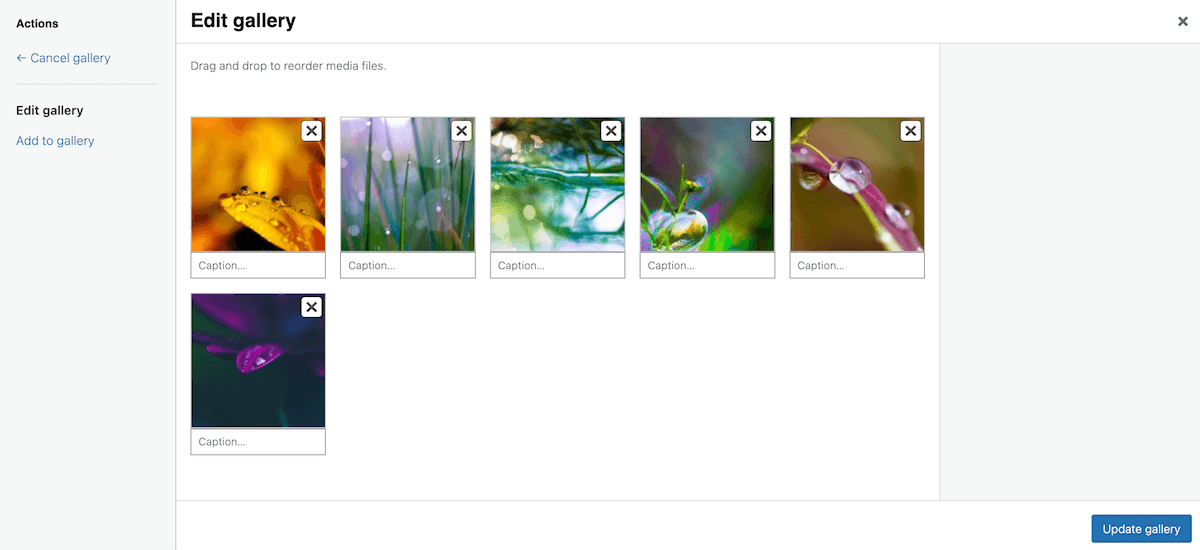
You can then upload new images to your media library or select images already in your library. WordPress automatically inserts these into a gallery for you. You will have a few options here – you can drag and drop images to reorder them, and add or remove images. You’ll also be able to add titles, captions, descriptions, and alt text to each image.
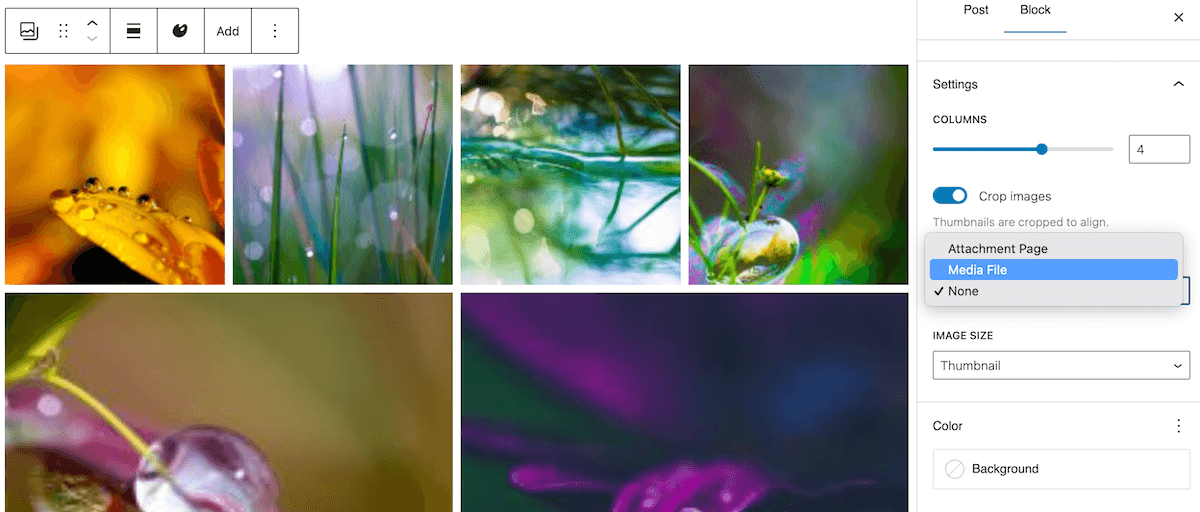
Once you’ve uploaded your images, you’ll see the gallery on your page or post. Here, you can use the settings in the sidebar of the page to style your gallery. For example, you can select the number of columns and say whether the images should be cropped. You can add rounded corners and select a background color for the gallery.
You can also link your images to an attachment page (such as a specialized page in your blog that shows the image in your selected theme) or a media file (a direct link to the full-size uploaded image). And you can alter the size of your images.
What Are the Limitations of Using Default WordPress?
The functionality, features, and other gallery options available to you in WordPress by default are somewhat limited, which makes it more difficult to create an eye-catching gallery. Aside from this, there are several other potential problems.
- Image galleries made with default WordPress aren’t responsive and so won’t look the same on different devices. This could mean that mobile users won’t be able to easily view your galleries, and this can be problematic for SEO.
- You can’t tag images or organize galleries by topic or album. While you do have the drag-and-drop functionality, reorganizing galleries manually can take time. It also limits you to smaller galleries if you want to avoid frustrating your users – using albums, paging, or filtering would fix this issue, making it easier for users to view items in the gallery, but these features aren’t available in default WordPress galleries.
- You can’t reuse galleries, and so need to build them from scratch if you want to display them more than once. This also means restyling each gallery when you create it.
- If you link your gallery to a media file or attachment page, users will be redirected to a new page. This means they’ll have to click the back button to return to your site, so there is a risk of losing your visitors.
How to Create an Image Gallery With FooGallery
Considering all the above, if you’re looking for anything more than a basic gallery on your website, it is better to use a WordPress photo gallery plugin. FooGallery is an ideal choice as it’s all-in-one image gallery for WordPress which includes three PRO plans.
FooGallery comes with loads of gallery features, including customizations, a built-in lightbox, custom CSS and lazy loading. The features then scale up accordingly and, depending on the pro version that you pick, you’ll get up to 11 gallery layouts, advanced filtering options, WooCommerce integration, and loads more (we’ll look at just a few of these features below).
The Best WordPress Gallery Plugin
FooGallery is an easy-to-use WordPress gallery plugin, with stunning gallery layouts and a focus on speed and SEO.
We’re going to show you how to create stunning, stylish, and engaging WordPress image galleries with FooGallery.
Step 1. Pick Your Plan
There are three different pricing plans available for FooGallery PRO, allowing you to choose the best fit for your needs. If you want a few more layouts to choose from, and more advanced customization, then PRO Starter is a good option. If you’re looking for more advanced features like filtering, video compatibility, and dynamic galleries, PRO Expert is a better choice. And finally, if you need to sell images or products directly through your image gallery then choose PRO Commerce.
I have just started using FooGallery PRO Expert on my website and my initial impressions are excellent. The ability to create dynamic galleries, filtered galleries and galleries from other sources like Post Queries gives me the ability to create attractive, easy to maintain galleries throughout my website!
Rob
As PRO Commerce comes with all the features available in FooGallery, we’ll go through the below steps using that as our plan of choice. Here’s a look at how a gallery could appear, using the Product Gallery layout from the PRO Commerce plan:
Once you’ve selected your plan, you can install FooGallery by going to Plugins -> Add New. Then simply drag the .zip file into the field or browse your file to upload it.
Step 2. Create a New Gallery and Add Images
Once FooGallery is activated, you can go to FooGallery in the WordPress dashboard and select Add New to get started. For your gallery, you’ll be prompted to either upload or add images from your media library or, if you’re using PRO Expert, you can add media from another source. This option pulls in images from a source such as media tags, server folders, or even WooCommerce for the PRO Commerce plan.
Want to make video galleries instead? PRO Expert users can also add videos to their galleries, by importing them from YouTube, Vimeo, or other sources.
When uploading images to your WordPress media library, ensure they are high-quality without being too large in size. We recommend using an image optimizer to help with this. It’s also advisable to take the time to add relevant keywords and alt tags to your images – you can do this with FooGallery Advanced Attachment Modal, once you have selected the images for your gallery.
Step 3. Choose Your Gallery Layout
Depending on the plan you choose, FooGallery PRO has up to 11 gallery layouts available. There are the usual options, such as the Masonry or Justified gallery, which stagger images according to their dimensions. The Carousel and Slider PRO galleries work well for slideshow galleries, ideal for creating a step-by-step tutorial, for example. Or you can choose the Grid PRO for something a bit more structured. For ecommerce, we recommend the Product Gallery layout, which comes with buttons and filtering set up.

The settings will change slightly, depending on the layout you choose. For example, in the Masonry gallery you can specify the number of columns, while in the Justified gallery, you would set your row height. But whichever layout you choose, you will still be able to style and customize your gallery.
Step 4. Select Your Appearance Settings
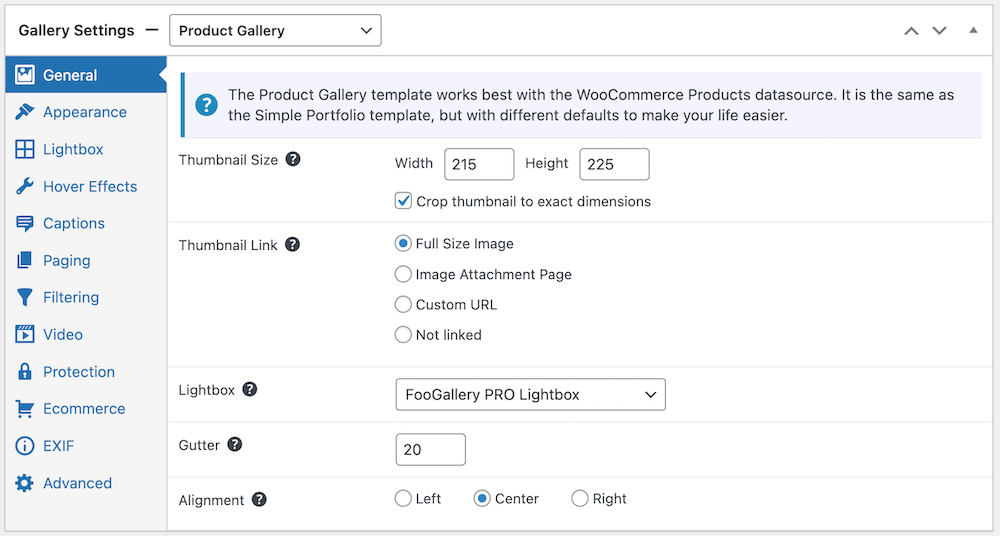
When it comes to the appearance of your gallery, you have a wide range of options. Looking at the Product Gallery layout, you can see the range of options available to you. The settings are all set to the default, so you don’t have to change anything, but you can adjust any of the options to suit your needs.
In the general tab, you can adjust the thumbnail size, gutters, and alignment.
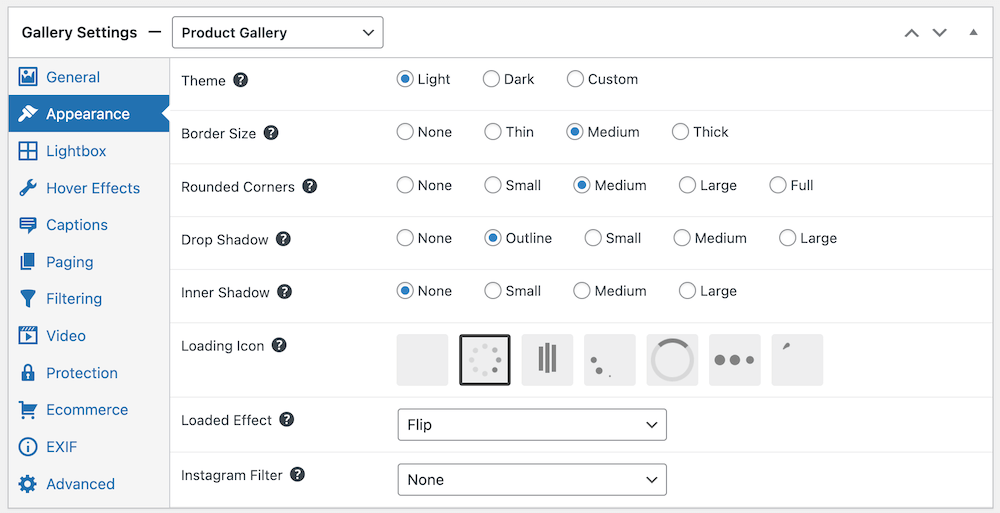
In the appearance tab, you have a bit more choice. Here you can change the theme, borders, corners, and shadows. There’s also a loading icon and loaded effect to choose from and FooGallery PRO customers can add a filter to their thumbnails.
As you’re making changes, you can see how they will appear on the frontend in the Gallery Preview tab at the top of the gallery edit page.
Step 5. Add Effects to Your Image Gallery
Next, you can set your hover effects – which happens when someone hovers over one of the thumbnails. You can select none, or alternatively, choose a theme, color, or scaling effect, along with a hover icon.
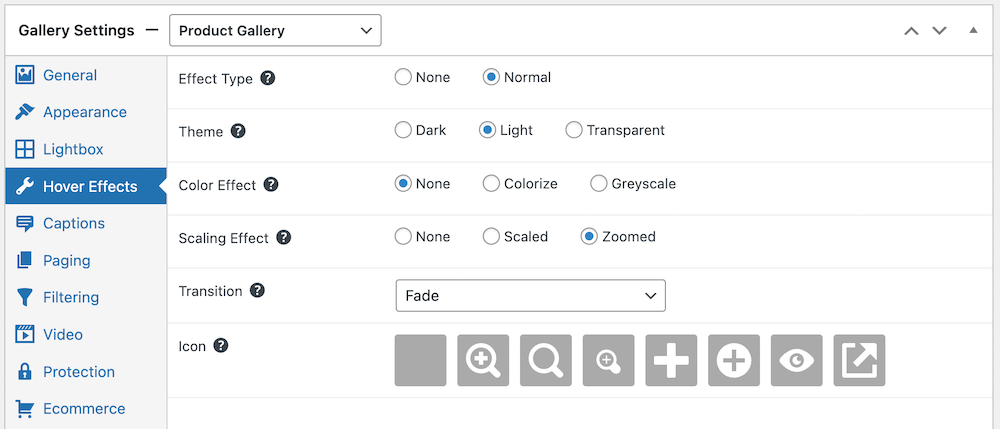
The Product Gallery includes captions within the border of the thumbnail, but some of the other templates allow you to show the captions on the thumbnail, either all of the time, or on hover.
There are a number of settings and effects to choose from, so setting up new galleries with the same settings could seem overwhelming. However, with FooGallery you can set a default gallery, and any new galleries that you add will start with the same settings in place as that default gallery. PRO Commerce also includes a Master Template feature, allowing you to set up a Master Gallery and assign other galleries to this, which then inherit these settings.
Step 6. Choose Your Lightbox Settings
FooGallery works with a lightbox, so your images open above the gallery when clicked on, similar to a popup. The big advantage with this is that users don’t navigate away from the page.
In the General settings of your gallery, you’ll be able to select your lightbox. FooGallery works with external lightboxes, including FooBox, which has been designed to work seamlessly with FooGallery. FooBox PRO includes a few additional features as well, such as social sharing and analytics integration.
However, all of the FooGallery plans come with a built-in lightbox, which you can style to match your gallery.
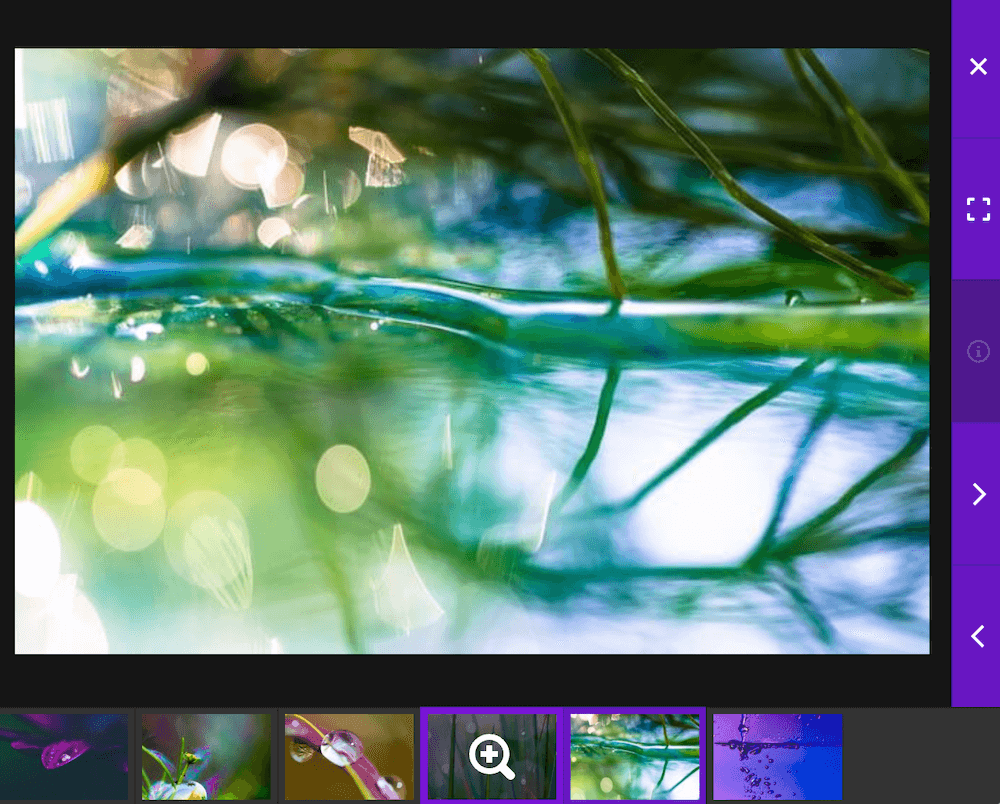
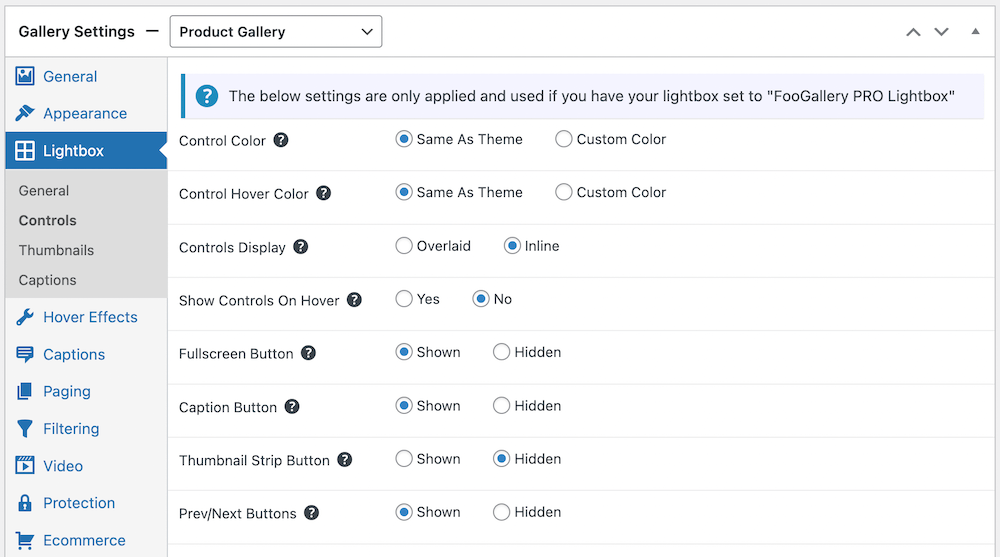
You can copy the theme from the gallery settings or choose a custom color. There are settings for the navigation within the lightbox, and you have control over how and where the captions display.
Step 7. Add Pagination and Filtering
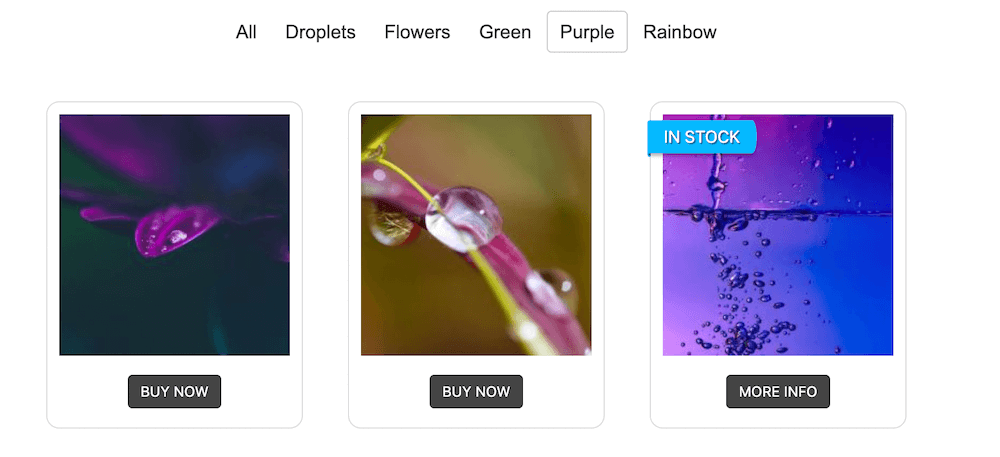
The final step is to add any advanced features that you need to your gallery. Filtering, for example, is a great way to help visitors find what they’re looking for quickly without having to go through every single image individually.
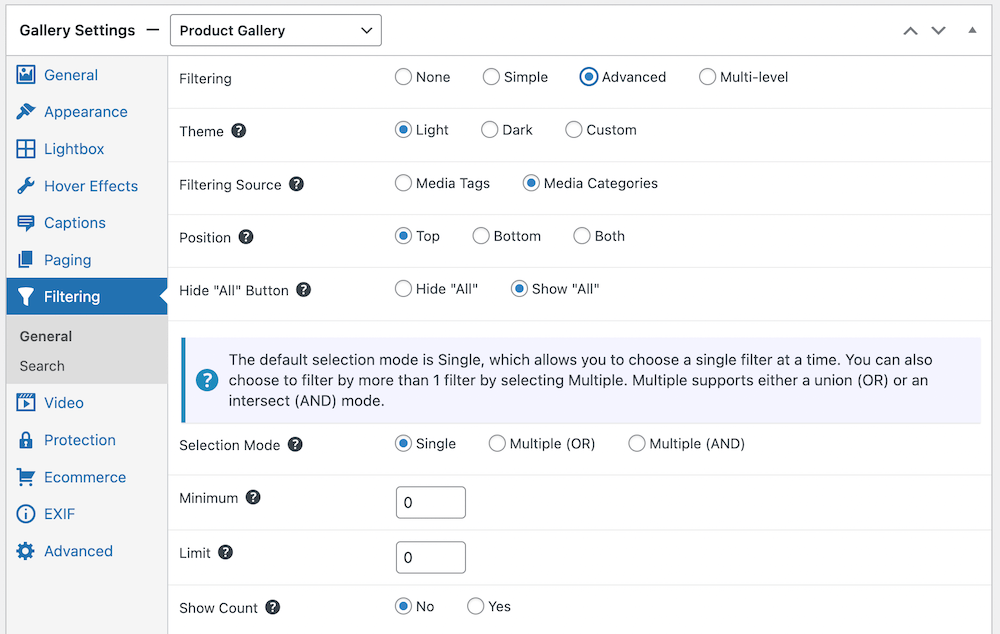
Paging is another useful feature, especially for larger galleries. It cuts down on load times and takes up less real estate on the page. Another way to improve user experience is by adding a Search bar to your gallery.
If you’re using PRO Commerce, you’ll also be able to add image protection and watermarking to your full-size gallery images. Plus you can include sale ribbons and buttons on your thumbnails (or integrate with WooCommerce to automate this).
Once you’re happy with your gallery, you can publish it. Then use the FooGallery block in the block editor or the gallery shortcode to insert it into your page and/or post.
The Best WordPress Gallery Plugin
FooGallery is an easy-to-use WordPress gallery plugin, with stunning gallery layouts and a focus on speed and SEO.
Create Stylish Image Galleries on WordPress With FooGallery!
While you can create image galleries without a WordPress plugin, using a plugin will make it possible to have much more aesthetically pleasing and better-curated image galleries. This will make a big difference in terms of how your website looks and how your site visitors interact with your images and content.
FooGallery is the best image gallery plugin for WordPress, as it’s so easy to create an image gallery from scratch. You can simply use the default settings to create stunning galleries, but the various customization options make it easy to adjust the settings to suit your needs and achieve the look and feel you want. Plus, with all the advanced settings, your galleries will be user-friendly as well.
If you want to display your images in a stylish gallery, check out the different FooGallery PRO pricing plans so you can pick the one that suits your needs best.
