Need to add some context to your images? One of the best ways to do this is by adding captions! WordPress users often overlook the importance of adding captions to images, but there are a number of benefits to doing so.
Primarily, captions give more context to your images, such as by:
- Describing them: It’s not always easy for site visitors to understand what they’re looking at and why; captions can help add context and detail that your users might otherwise miss. This can be beneficial for photography sites or online stores, for example.
- Dating them: This can be useful in many situations. For example, if you’re showcasing a collection of historical artifacts, or you own a fashion store and are highlighting your best products from discontinued lines.
- Attributing them: This is handy if you want to credit the photographer or are using stock images and are legally required to display the license.
Captions are also important for SEO, as they give more context to search engine crawlers in the same way that file names and alt texts do.
You can easily add captions to images in WordPress by default (without any additional plugins), and we’re going to show you how to do so. But we’ll also look at how using a WordPress plugin can give you more control over the way you display captions on images and in image galleries.
How to Add Captions to Images in the Media Library
Perhaps one of the simplest ways to add captions is from within the WordPress media library. The media on your site is all stored in your media library, which can be found in the dashboard menu.
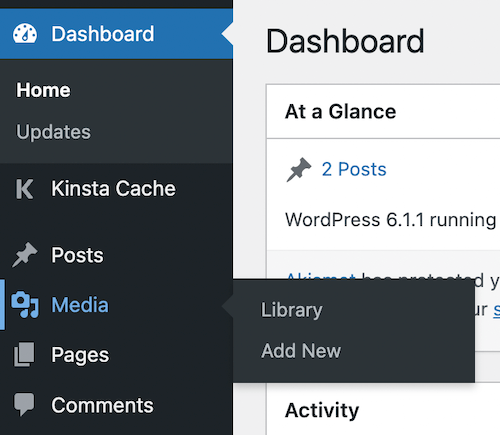
To upload new images to your media library, you can go to Media, and then Add New. You’ll see the option to either drop files, or you can click on Select Files to browse and choose the images you want.
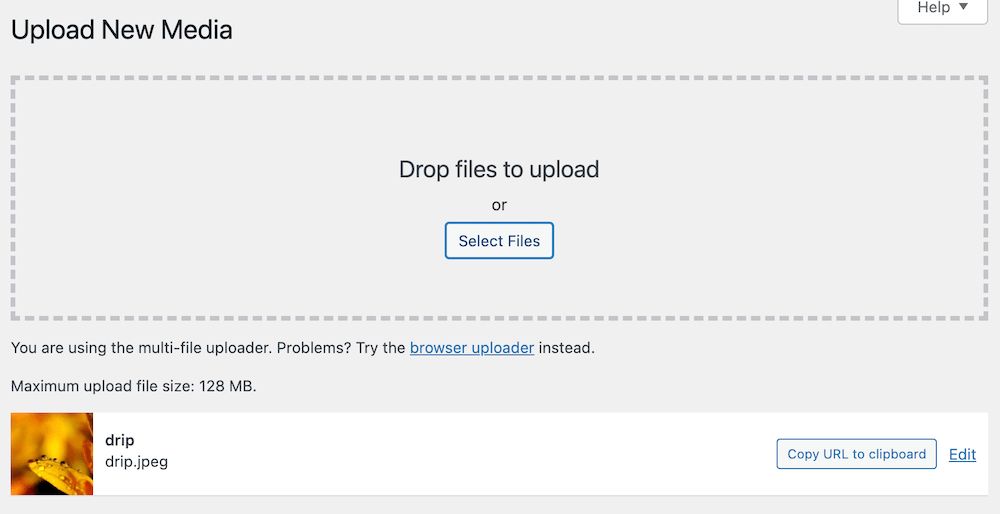
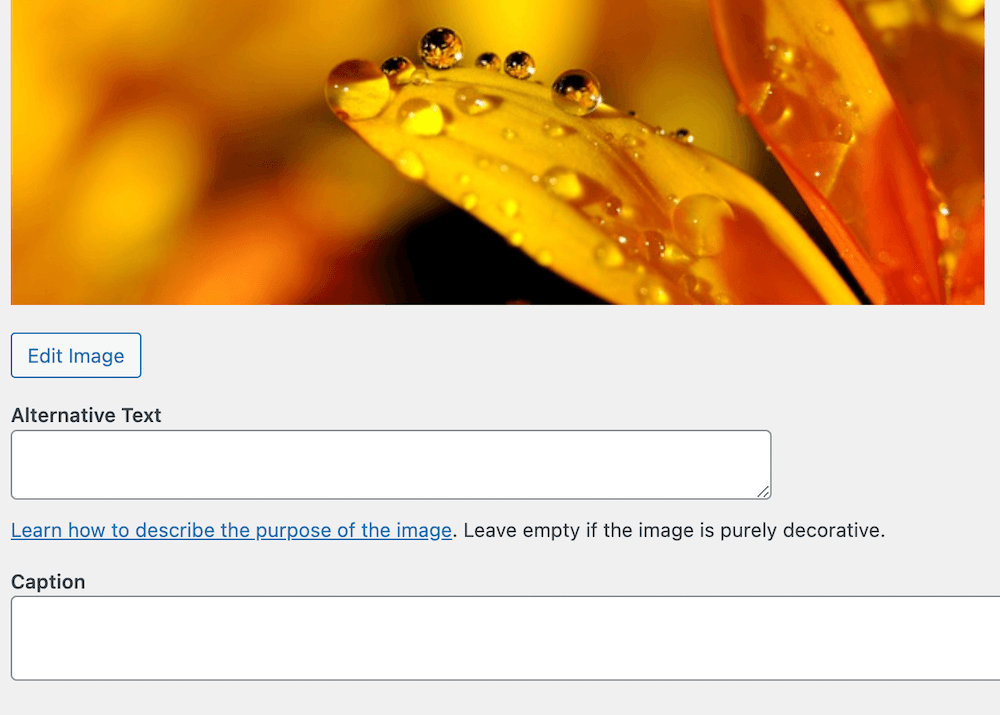
Once you’ve uploaded your image, you’ll see an option to Edit. Click on this to open up the image, where you can add your caption text or metadata (captions, image title, alt text, descriptions, and so on). You can also do this from the Media Library – if you hover over each image in the library and click on Edit from there.
The image will open on a new page, and here you can add your captions. This is a good opportunity to also add Alt text, along with image descriptions. Alt text is important, as it gives search engines and visually impaired readers a better understanding of the image content. You can also click on the Edit Image button if you want to resize or scale your image, for example.
How To Add Captions To Images in the WordPress Editor
Another way to add captions is in the page editor itself. In this scenario, you wouldn’t upload an image to the media library first; instead, you would add it directly to the page or post on which you were working.
This is useful if you’re simply uploading images as you’re working on a page or post, and saves you from having to navigate away to the media library. Or, you may want to display the same image more than once, but you want to change the caption depending on the topic being discussed.
How you add captions in this way will depend on whether you’re using the block or the classic editor.
How to Add Image Captions With the Gutenberg Block Editor
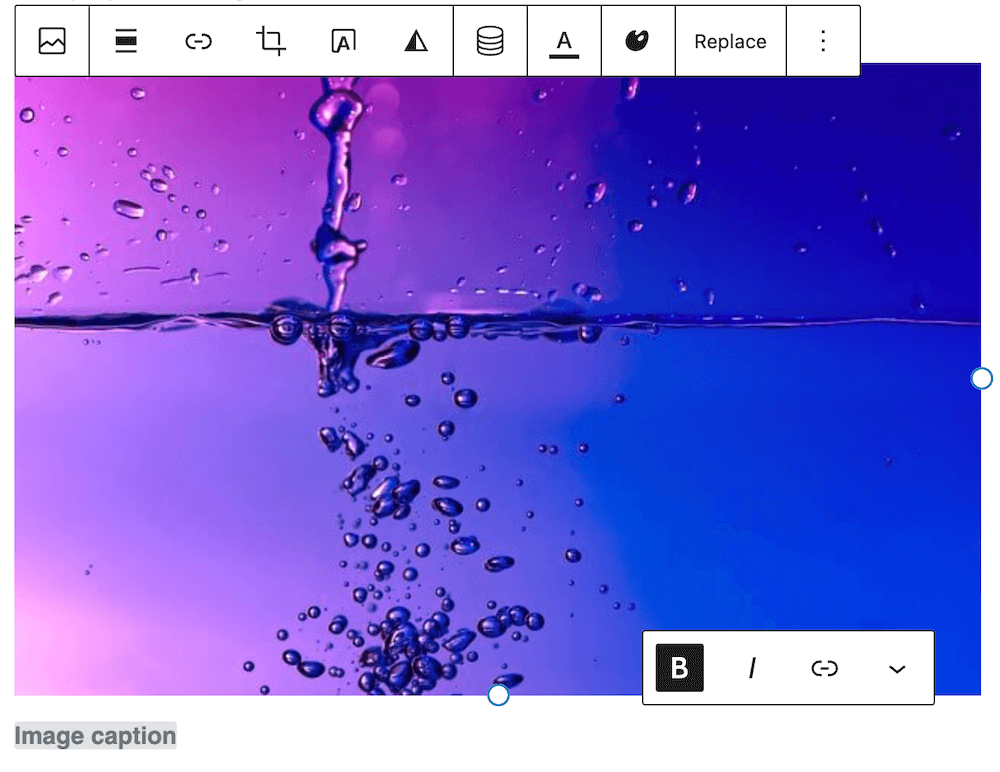
In the block editor, you can include a caption once you’ve added your image to the page. To do this, you would select the Add Image block and then choose your image, either by uploading it or selecting it from the media library.
As you can see in the screenshot below, once your image has been added to your post or page in the block editor, you can adjust the alignment, crop, and so on. Below the image, you can add text to the caption field; there are also caption settings for Bold, Italics, a link, and several other options.
How to Add Image Captions With the Classic Editor
In the Classic Editor, there is a toolbar above the page with which you can add images. Clicking on the Add Media button will open the media library, from which you can either upload a new image or select one already in the library.
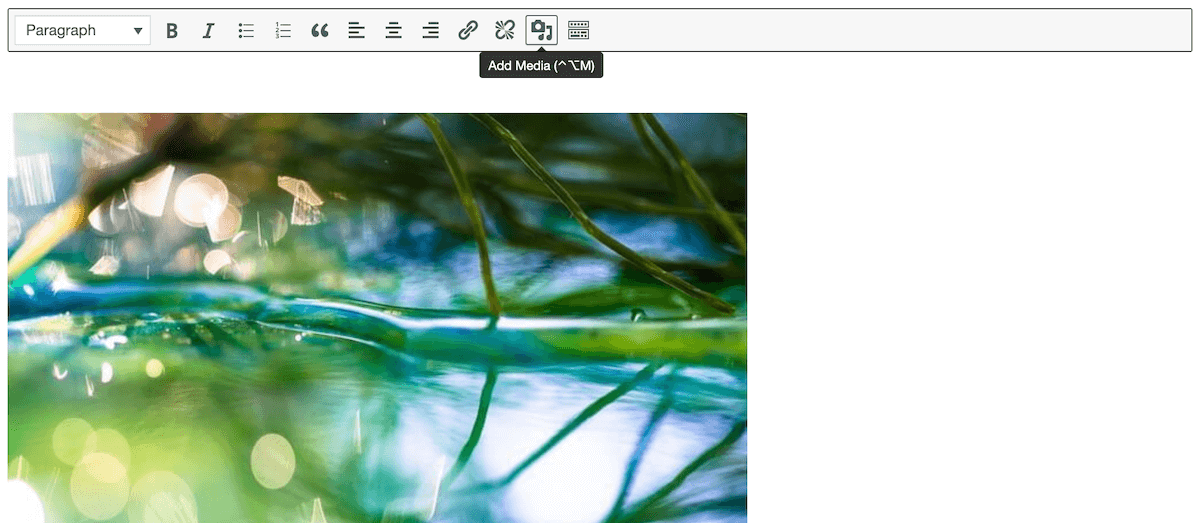
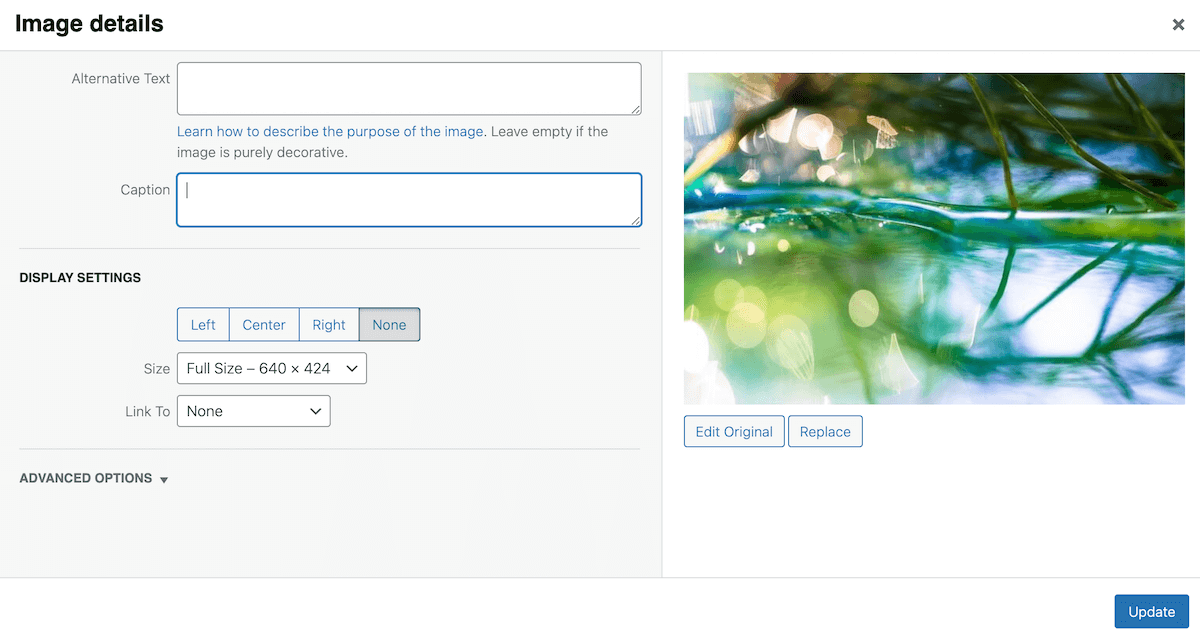
Once your image is selected, you can click on the image itself. You will see a small toolbar allowing you to adjust the alignment, or edit the image – click on the edit button to open the image. Here you can add your caption and alternative text, and adjust a few of the other settings. Click on update when you’re finished.
How to Add Captions to Image Galleries
Another option is to add captions to images in an image gallery. Using a gallery is often preferable to single images, as it means you can group images together, such as event photos, artworks, or product photos. Displaying them in sequence, as standalone images, would clutter the page and detract from the user experience – scrolling through lots of large photos can be frustrating. It can also significantly impact your page speed.
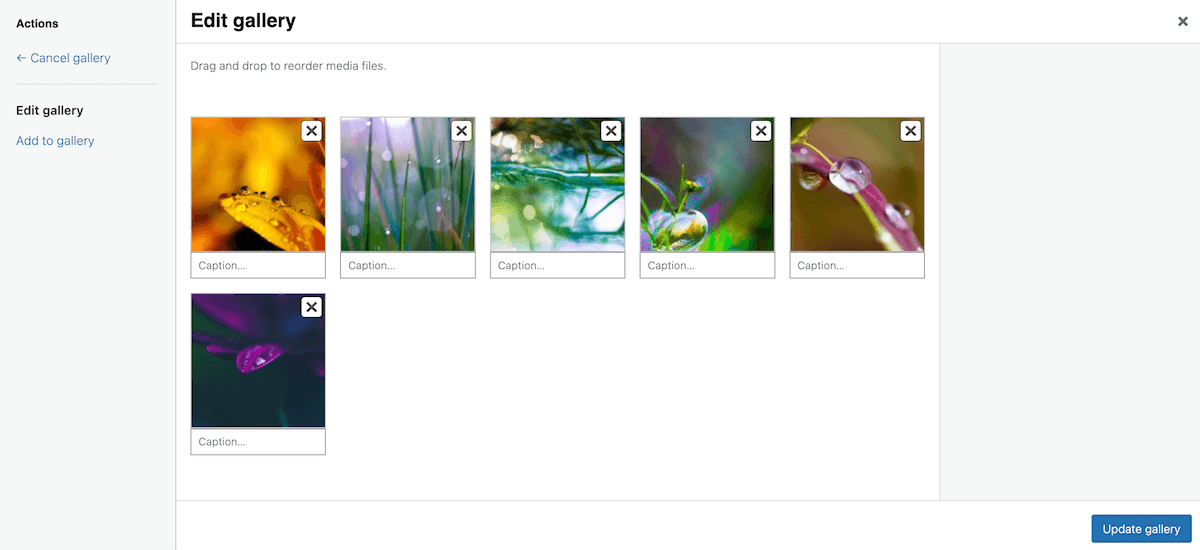
You can create a basic image gallery on your WordPress website and add captions in this way. To do this, you can use the Gallery block in the page editor to add a gallery. Once you’ve uploaded images, or added them from your media library, you’ll be able to add captions to each of the photos. You’ll also be able to add alt text, titles, and descriptions.
The Best Way to Add Captions to Images? Use an Image Gallery Plugin
We’ve now seen how to add basic captions to images and to basic image galleries. This is absolutely fine if you only need to display a few images, but if you plan on displaying lots of images, for example, if you’re a photographer or WooCommerce store owner, then you would really benefit from an image gallery plugin.
A gallery plugin gives you much more control over how your images look on your website and gives you added functionality for adding captions to images. You’ll be able to choose and customize a gallery layout that suits your WordPress theme and content. But more to the point here, you’ll have more control over image captions and how they are displayed to your site’s visitors.
Introducing FooGallery
FooGallery is an image gallery plugin with all the features you could possibly need to create compelling image galleries on WordPress. It offers you loads of customizations and options for displaying your images in the best way possible, along with different gallery layouts. FooGallery has also been optimized for performance, with lazy loading built-in.
I’ve been using this gallery for over a year now and love it! Super easy to use, and it looks wonderful – exactly what I needed.
Annemarie
There are three different Pro plans available:
- The FooGallery PRO Starter plan is great for beginners and incredibly well-priced at just $5.99 a month or $33.99 per year. And with that, you get 3 more exclusive gallery layouts, a lightbox, and advanced effects.
- If you want to look into all the available plans (suitable for professional users and eCommerce stores), then you can check out the FooGallery plan comparison on our website for more info.
Apart from creating stunning image galleries, you also get lots of flexibility with your image captions. You get detailed caption settings for every gallery layout included with FooGallery, which we’ll go through soon. Additionally, if you’re a more advanced user you can create custom captions with custom HTML, which can include dynamic placeholders (keep reading for more on this).
The Best WordPress Gallery Plugin
FooGallery is an easy-to-use WordPress gallery plugin, with stunning gallery layouts and a focus on speed and SEO.
How to Create an Image Gallery With FooGallery
Before we show you how to add advanced captions to your galleries, we’ll quickly show you how to create a new gallery with FooGallery (it’s really easy).
The first step is to install and activate FooGallery. Once this is done, you can get started straight away by clicking Add Gallery under FooGallery. This will open up a new gallery page:
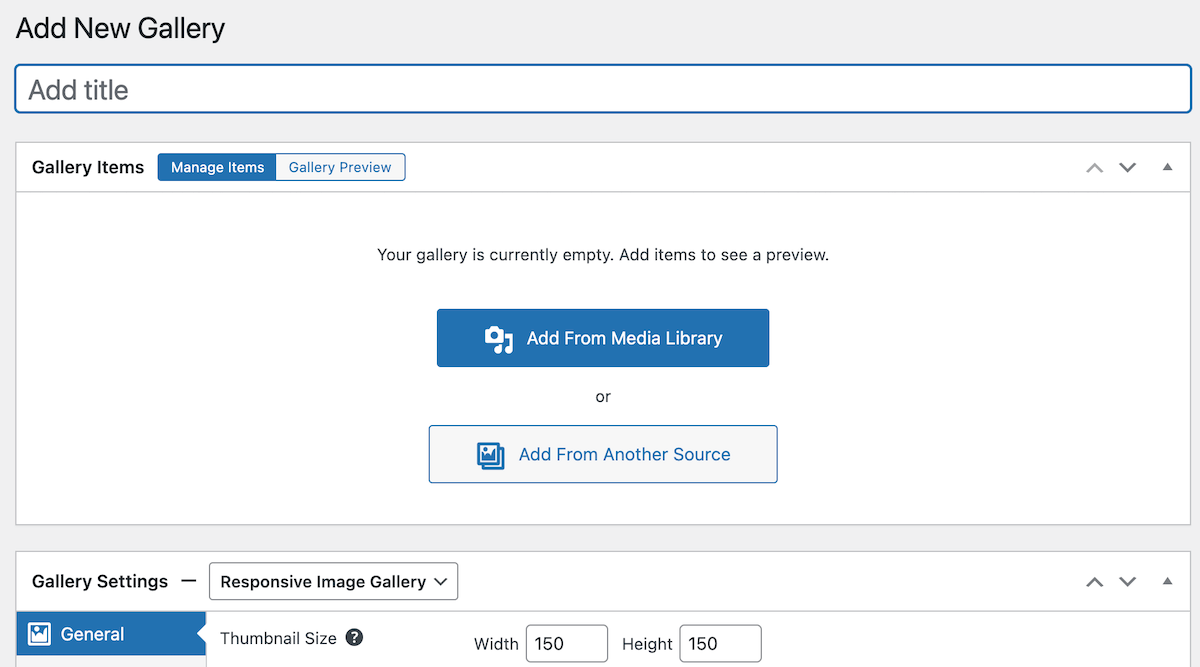
You can then add your media from your media library or by uploading to your website (images will then be stored in the media library). If you’re a PRO Expert user, you can also add media from various data sources.
Once images are uploaded, you’ll see them in the Manage Items tab of your gallery, where you can drag and drop, or use the sort function to order them. You can toggle to the Gallery Preview tab to see how the gallery will appear when you make changes.
Below this, you’ll be able to select the gallery layout you want to use. The settings that are shown will be determined by the layout you select, but for the most part, you’ll be able to adjust the thumbnail size, borders, hover effects, add custom CSS, and so on. Here’s a screenshot of the type of settings available to you.
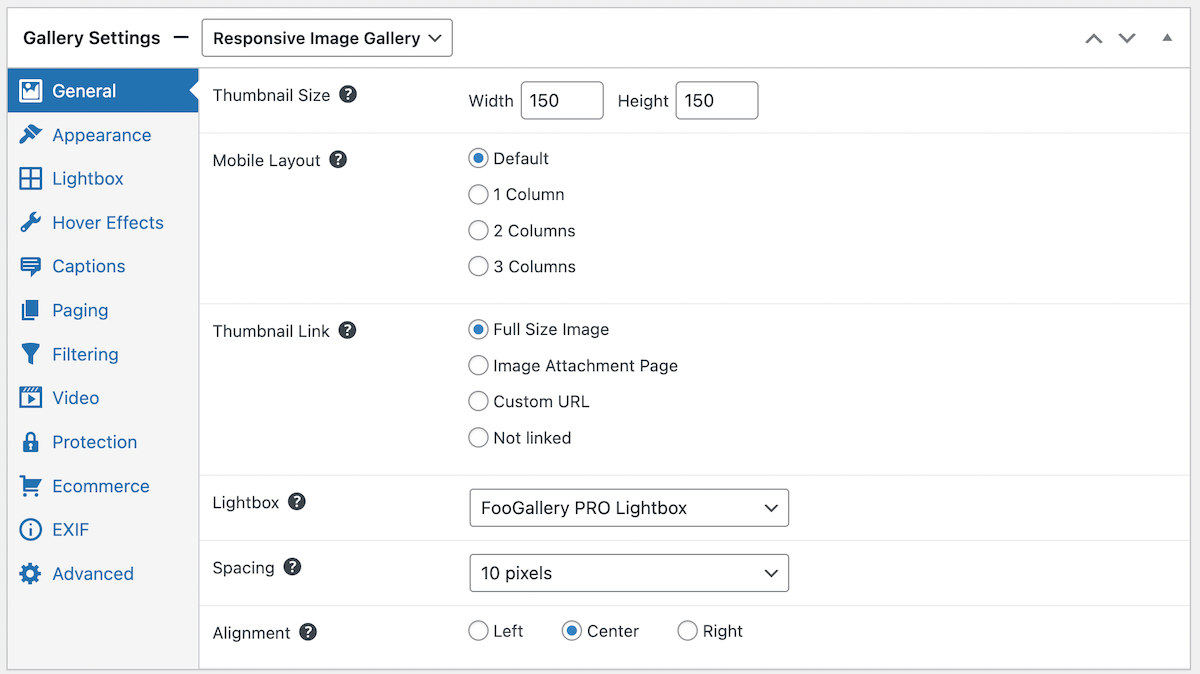
Some of the features, such as Filtering, Video, and EXIF, are only available from the PRO Expert plan up, while the Protection and Ecommerce settings come with the PRO Commerce plan.
Once you’ve styled your gallery, click on Publish. To display the gallery, go to your page or post and search for the FooGallery block in the block editor. You can then browse through and select the gallery you want to show. There is also a gallery shortcode if you’d prefer to use this in the page editor.
How to Add Captions to Your FooGallery Image Gallery
Adding captions with FooGallery is easy. You’ll first need to add your captions, titles, alt text, and/or descriptions to your images. You can do this in the media library or from your gallery. In the Manage Items tab of your gallery, click on the small ‘i’ in the corner of an image – this will open the image, allowing you to fill in the metadata (your captions, alt text, etc).

FooGallery also includes an Advanced Attachment Modal, which you can enable from your gallery. The modal makes it even easier to add metadata to images.
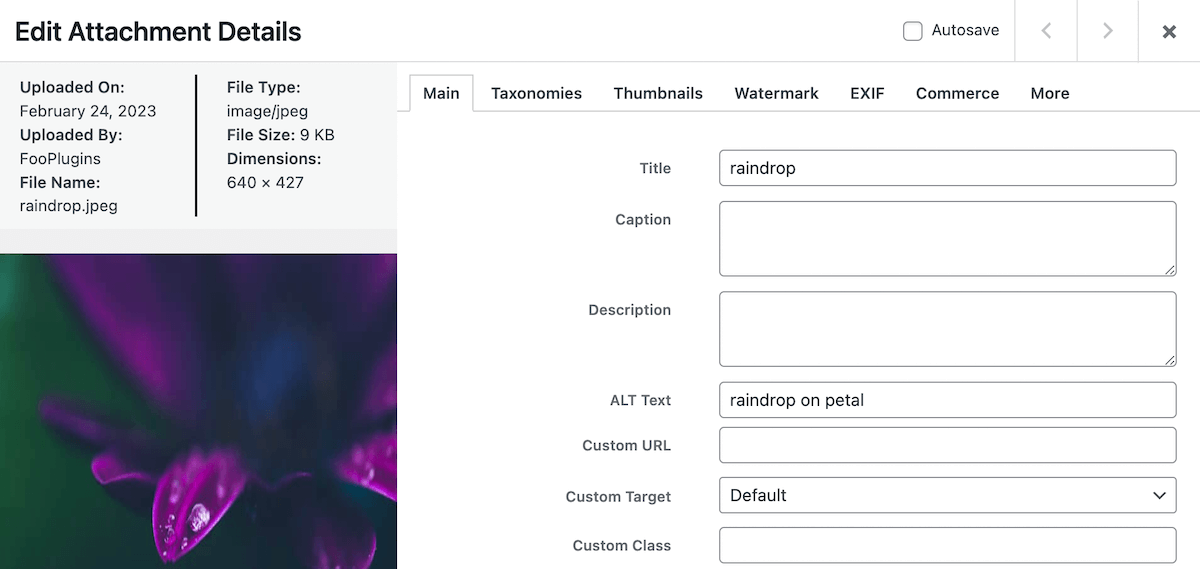
Once you’ve added captions to your images, you can use the settings in FooGallery to set how the captions display on your images. For this, go to the Captions tab.
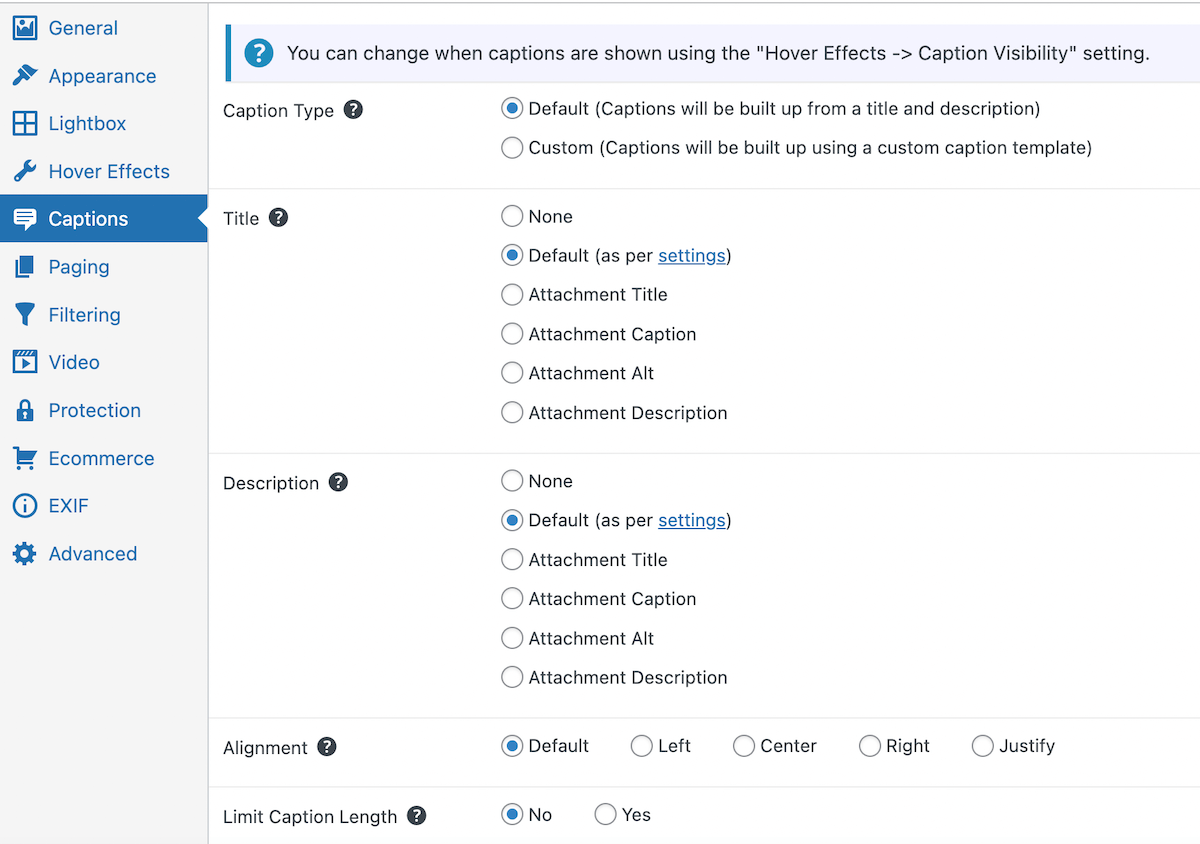
Here are some of the available options, although these may differ depending on the layout you choose:
- Caption Type: FooGallery PRO Expert lets you use Default captions or you can create custom captions. We’ll discuss this further on. For now, let’s look at how the default captions work.
- Title: Here you can select the source of your Title. In other words, you can choose which field you want to use for your Title. You can set this up in the FooGallery settings, or you can select a different source to act as your title.
- Description: Again, you can select the default description, or you can override this by selecting None or an alternate source.
- Alignment: The alignment determines whether the captions are centered or shown on the left or right of the image.
- Limit Caption Length: captions and, more often, descriptions can be quite lengthy. As these show on your image thumbnails, they can take up too much space and prevent users from seeing the actual image. With this setting you can limit the length of the captions on the thumbs – they’ll still show the full-length caption when opened in the lightbox.
If you’re using FooBox, or the built-in FooGallery PRO Lightbox, you get additional caption settings as well. These determine whether captions display when an image is opened in the lightbox, and how and where they display. You can also override the captions source, meaning that you can have different captions in the lightbox to your gallery thumbnails.
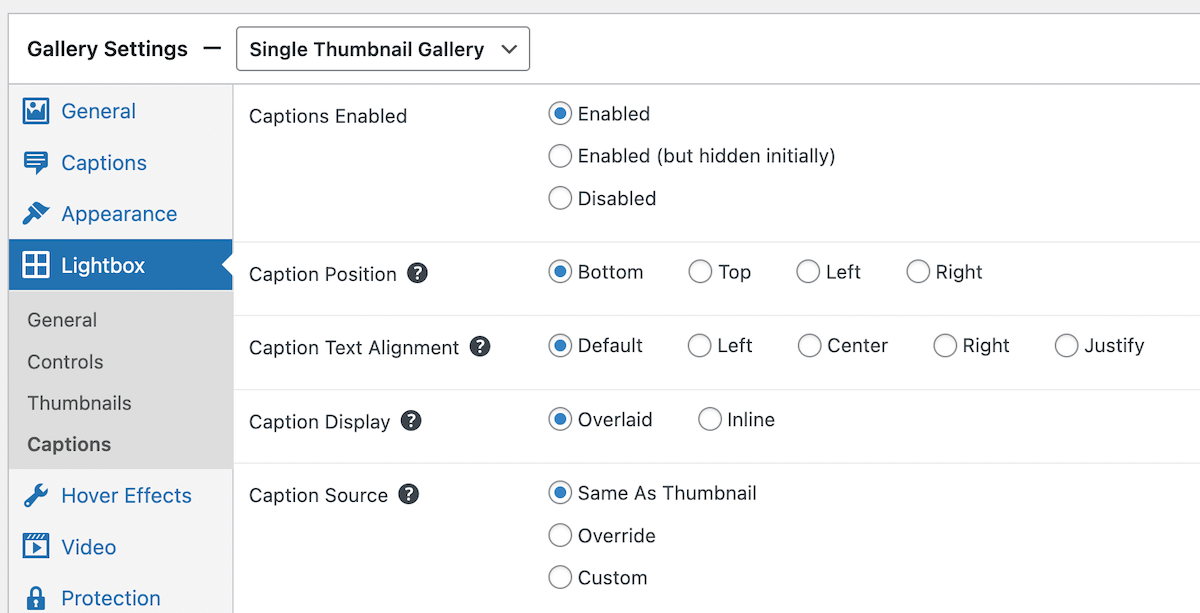
It’s worth noting that some gallery types have special settings for captions:
- Single Thumbnail Gallery: With this layout, only one thumbnail for the gallery shows on the page. Usually, the featured image caption and description would be showing, but the Override Title and Override Description setting allows you to add a caption for the entire gallery instead.
- Simple Portfolio: Most often, captions display on the image thumbnail in the gallery, or on hover, but with this layout, you can set the caption position to above or below the image. In this way, the caption is always visible. Note that you can do this with the Masonry gallery as well, by setting the captions to appear below the thumbnail.
The Best WordPress Gallery Plugin
FooGallery is an easy-to-use WordPress gallery plugin, with stunning gallery layouts and a focus on speed and SEO.
Creating Custom Captions With FooGallery
With FooGallery PRO Expert and PRO Commerce, you can create custom captions using HTML. This is a fairly advanced feature, so some understanding of HTML can help here. What you get with this feature is much more functionality to customize your captions. For example, you can add links or buttons, put captions in bold or italics, change the font or font size, and so on.
The other advantage is that you can use dynamic placeholders in your captions, so you can show prices, additional details, and more within the captions. FooGallery does this by finding any available metadata fields, which you can then use to create placeholders. You can add this data to your images in the media library, or by using plugins like ACF – Advanced Custom Fields or Pods – Custom Content Types and Fields.
This kind of functionality is useful for ecommerce businesses that really need their product images to stand out and have the budget to work with developers who can use the plugin to its full potential. So if you have the know-how or the resources, using custom captions can be a great way to set your gallery apart.
My images tell stories, and I want to get that across with captions. Not truncated captions. WHATEVER I WANT captions. Foo does that.
Carla
Make Your Image Captions More Enticing With FooGallery
While you can easily add captions to your images in WordPress, you’re quite limited in terms of how your images and captions appear. To get around this, we recommend using an image gallery plugin instead as you’ll get more options for displaying stunning images on your WordPress site and you will have more control over how your captions appear.
FooGallery is a great option; it comes with up to 10 gallery layouts (with FooGallery PRO starter) and has versatile caption settings for each layout, both in the gallery and in your lightbox. You can also create custom captions if you want to take your image captions to the next level.
If you want to add captions to your images and create beautiful WordPress galleries, FooGallery is an ideal choice. And for more layouts, features, and ease of use, try FooGallery PRO.
The Best WordPress Gallery Plugin
FooGallery is an easy-to-use WordPress gallery plugin, with stunning gallery layouts and a focus on speed and SEO.







Comments are closed.