FooGallery PRO Expert and PRO Commerce allow you to create galleries from Server Folders. This functionality means that you can select a folder on your server and the gallery will pull the images from that folder.
A Server Folder is a folder on your website’s server. You can transfer files and folders to your server. These aren’t stored on your actual website, so with this new feature, FooGallery Pro enables you to pull images from these folders.
Create a Gallery from a Server Folder
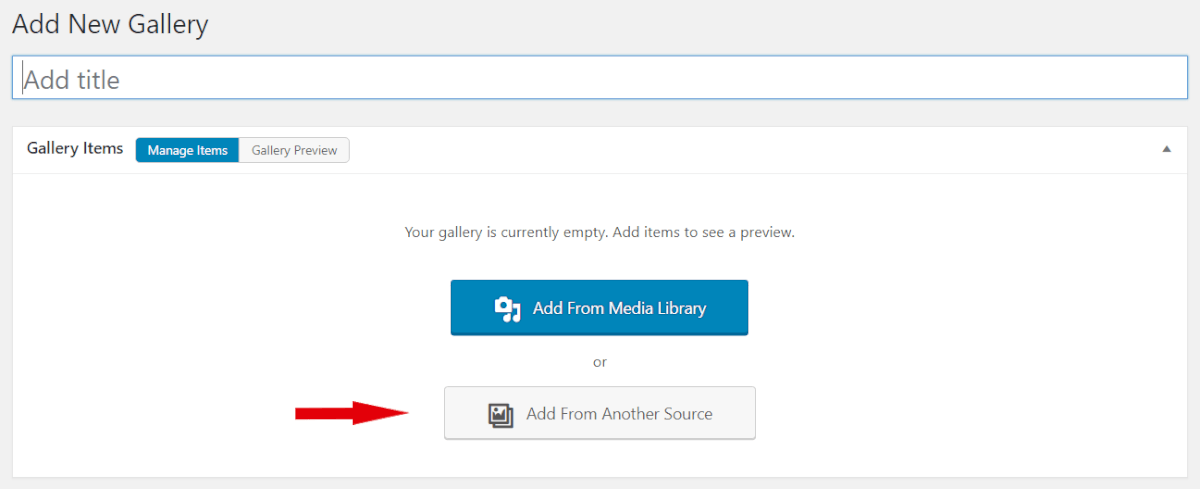
The first step is to Add a Gallery from the FooGallery menu. Once you click on this, you will be given the options to Add From Media Library or Add From Another Source. You need to choose this second option.
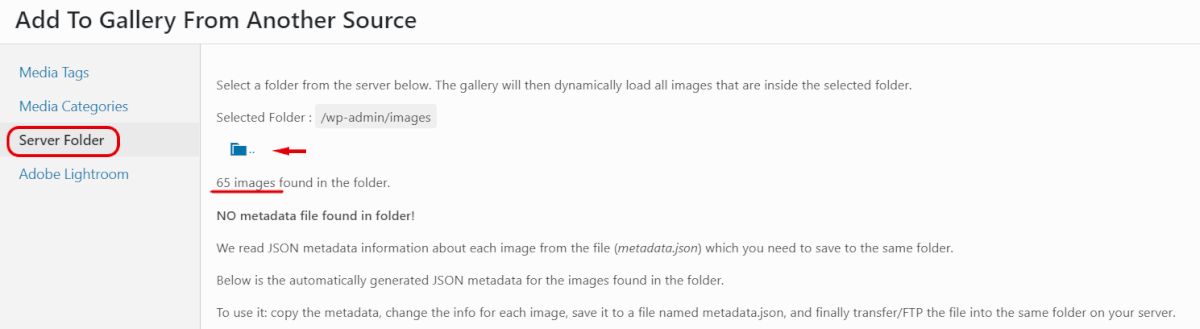
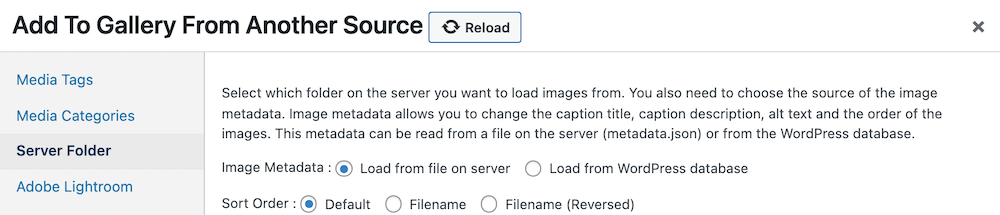
A popup window will appear, giving you a selection of datasources from which you can create a gallery. Click on Server Folder. A list of all your Server Folders will appear. From these you can navigate to the one you want to use. (If you click on the File icon, you will go up a level).
Once you select the folder you want to use for your gallery, you will see a screen similar to the below image. This will tell you which folder you are using, how many images are in the folder and whether any metadata file was found.
What about Captions?
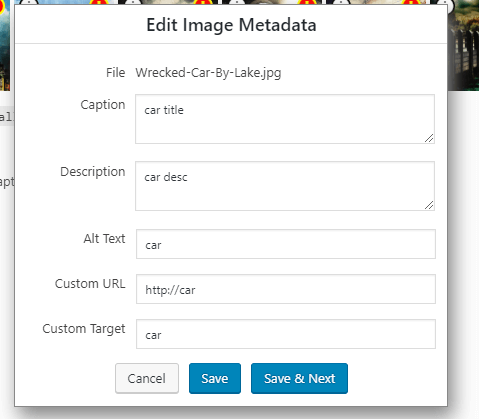
Captions, titles, alt text and other such details are provided by the metadata file. The metadata is required, to be able to populate the images with this information.
If a metadata file doesn’t exist in the folder, the metadata contents will be generated in the modal. You can then use this to create a file and upload it manually. To create the file, copy the metadata, update the info for your images and save it to a file named metadata.json. You can then transfer this file to the same folder, so that the gallery can use the metadata for the images.
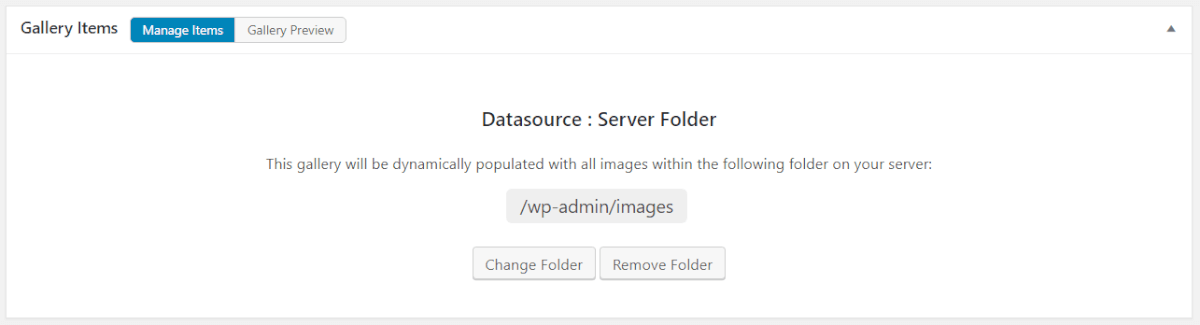
Once you are ready, you can click on Ok in the bottom right corner. Your gallery will now pull in the images and metadata from the folder, and you will see the below screen confirming which folder you are using. From the Manage Items tab, you will be able to change or remove the selected Server Folder.
Is there any other way to add captions?
We have now included another way to add metadata to your images without having to upload a metadata.json file to the same folder location. This alternative method stores the metadata in the database.
When using this feature, you can follow these guidelines:
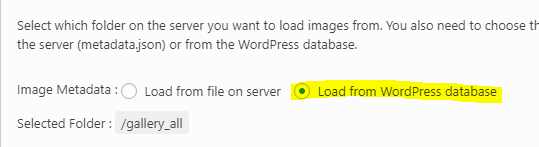
1. In the modal for selecting the server folder, make sure you set the metadata source to be the WordPress database.
2. Once you have selected the correct folder, a list of all the thumbnails that are found will be shown. The red exclamation means that there is no metadata for these images.

3. At this point, you can drag and drop the image thumbs around to change the order. You can also click on the “i” icon to enter metadata for each image.
4. Once you are happy with all the metadata you have captured and the order of the images, you will need to click on Save Metadata, which stores this information in the WordPress database.
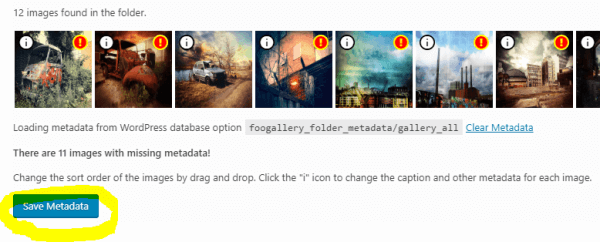
5. You can also clear the metadata if you want to start over.
Gallery Sort
You can also sort your gallery from a server folder by selecting the preferred sort order when creating or editing your gallery. Once you have selected the server folder datasource you will see a panel showing you the available folders as well as a sort order. Simply select the order in which you would like your items to be displayed.
Note that if you have already created your gallery for a server folder, then you can still edit the sort order. In the Manage Items tab of your gallery, select Change Folder. The server folder options panel will open again, where you can change the sort order.
Editing your Gallery
You can now style your gallery as you would any other gallery. If you toggle over to the Gallery Preview tab you will see all of your images and how they will appear in your gallery. Plus you can adjust your gallery template and other settings. You will have access to all the usual FooGallery Pro settings.
If you want to add or remove images, then simply upload them to the folder on your server, by FTP or any other method you would usually use to get your files uploaded. Once you make changes there, they will automatically reflect in the gallery. However, as the galleries are cached, this may take up to 24 hours.
Images Are Cached
We cache the images in a gallery using the folder datasource for 24 hours. We do this for good reason, as it uses a lot of server resources to read from a folder every time the gallery loads.
If you add images to your folder and want the changes to reflect immediately, then simple edit the gallery and update it in your WP admin, which will force the cache to clear.
You can also override the 24 hour cache to be less, by adding this code to your functions.php:
add_filter( 'foogallery_datasource_folder_expiry', 'foogallery_datasource_folder_expiry_override' );
function foogallery_datasource_folder_expiry_override( $default ) {
    return 3; //change to cache for only 3 hours
}Code language: PHP (php)