Gallery Filtering, available with FooGallery PRO Expert and PRO Commerce, allows you to filter your gallery using Media Tags and Categories. Here is a step-by-step walkthrough of how to create a filtered gallery, including assigning tags to individual images.
Step 1: Add Images
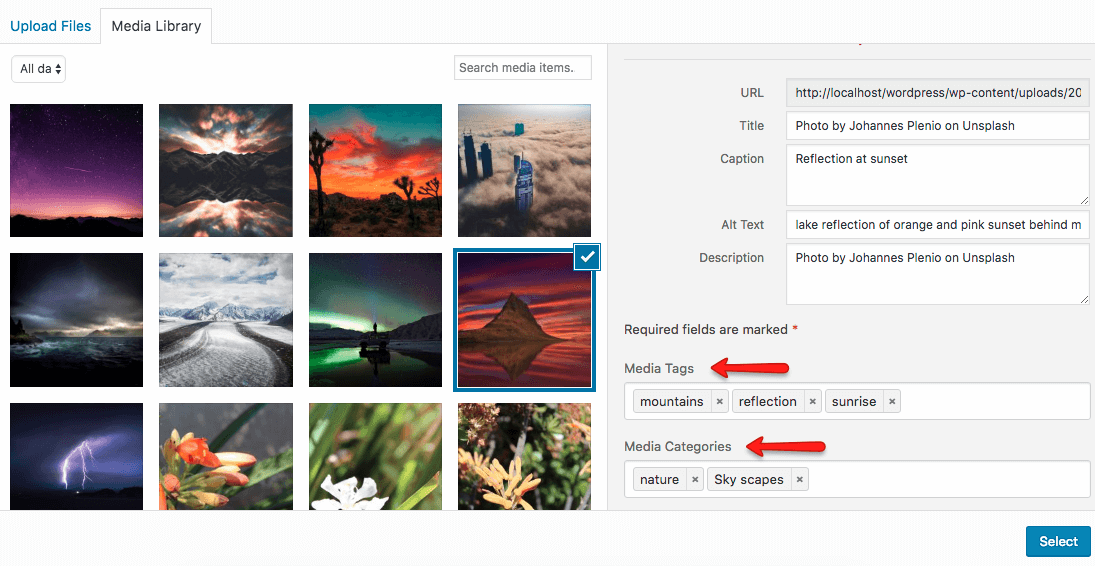
As with any image gallery, you first need to add your media. Once you have uploaded your images though, you can add your Media Tags and Categories. You will also still see the sections for adding the Title, Caption, Alt Text and Description – add these in.
If you scroll down a little further, you’ll now see additional fields for Media Tags and Media Categories. Gallery Filtering allows you to filter by tag or category, so add both. You can also make changes to both fields later on.
Adding Media Tags to Individual Images
You can also add Media Tags and Categories to individual images as you load them. Once an image is uploaded, you’ll have the option to add these fields. These tags won’t appear with the image on the frontend, but will help for sorting and categorising images in your media library.
Step 2: Enable Gallery Filtering
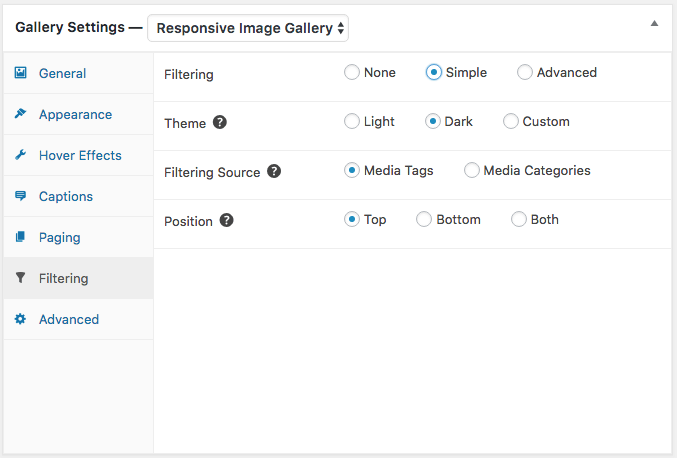
Once you have selected your Gallery Template and customised the other settings, you can adjust your Gallery Filtering. Select the Filtering tab in the left-hand menu. The default is set to None, so to activate Filtering just select Simple, Advanced or Multi-Level.
We cover the settings for Simple and Advanced filtering below. For more details on Multi-Level filtering, read this article.
Simple settings
The Simple settings allow you to choose whether your images will filter according to the Media Tags or Media Categories. You can also adjust the theme (light, dark or custom) for the Tags / Categories. Finally, you can choose to show the Tags above or below the images, or do both for your bigger galleries.
Select the Gallery Preview tab to see how the tags will appear in the gallery.
To change your tags after you have created your gallery and set up filtering, simply select the Manage Items tab and hit the Edit Info button on the image. You’ll be redirected to the same screen you saw when you uploaded your image. Here you can add, remove or edit the tags for your images.
Advanced settings
The Advanced Filtering gives you a bit more versatility when it comes to customizing your gallery. Below are the settings, with a guide on how to set each up.
Selection Mode
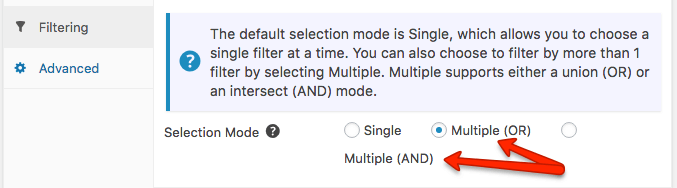
You can change the Selection Mode from Single (the default) to Multiple. In the Multiple Selection Mode, you can show all images from two or more tags – this is under the Multiple (OR) setting. Or you can set it to show images that only feature in all of the selected tags – select Multiple (AND).
Set Limits
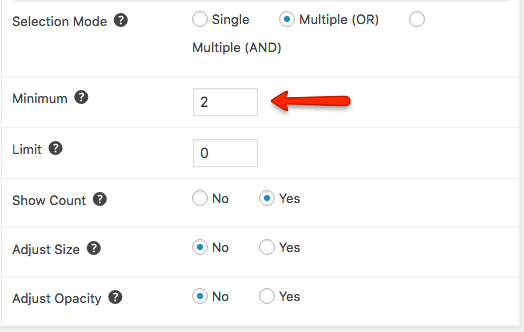
The Minimum and Limit buttons let you adjust which tags appear. Only tags with the number of images that fall within the specified range will appear. If you don’t want to add these limits, then simply leave it set to the default.
Show Count
The Show Count displays how many images fall under each tag – a number will appear next to each of the tags indicating how many images apply to each tag. For this feature to work, simply select Yes next to Show Count.
Adjust Size
The Adjust Size setting changes the size of the Media tags or Categories, depending on the number of images under each. Tags with more images under them will appear bigger than those with less images. Select Yes under Adjust Size and then set your size range from smallest to largest.
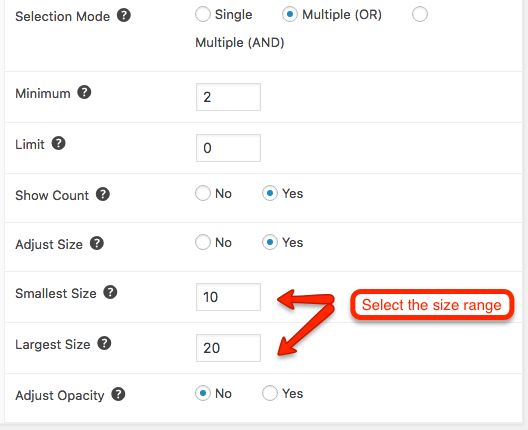
Adjust Opacity
The final setting is Adjust Opacity. This adjusts the density of each tag, depending on the number of images under each. To apply this setting, select Yes under Adjust Opacity and then set your density from lightest to darkest.

Filtering Demo
Check out a few demos for filtering.