Your gallery thumbnails do not need to point to the full size images as a gallery usually does. You can also setup a gallery to point to your own custom URL’s (these can be internal or external links – it’s up to you!)
Follow these steps to get this working:
- Edit the gallery of your choice.
- Under the Gallery Items metabox, make sure you are on Manage Items and not the Gallery Preview. You will know you are in the right place, if you see an “i” when you hover over a thumb (see Image below).

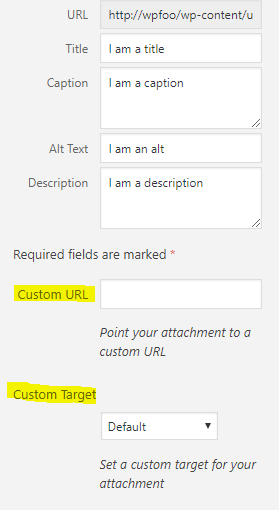
- Click the “i” for each thumb you want to define a custom URL for. The media modal will popup and you can edit the image attributes in the right sidebar. Scroll down and you will find “Custom URL” and “Custom Target”.
- Edit the custom URL to be the external/internal custom URL of your choice.
- Edit the custom Target if you want the link to open in a new tab or redirect the current page that the user is visiting.
- Close the media modal popup when you are done editing all the attachments you wish.
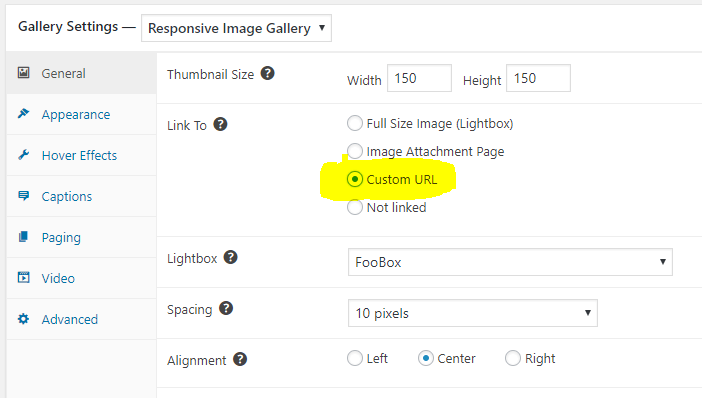
- Scroll down to the Gallery Settings metabox and locate the “Link To” setting. Change it to “Custom URL” (see Image 3 below).
- Save your gallery and you are done!
If thumbnails in your gallery have a custom URL or custom target set, then they will now use those attributes. If not, then it will fall back to opening the full-size image as before.

