Any product gallery should include Add to Cart buttons, so that your customers can purchase products directly from the gallery and/or lightbox. FooGallery PRO commerce includes Add to Cart and other options for buttons that work with the WooCommerce integration.
We show you how to set up and customize these buttons below.
Adding Buttons To Your Product Gallery
If you are using the product datasource to create your galleries, then you can easily add buttons to both your gallery thumbnails and the lightbox. To do this, go to the edit gallery page and click on the Ecommerce tab. Note that you need to be using WooCommerce for this to work.
In the settings panel, you will see a number of options for your product gallery. These include your button settings.
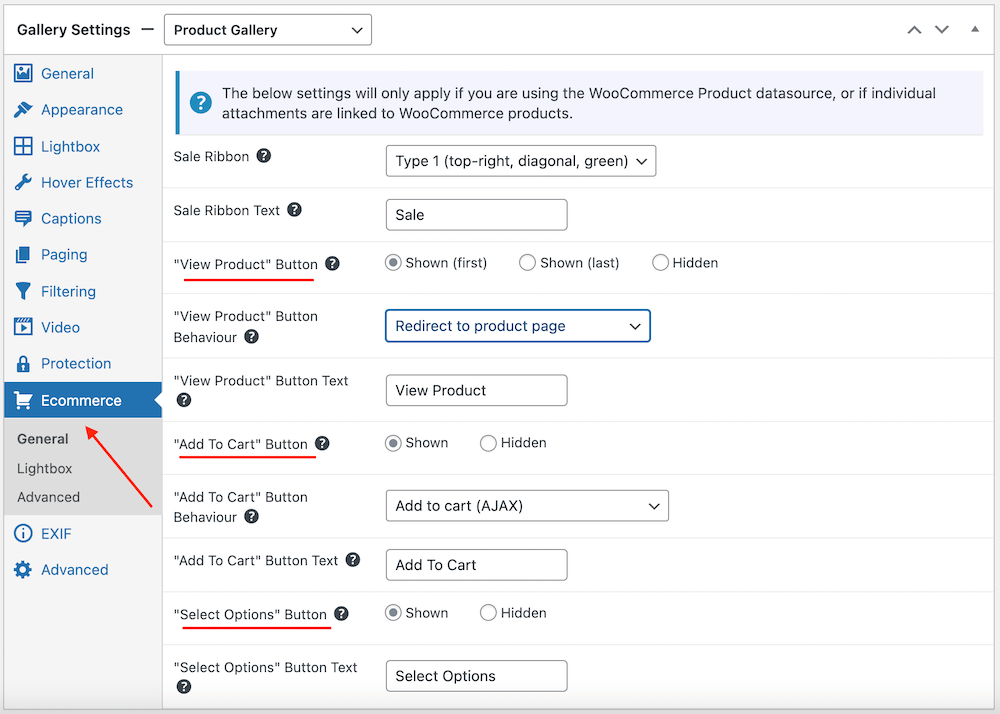
As you can see in the above screenshot, there are three different types of buttons available in FooGallery PRO Commerce.
The first is a View Product button. The purpose of this is to redirect customers to a more information about the product. It is hidden by default, but you can enable it by selecting Shown (first) or Shown (last) – these options determine where the button is placed in relation to any other buttons. You can also select to redirect customers to a product page, or to a lightbox where they can view the details.
The next button is the Add to Cart button. This is shown by default but you can choose to hide it if you wish. The Add to Cart behavious determines what happens when someone clicks on the button. The product can simply be added to the cart, or it can be added to the cart and then refresh the page. Alternatively, you can add to cart and then redirect the customer to either the cart or the checkout.
The third button type is the Select Options button. This is set to Shown but will only display on the variable product items. In other words, if a product has variations (such as size or color) then this button caters for this by allowing the customer to select one of the options. If a product does not have variations, this button will not appear. You can, however, set it to hidden to prevent it showing on variable products.
For each of the buttons, the default text has been added to the text field. But you can change this to suit your needs.
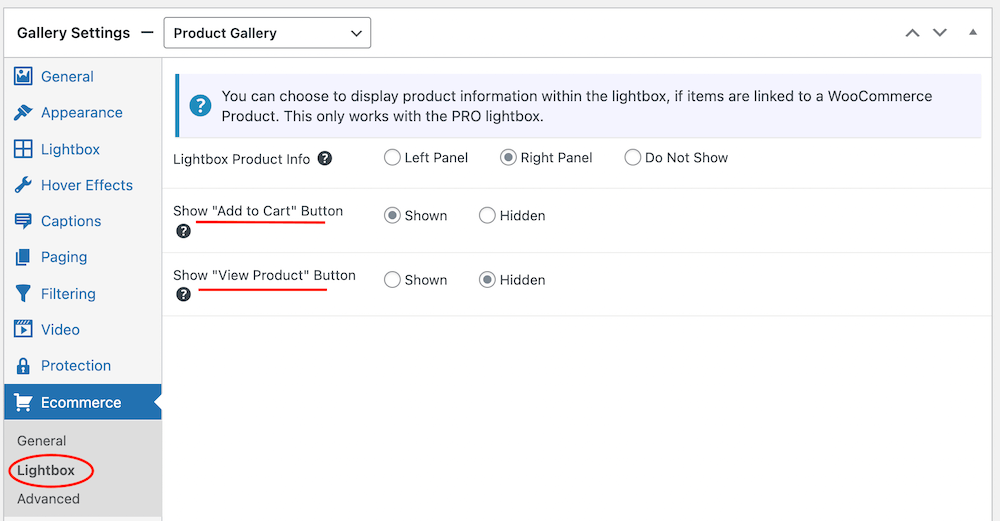
You can also enable or disable buttons in the lightbox. This means that when a customer clicks on a gallery thumbnail, and the full-size image opens in the lightbox, you can include buttons here. This is useful for providing more opportunity for customers to buy now.
Overriding Product Buttons
It is possible to override the gallery button settings on individual items. Doing this will add to, or replace, the buttons on an individual product.
As this occurs at a product level, rather than a gallery level, you will need to override the buttons on the product itself. To do this, navigate to your products and select the specific item for which you want to add / replace buttons. Now scroll down to the FooGallery tab in the product editor.
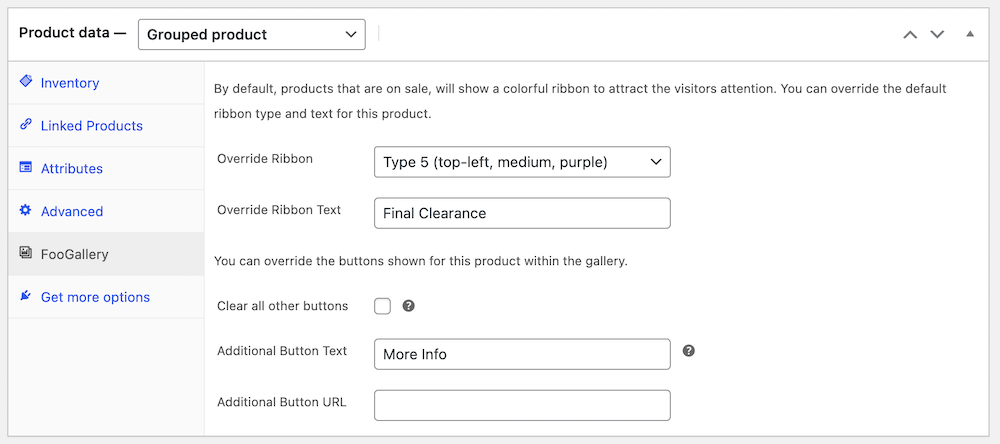
Here you can change your ribbon settings and override the buttons for this particular product. To remove all other buttons from the product in the gallery, select Clear all other buttons. This will remove the Add to Cart button or any other buttons that you’ve enable in the gallery. If you want to keep the existing buttons, and just add another button, then do not select this option.
To add a new button, fill in the Additional Button Text field. If you leave this field blank, you will not see an additional button on the product. You can also then add the URL to which the button should redirect.
Once you have made the changes to the product, click on update and then refresh your product gallery to see the changes.
To see how buttons appear in the product gallery, look at the demos here.