
Customers crave speed and convenience, especially when shopping online. A “Buy Now” button on your WooCommerce store can help meet this demand by bypassing the traditional cart stage and taking customers directly to the checkout page. This reduces friction and increases the likelihood of completing a purchase.
In this article, we provide an overview of six possible methods for adding “Buy Now” buttons to your WooCommerce store. We’ll also provide a step-by-step guide to setting up and configuring a “Buy Now” button using our recommended plugin: FooGallery PRO Commerce.
6 Methods of Adding Buy Now Buttons to WooCommerce
Adding a “Buy Now” button that redirects users directly to the checkout page can be accomplished in several ways. Below are six methods, each with a brief tutorial:
Method One: Using WooCommerce’s Built-in Features to Add a Buy Now Button
- Navigate to settings: Go to WooCommerce -> Settings -> Products -> General.
- Enable redirect: Check the box for “Redirect to the cart page after successful addition.”
- Change button text: You will need to use a plugin like FooGallery PRO Commerce to change the default CTA text to “Buy Now.”
- Save changes: Click “Save changes” to apply the setting.
Pro: Easy to set up using WooCommerce’s native features.
Drawbacks This method is limited in customization options and requires additional plugins for text changes.
Method Two: Using Custom Code to Add a Buy Now Button in the Single Product Pages
- Access theme editor: Go to Appearance -> Theme Editor.
- Add custom code: Insert the following code into the functions.php file of your child theme:
// Add "Buy Now" button next to Add to Cart button

function add_buy_now_button() {

    global $product;

    $product_id = $product->get_id();

    $checkout_url = wc_get_checkout_url();

    echo '<a href="' . esc_url( $checkout_url . '?add-to-cart=' . $product_id ) . '" class="button buy-now-button" style="margin-left: 10px;">Buy Now</a>';

}

add_action( 'woocommerce_after_add_to_cart_button', 'add_buy_now_button' );

// Redirect to checkout page if "Buy Now" button is clicked

function custom_add_to_cart_redirect( $url ) {

    if ( isset( $_REQUEST['add-to-cart'] ) && has_term( '', 'product_cat', $_REQUEST['add-to-cart'] ) ) {

        return wc_get_checkout_url();

    }

    return $url;

}

add_filter( 'woocommerce_add_to_cart_redirect', 'custom_add_to_cart_redirect' );Code language: PHP (php)- Save changes: Update the file to implement the changes.
Pro: Highly customizable and tailored to your specific needs.
Drawback: This method requires coding knowledge and can be risky if not done correctly, potentially breaking your site.
Method Three: Using Shortcodes to Add a Buy Now Button
- Add the Custom Shortcode Code to your child theme’s functions.php file.
// Shortcode to display Buy Now button

function buy_now_button_shortcode($atts) {

    $atts = shortcode_atts(

        array(

            'product_id' => '',

            'text' => 'Buy Now',

            'class' => 'buy-now-button',

        ), $atts, 'buy_now_button'

    );

    if (empty($atts['product_id'])) {

        return ''; // Return empty string if product_id is not provided

    }

    $checkout_url = wc_get_checkout_url();

    $product_id = esc_attr($atts['product_id']);

    $button_text = esc_html($atts['text']);

    $button_class = esc_attr($atts['class']);

    return '<a href="' . esc_url($checkout_url . '?add-to-cart=' . $product_id) . '" class="button ' . $button_class . '" style="margin-left: 10px;">' . $button_text . '</a>';

}

add_shortcode('buy_now_button', 'buy_now_button_shortcode');Code language: PHP (php)- Insert shortcode: Add the following shortcode where you want the Buy Now button to appear:
[buy_now_button product_id=”123″ text=”Buy Now”]
- Publish: Save and publish the page or post.
Pro: Simple to insert in specific products or pages.
Drawback: Shortcodes can be cumbersome to manage for large numbers of products and may not offer the best user experience.
Method Four: Using Page Builders to Add a Buy Now Button
- Open page builder: Use a page builder plugin like Elementor.
- Add WooCommerce widget: Drag and drop the WooCommerce Product widget onto your page.
- Change button text: Customize the button settings to change the default CTA text to “Buy Now.”
- Configure redirect: Set the button to redirect to the checkout page.
Pro: Intuitive and visually appealing design interface.
Drawback: Page builders can slow down your site and may have compatibility issues with other plugins or themes.
Method Five: Using WooCommerce Blocks to Add a Buy Now Button
- Edit page/post: Go to the editor for the page or post where you want to add the button.
- Insert block: Add a WooCommerce block, such as the “All Products” block.
- Change button text: Use a plugin like “Button Text Changer” to change the button text to “Buy Now.”
- Configure redirect: Customize the button settings to redirect to the checkout page.
Pro: Seamless integration with the Gutenberg editor.
Drawback: Limited customization options and may not offer a seamless user experience for more complex setups.
Method Six: Using Plugins to Add a Buy Now Button (Recommended)
- Install and activate plugin: Choose a plugin that adds Buy Now functionality, such as FooGallery PRO Commerce.
- Configure settings: Follow the plugin’s setup instructions to configure the Buy Now button.
Pro: Extensive customization options and ease of use.
Drawback: Requires purchasing.
The Best Way to Add Buy Now Buttons to Your Store: FooGallery
Using a plugin to add “Buy Now” buttons to your WooCommerce store is the most efficient and flexible option. Plugins offer ease of use, require no coding knowledge, and provide extensive customization options. Other methods, such as manually coding buttons, can be time-consuming and require advanced technical skills.
We recommend using FooGallery PRO Commerce.
This is a popular WordPress photo gallery plugin that allows you to create dynamic image galleries with ease. With FooGallery, you can easily convert the default Add to Cart button to a Buy Now button, as well as add other options like View Product and Select Option buttons.
How to Set Up a Buy Now Button with FooGallery PRO Commerce
Ready to get started? Before you add your Buy Now button, you’ll need to set up FooGallery PRO Commerce and create your WooCommerce product gallery.
Below are the complete steps to follow:
1. Install and Activate FooGallery PRO Commerce
Once you’ve purchased the FooGallery PRO Commerce plan here (this is the only FooGallery plan that integrates with WooCommerce), you’ll need to take the following steps:.
To install and activate FooGallery PRO Commerce, follow these steps:
- Purchase the plugin: First, purchase the FooGallery PRO Commerce plan here (this is the only FooGallery plan that integrates with WooCommerce).
- Process payment: Complete the payment process.
- Check your email: After payment, check your email for the download link and FooPlugins license key.
- Download the plugin: Download the .zip file containing FooGallery PRO Commerce and save it to your desktop.
- Upload the plugin to WordPress:
- Go to your WordPress dashboard.
- Navigate to Plugins -> Add New.
- Click on Upload Plugin.
- Drag and drop the .zip file into the upload field.
2. Create a New Product Gallery
Now, you’re ready to create a dynamic and visually appealing product gallery for your WooCommerce store. Take the following steps:
- Activate the plugin: Activate FooGallery PRO Commerce in your WordPress dashboard.
- Add a new gallery: Go to FooGallery in the WordPress dashboard and select “Add New.”
- Add images or choose a data source: You will be prompted to upload images or add them from your media library. Alternatively, FooGallery PRO Expert users can select another source, such as media tags or server folders, from which to pull your images into the gallery. In this case, you won’t need to add images from the media library.
For ecommerce purposes, select WooCommerce as the data source – you’ll need the PRO Commerce plan for this, with WooCommerce integration. (See below for more info on how to do this.) - Customize the layout: Choose your preferred gallery layout and customize it. You can set pagination and filtering options, customize the lightbox, add hover effects, and more.
3. Populate the Gallery from Your WooCommerce Store
To set up your WooCommerce gallery you need to populate it with your products.
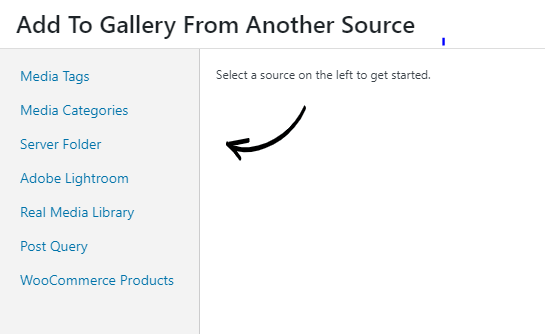
- Add media from another source: In the Gallery Items panel of your gallery, click on “Add Media from Another Source.”
- Select WooCommerce products: You will be directed to a new panel where you can choose the source for your images. Select “WooCommerce Products” at the bottom of the list.
- Choose products:
- You can select products for the gallery individually or by category.
- Set the number of products to display in the gallery.
- Include a list of product IDs for any products you want to exclude from a category.

- Provide title and description source: Select the source for your image titles and descriptions. For example, if you want to display the product title and cost, choose “Title” for Caption Title Source and “Price” for Caption Description Source.
- Finalize the gallery: Once you’ve set up the gallery images, click “OK” in the bottom right corner. Your gallery will now be dynamically populated with your selected WooCommerce products.
4. Create Your Buy Now Button
Now you’re ready to set up your first ‘Buy Now’ button in WooCommerce.
- Set up your first ‘Buy Now’ button:
Once your gallery is populated with product image thumbnails, go to Gallery Settings and click on the ecommerce tab. - Configure the CTA button to behave like a Buy Now button:
- In the Button Behavior dropdown, select “Add to cart and redirect to checkout”. This setting will send customers straight from a product to your WooCommerce payment gateway.
- Change the button text to ‘Buy Now’:
In the button text field, change the text to ‘Buy Now’, or whatever alternative you prefer, and publish your changes.
That’s it: you now have an instant purchase button.
Add Buy Now Buttons to Your Store with FooGallery PRO Commerce
Let’s recap. Adding a “Buy Now” button to your WooCommerce store streamlines the purchasing process and boosts sales. While there are several methods to achieve this, using a plugin like FooGallery PRO Commerce is the most efficient and flexible option.
With this plugin, you can:
- Add dynamic product image galleries, complete with a Buy Now button on every product, to any page of your WooCommerce store.
- Change the CTA button to ‘Buy Now’ in galleries without affecting CTA buttons on WooCommerce product pages.
- Add a View Product and/or Select Options button to gallery images and customize them.
- Customize the messaging of all three buttons.
And much more!
Ready to improve the impact of your CTA buttons and increase product sales with the FooGallery PRO Commerce plugin? Then may we invite you to…
FAQs
A “Buy Now” button redirects customers directly to the checkout page, streamlining the purchasing process and reducing the likelihood of cart abandonment. An “Add to Cart” button, on the other hand, allows customers to continue shopping and add multiple items to their cart before checking out.
Adding a “Buy Now” button to your WooCommerce store streamlines the purchasing process by adding a sense of urgency and bypassing the “Add to Cart” step, taking customers directly to the checkout page. This faster flow caters to customers who have already decided on their purchase and want a quick and convenient shopping experience.
Here’s the evidence:
- A Think with Google study found customers often research their purchases beforehand and therefore prefer a quicker checkout process.
- The recent study “Fewer Clicks, More Purchases” confirms that a simplified, fewer-clicks process leads to more purchases and fewer abandoned carts.
Using a plugin like FooGallery PRO Commerce simplifies the process, requires no coding knowledge, and offers extensive customization options. It integrates seamlessly with WooCommerce, making it easier to manage and enhance your store’s functionality.
Yes, with most plugins, including FooGallery PRO Commerce, you can choose to add “Buy Now” buttons to specific products or categories, giving you control over which items have this functionality.
For products with variations (e.g., different sizes or colors), you can use the “Select Options” button in FooGallery PRO Commerce, allowing customers to choose their desired variation before proceeding to checkout.

No, adding a “Buy Now” button does not replace the “Add to Cart” button. Both buttons can coexist, giving customers the option to either buy immediately or continue shopping.
FooGallery PRO Commerce is designed to be compatible with most WordPress themes. However, it’s always a good idea to check compatibility with your specific theme and test the plugin in a staging environment before deploying it on your live site.