FooGallery PRO Commerce includes a White Labeling feature, which allows you to rename FooGallery on your client’s site. This feature is intended for freelancers and agencies who work predominantly on client sites, and gives you the ability to rebrand FooGallery.
Below is a guide to using the White Labeling feature:
Activating White Labeling
This feature is only available in FooGallery PRO Commerce, and needs to be activated for it to work. To activate white labeling, navigate to FooGallery -> Features and click on Activate for White Labeling.
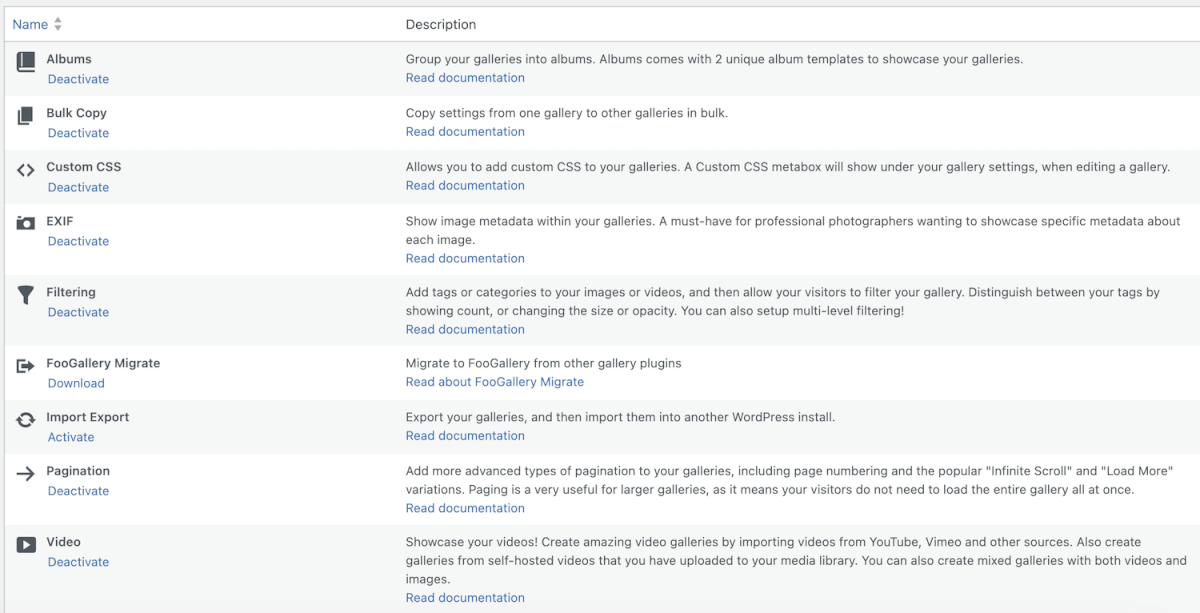
You can now find the specific settings for this feature in the global settings for FooGallery.
White Labeling Settings
To get started, navigate to FooGallery -> Settings. Here you will see a selection of tabs; go to the one for White Labeling.

You will now be able to change the branding for FooGallery. To begin with, you can change the plugin name and the shortcode. Note that with the Shortcode rebranding, you should not use square brackets in the name.
Following this, you can change the visibility settings for the various FooGallery menus and choose whether to disable certain datasources. Let’s take a closer look:
Menu Visibility
The white labeling feature gives you the ability to adjust who sees the various menus and which menus to show. The menu items are those that display under FooGallery in the WordPress dashboard.
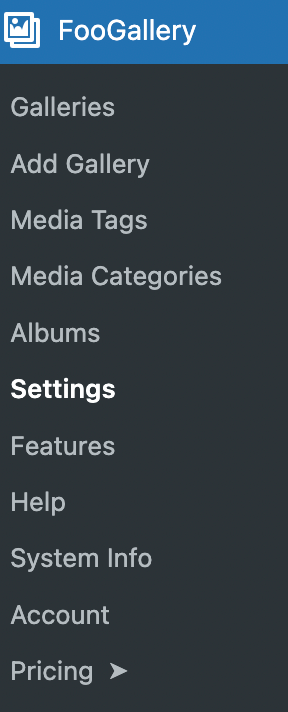
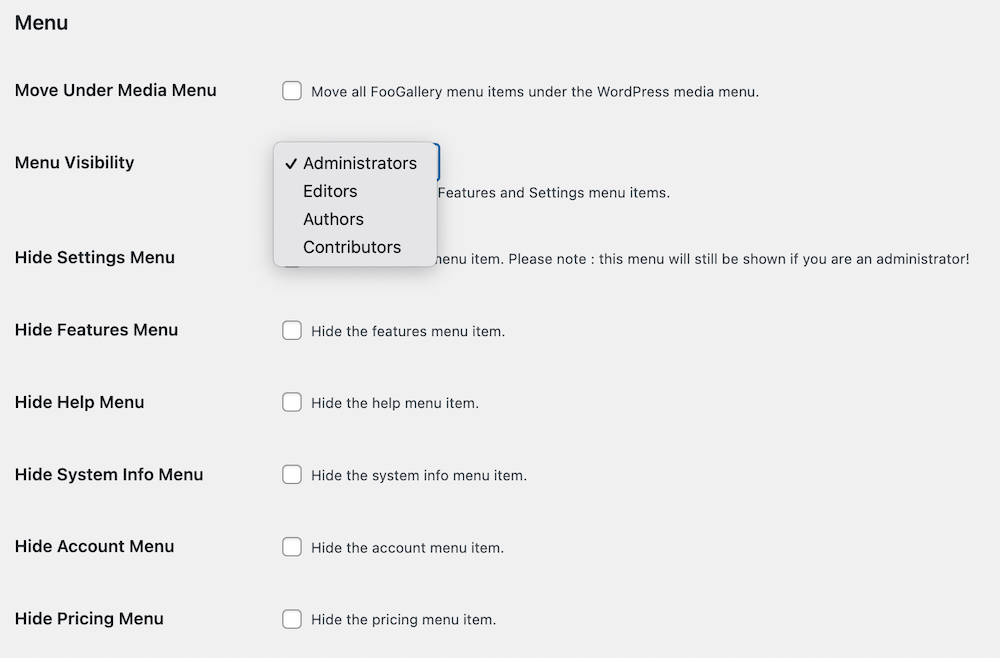
You can choose which of these menu items to hide by selecting the relevant boxes. For example, you may want to hide the pricing or account page, so that your client can not see these particular options. You may also want to hide the features or settings menu.
One of the other options you have is to select the user roles for who can see the Help, Features and Settings menu.
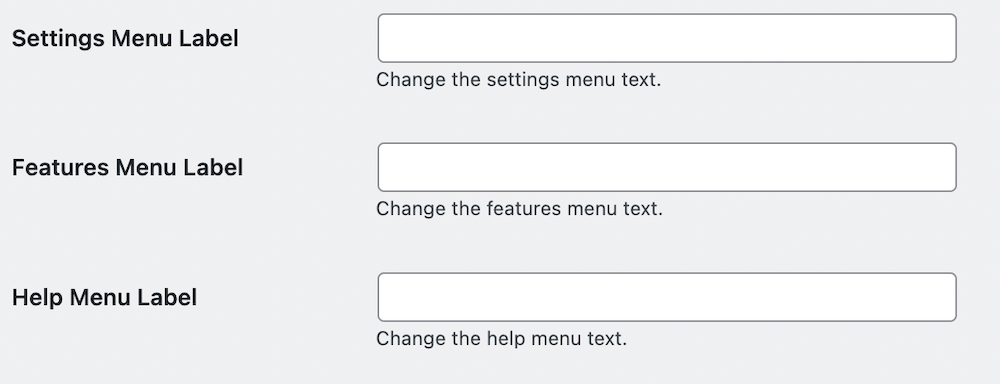
Under the Menu settings for White Labeling, you also have the option to change the names for some of the menus. These are the Settings, Features and Help menus.
Data Sources
Finally, with White Labeling, you are able to disable Data Sources so that they are not available when loading galleries from another source. This will cut down on some of the options available to your clients, which can help to avoid confusion or mishaps.
To disable a data source, click on the relevant box.
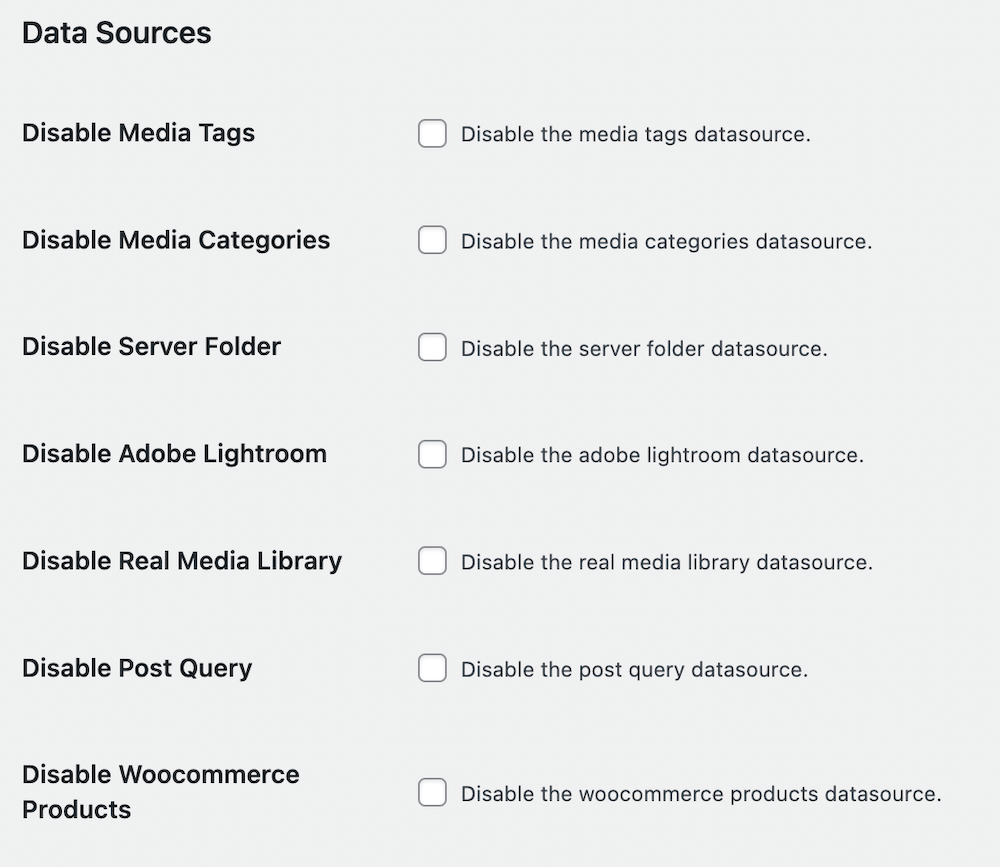
After you have made your selections, click on Save Changes at the bottom of the screen. Note that these changes will be applied to all galleries on the site.