FooGallery PRO Expert and FooGallery PRO Commerce allow you to create custom captions using HTML and custom attachment metadata. FooGallery PRO searches for metadata fields that it can identify and displays these as dynamic placeholders. You can add to any existing fields by using a custom fields plugins, such as ACF – Advanced Custom Fields or Pods – Custom Content Types and Fields.
Below is a guide on how to create custom captions.
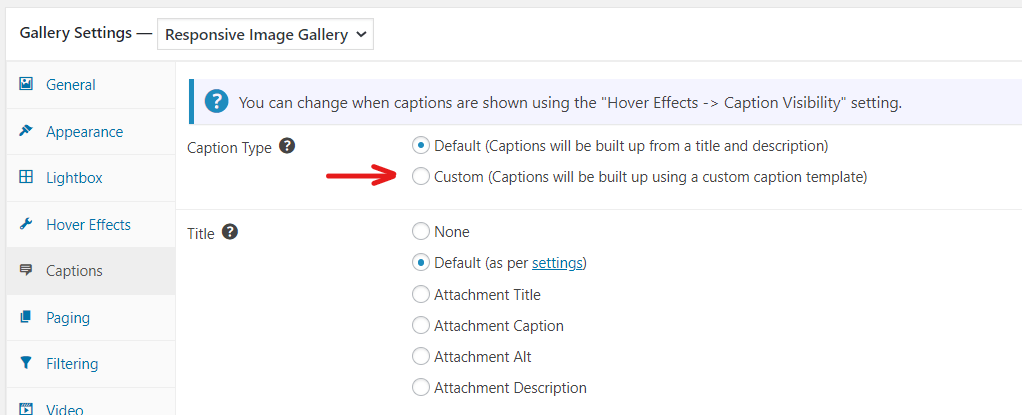
Getting Started with Custom Captions
You will find the Custom Captions option in the Captions settings for your gallery. To access this, select Custom.
You’ll now see a field where you the can create your own captions using HTML, dynamic placeholders and attachment metadata. You’ll also see the available fields from which FooGallery is pulling information. For example, in the below image, you can see three fields being generated from Pods.

These fields were created in the Pods plugin. (See below on how to do this.) You can then fill in these fields for the individual images by editing them in the media library or directly from the gallery.
You can do this by clicking on the ‘i’ on the image, when in the Manage Items view of your gallery. This will open up your Media Library. For each image, you’ll see the Attachment Details on the right of your screen, which includes all of the available fields. Scroll down through these and add details in the relevant fields.
Building Captions
Once you have populated the fields for your gallery images, you can begin building your captions. The first step is to select the fields that you want to display as your captions. You’ll then add these to the Custom Caption Template box.
You could, for example, use something like the below:
{{title}}{{custom_url}}
This will display the title, followed by the custom URL. These fields are available to you already, so you wouldn’t need a separate plugin for this. You could also add HTML to the caption template, for example:
<h4>{{title}}</h4>
<strong>{{custom_url}}</strong>
However, this only provides a limited range of custom options. For more advanced captions, you would need to use a plugin like ACF or Pods. Below is a quick guide to using each of these.
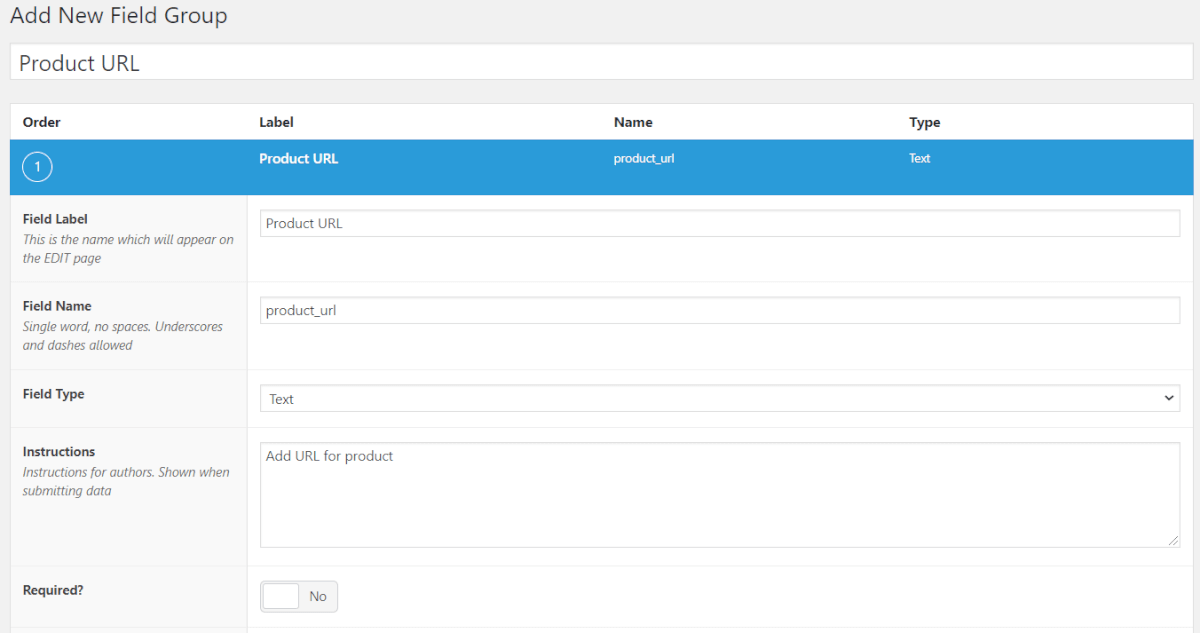
Advanced Custom Fields
You can install and activate the free version of this plugin from your Plugin page. Once activated, you can navigate to the plugin and add your fields:
- In the ACF settings, select Add New.
- Fill in the Field Group name, followed by the Field Label, and select Text for the Field Type.
- Then add additional information, such as instructions, as needed.
- You then need to set the location for your fields by creating a rule for the field. For images, select ‘Attachment’, ‘is equal to’ ‘ and ‘All image formats’.
- Click on Publish.

You can view and edit your existing fields from the Fields Group page. These fields will now be available in the Attachment Details for your images.
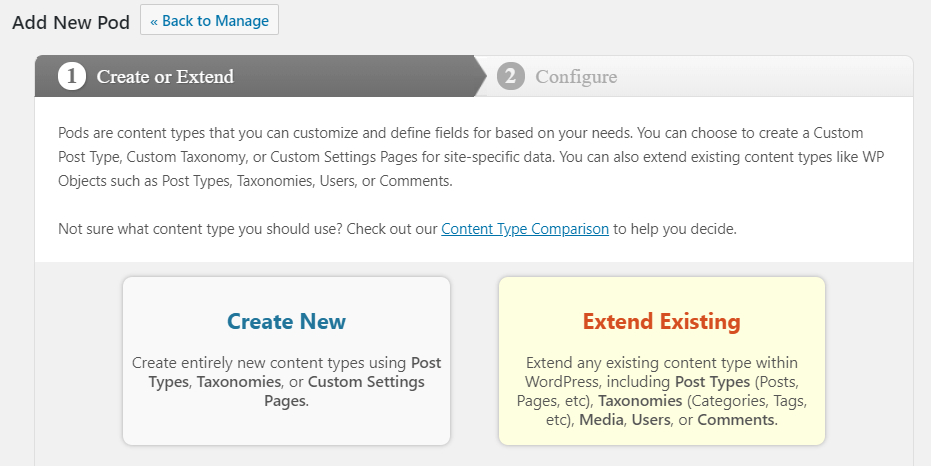
Pods – Custom Content Types and Fields
Pods works in a similar way. You will create Pods, and then add fields to these.
- To start, click on Add New –> Extend Existing. Here you will select Media from the drop down menu.
- You can then add fields to this pod (or edit existing fields). Click on Add New.
- Fill in the label and select Plain Text.
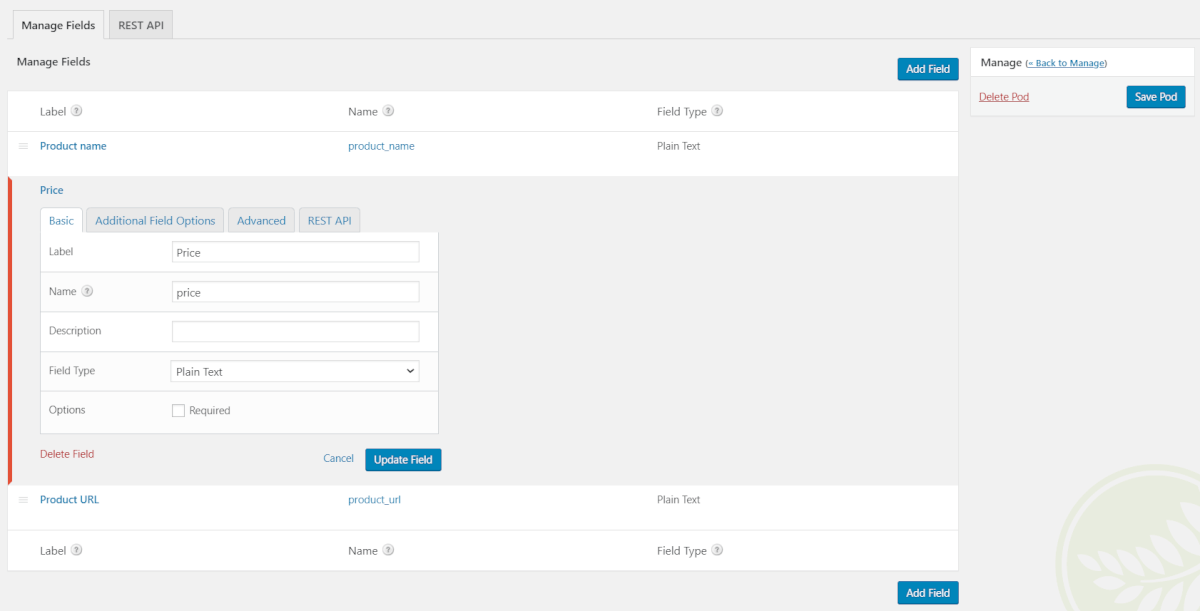
- Once you have added your fields, click on Save Pod.
These fields will also be available in the Attachment Details for your images.
Using Fields to Build Captions
Once your fields are set up, it’s easy to use these to build your captions. You’ll do this in the Custom Caption Template block by using the metadata fields as your placeholders. You can also add HTML to help style your captions.
Here’s an example:

To create your template, search the list below the caption template block for available fields. Copy and paste these into your template. Ensure all of the fields are filled in for each of your gallery images – if they’re not filled in these captions will be blank in the gallery.
You can then add HTML in the form of line breaks, hyperlinks, additional text, and much more to create the style you want.
Once your gallery is published, you will be able to see the captions. You can set these to appear on hover, or be always visible in the hover settings.
Here is how the above template displays the captions in the gallery. These are set to display on hover.

Taking Custom Captions To The Next Level
Now that you can create your very own custom captions using media metadata and HTML, you can combine this with the Custom CSS functionality already available with FooGallery to create amazing image captions. For example, you could style a link to look like a call-to-action button which links to your product page.
We have create a demo gallery showcasing custom captions together with custom CSS. The result is pretty awesome:

9 Beautiful Gallery Templates
View Demo
Video Galleries
View Demo
Tag Filtering
View Demo
Dynamic Galleries
View Demo
Custom Captions
View Demo
PRO Lightbox
View Demo
Pagination
View Demo
Advanced Effects
View DemoThe gallery uses custom fields created with Advanced Custom Fields, and looks like this:
FooGallery PRO feature #{{acf.feature_num}}
<h3>{{caption}}</h3>
<p>{{acf.feature}}</p>
<a class="foogallery-cta" href="{{custom_url}}" target="_blank">View Demo</a>Code language: HTML, XML (xml)
Then to style the call-to-action button, the following custom CSS was added to the gallery:
.foogallery-cta {
  background:    #15d798;
  background:    linear-gradient(#15d798, #073763);
  border-radius: 1000px;
  padding:       10px 25px;
  color:         #ffffff !important;
  display:       inline-block;
  font:          normal normal 16px/1 "Open Sans", sans-serif;
  text-align:    center;
}Code language: CSS (css)