Want to make your WordPress site pop? Image galleries are the answer. Whether you’re showcasing your portfolio, products, or precious memories, a well-crafted gallery can transform your site from bland to grand.
But what’s the best way to create these visual masterpieces? Should you use WordPress’s built-in features or opt for a plugin like FooGallery?
In this guide, we’ll compare both methods and reveal why many WordPress users are choosing plugins for their gallery needs. Get ready to unlock the full potential of your images and win new business in the process!
How to Add an Image Gallery in WordPress Without a Plugin
WordPress includes a built-in gallery feature that lets you create image galleries without installing additional plugins. This native method is perfect for basic gallery needs and works with any WordPress theme.
Here’s how to create a gallery using WordPress’s native tools:
1. Open the WordPress editor for your post or page.

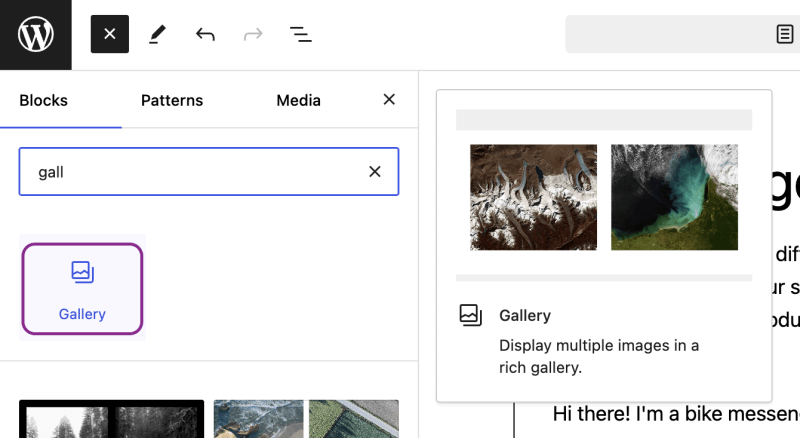
2. Click the ‘+’ icon to add a new block.
3. Search for “Gallery” and select the Gallery block.
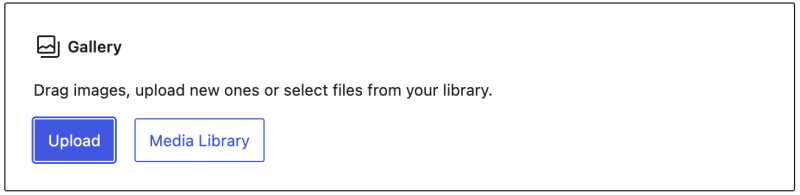
4. You’ll see options to upload files or select images from your media library.
5. Choose your desired images by clicking on them (make sure you’ve optimized your images first). Selected images will have a checkmark.
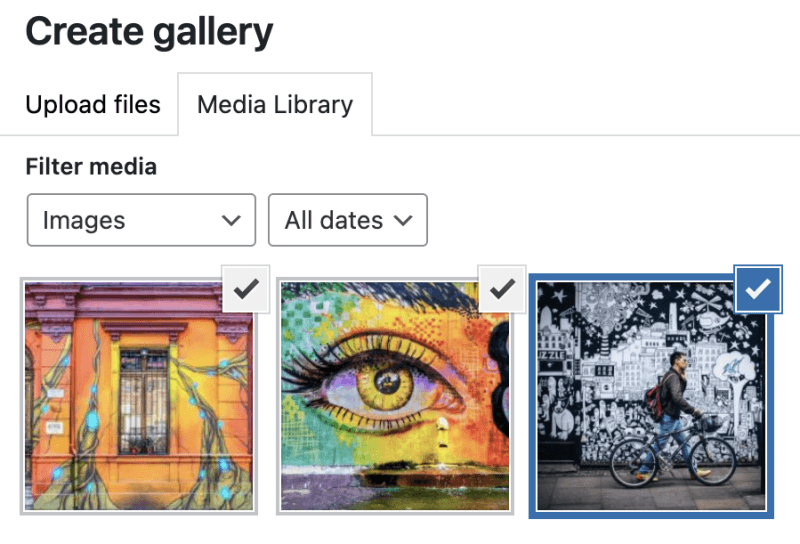
6. Once you’ve selected your images, click “Create a new gallery” at the bottom right.
7. Arrange your images by dragging and dropping them into your preferred order.
8. Click “Insert gallery” to add it to your page or post.
After inserting the gallery, you can click on the block to further customize it:
- In the toolbar above the gallery, you can:
- Align the gallery (left, center, right, or wide width).
- Apply color filters.
- Choose where images link to (None, Attachment Page, or Media File).
- Add captions.
- Add or replace images by going back to your gallery creation section.

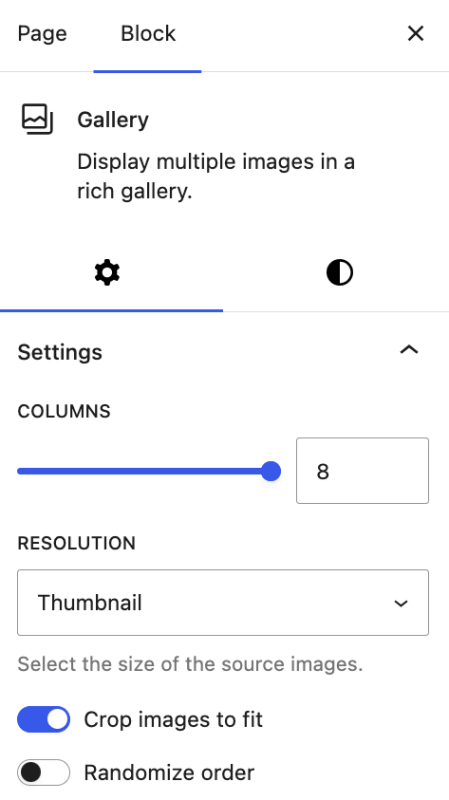
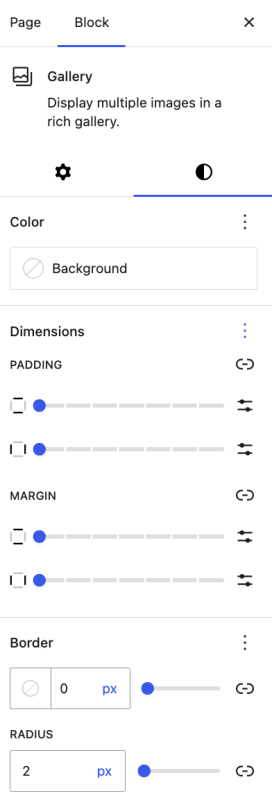
- In the block settings/styles sidebar on the right, you’ll find various options:
- Adjust the number of columns (from 1-8).
- Choose to crop images to fit.
- Set image size (Thumbnail, Medium, Large, or Full Size).
- Adjust the spacing between images.
While this method works well for basic needs, if you want to create more professional or customized galleries, you will encounter significant limitations. Let’s look at these constraints and why, like many other many site owners, you will eventually need to seek more powerful solutions.
Limitations of the Default WordPress Gallery
When creating galleries with WordPress’s built-in functionality, you’ll quickly encounter several practical limitations that might affect your site’s presentation:
- Limited layout options: You’re restricted to a basic grid with no carousel or slider options to save space and add visual interest.
- No lightbox functionality: Without lightbox, visitors can’t click to view larger images in an overlay.
- Minimal hover effects: No animations or interactive elements to engage visitors.
- Poor mobile responsiveness: Native galleries often don’t adapt well on phones and tablets.
- No video support: Can’t combine videos and images in the same gallery.
- Performance concerns: No built-in lazy loading for large galleries.
- Limited caption options: Minimal space for adding context to your images.
As your site grows and your presentation needs become more sophisticated, you’ll need to determine whether the native gallery meets your requirements or if it’s time to explore gallery plugin options.
Choosing the Right Gallery Solution for Your Needs
Deciding between WordPress’s native gallery feature and a dedicated gallery plugin depends on your specific requirements. With one glance, this comparison will help you determine which approach works best for your website:
| Feature | WordPress Native Gallery | Gallery Plugin (like FooGallery) |
| Ease of Setup | ⭐⭐⭐⭐⭐ No installation needed | ⭐⭐⭐⭐ Simple plugin installation |
| Layout Options | ⭐⭐ Basic grid only | ⭐⭐⭐⭐⭐ Multiple layouts (grid, masonry, carousel, etc.) |
| Lightbox Effects | ❌ Not available | ✅ Professional image viewing experience |
| Video Support | ❌ Images only | ✅ Mix videos and images |
| Mobile Responsiveness | ⭐⭐⭐ Basic adaptation | ⭐⭐⭐⭐⭐ Fully responsive designs |
| Performance | ⭐⭐⭐ No optimization options | ⭐⭐⭐⭐ Lazy loading, optimization features |
| Best For | Simple blog posts, occasional image displays | Photography sites, portfolios, product galleries, visual-focused websites |
The right choice ultimately depends on how important visual content is to your site and what your visitors expect. If images are central to your website’s purpose, especially for photographers selling their fine art online or portfolio sites, a dedicated gallery plugin will provide the professional features and flexibility you need to showcase and monetize your visual content effectively.
How to Create an Image Gallery With FooGallery
FooGallery enhances your WordPress site with professional gallery capabilities beyond the basic built-in function. Here’s a quick overview before we dive into the steps:
- Perfect integration with WordPress.
- Multiple layouts (Masonry, Grid, Justified) and dynamic styling options.
- User-friendly interface for both beginners and professionals within the WordPress dashboard.
- Built-in lightbox, hover effects, and SEO optimization.
- Advanced features like filtering and WooCommerce integration in PRO and PRO Commerce versions.
I have just started using FooGallery PRO Expert on my website and my initial impressions are excellent. The ability to create dynamic galleries, filtered galleries and galleries from other sources like Post Queries gives me the ability to create attractive, easy to maintain galleries throughout my website!
Rob
Read more reviews for FooGallery
The Best WordPress Gallery Plugin
FooGallery is an easy-to-use WordPress gallery plugin, with stunning gallery layouts and a focus on speed and SEO.
Let’s create your first gallery using FooGallery PRO Commerce (which includes all available features):
Follow the instructions below to create stunning, stylish, and engaging WordPress image galleries with FooGallery.
Step 1: Install and Activate FooGallery in WordPress
- Log in to your WordPress dashboard.
- Go to Plugins > Add New.
- Search for “FooGallery” in the plugin directory.
- Click “Install Now” next to FooGallery, then “Activate”.
For the pro version, simply download the FooGallery PRO zip file from your account, then go to Plugins > Add New > Upload Plugin, select the zip file, and follow the prompts to install and activate.
Step 2: Create a New Gallery and Upload Images
- In your WordPress dashboard, go to FooGallery > Add New.
- Give your gallery a name.
- Click “Add Media” to upload new images or select existing ones from your WordPress media library.
- For PRO users: You can also import media from other sources, like media tags or WooCommerce products.
Step 3: Choose and Customize Your Gallery Layout
- In the gallery editor, find the “Gallery Template” section.
- Choose from layouts like Masonry, Justified, Grid, or others (selection depends on your plan).
- Adjust layout-specific settings. For example:
- For Masonry: Set the number of columns
- For Justified: Set the row height
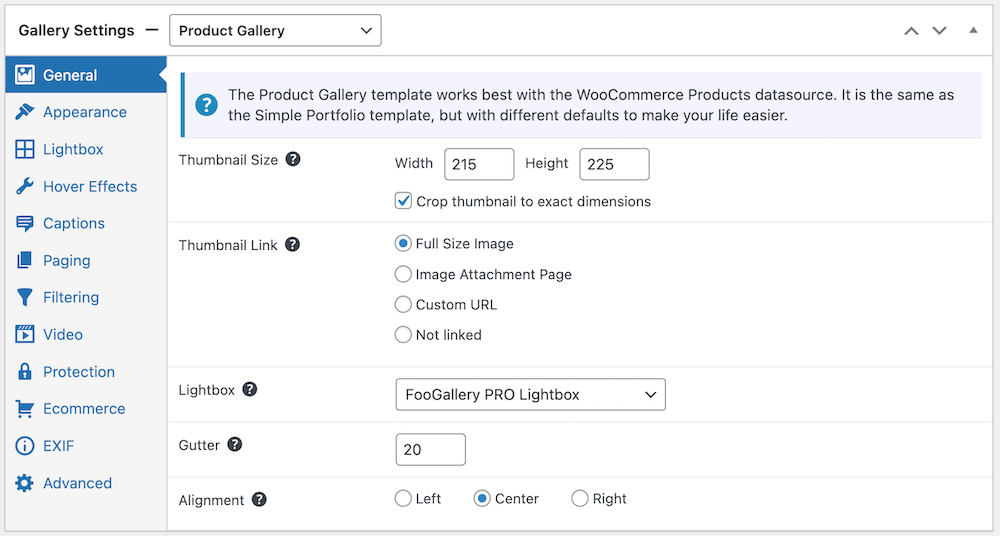
Step 4. Select Your Appearance Settings
1. In the “General” tab, you can adjust the thumbnail size, gutters, and alignment.
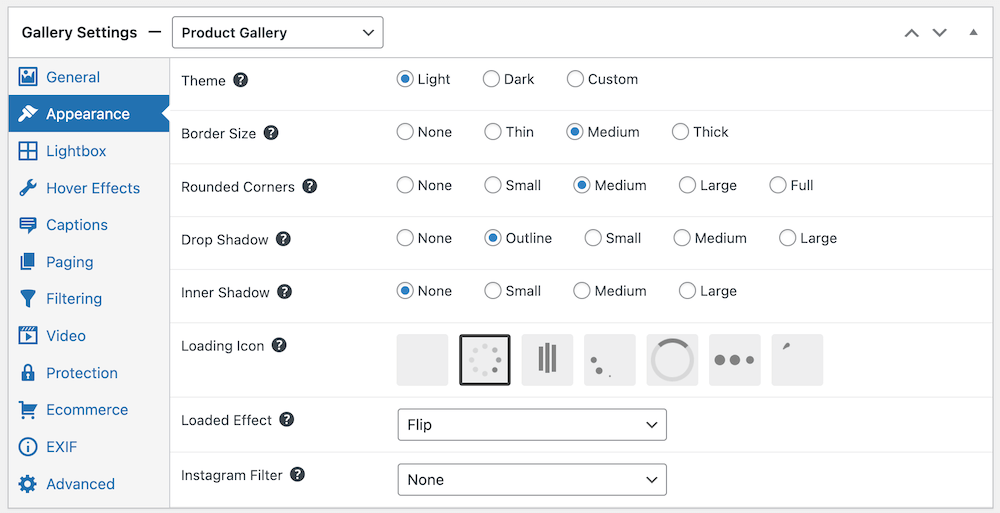
2. In the “Appearance” tab of your gallery settings:
- Choose a theme.
- Set border styles.
- Adjust corner rounding.
- Add shadows if desired.
- Preview your changes in real-time using the “Gallery Preview” tab.
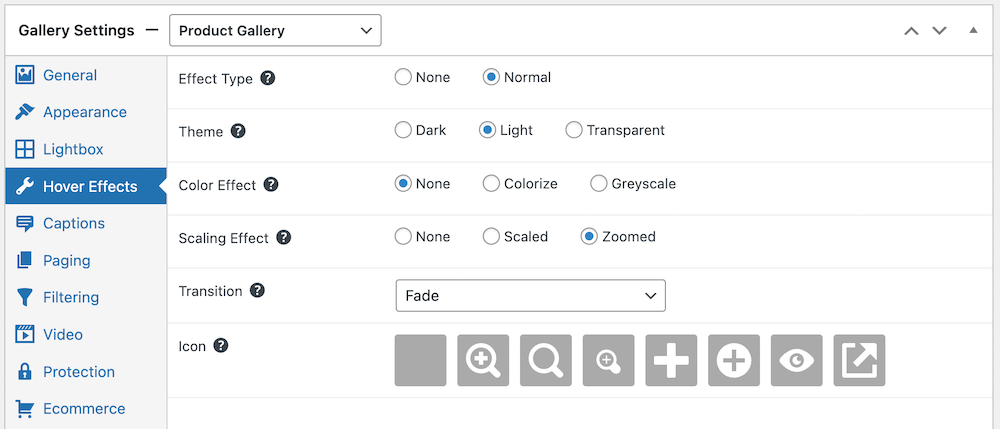
Step 5. Add Effects to Your Image Gallery
1. In the “Hover Effects” section:
- Choose a hover effect (e.g., theme, color, or scaling).
- Select a hover icon if desired.
If you want to know more about customizing your gallery with effects, check out our guides on WordPress hover effects and on custom CSS image hover effects.
2. For captions:
- Decide where to display captions (on thumbnail, in lightbox, etc.).
- Choose caption style and positioning.
Want to know more about how to install captions? Take a look at our WordPress image caption guide.
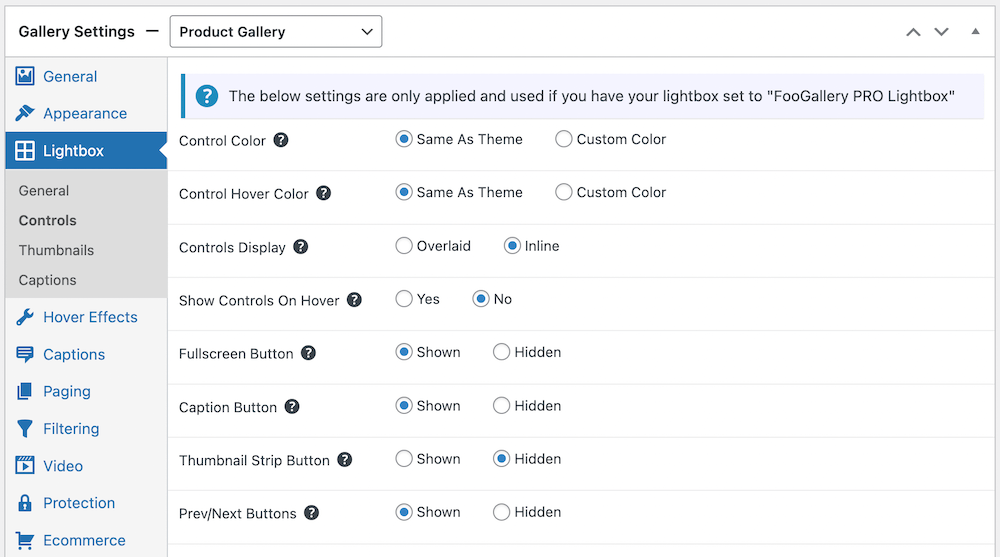
Step 6: Set Up Lightbox Functionality
1. In the “General” settings, select your preferred lightbox option.
2. If using the built-in lightbox:
- Choose to copy the theme from gallery settings or select a custom color.
- Configure navigation options.
- Set caption display preferences.
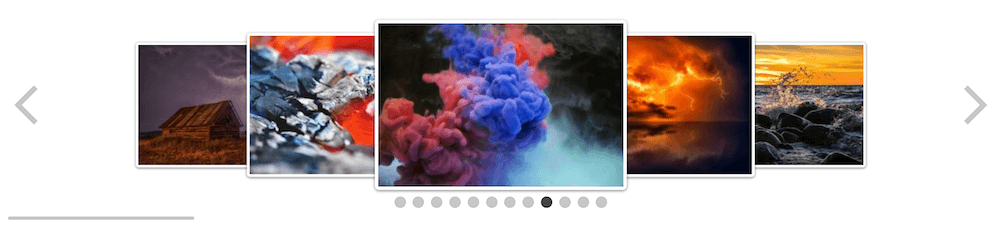
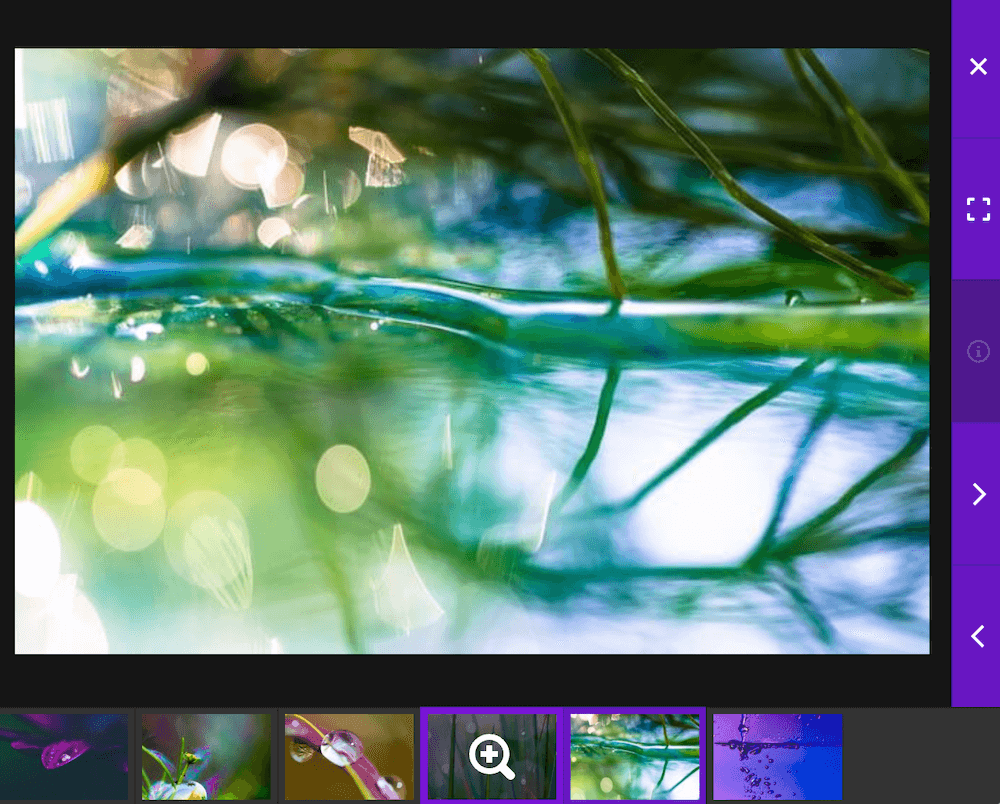
Here’s an example of how a FooGallery Lightbox looks once set up:
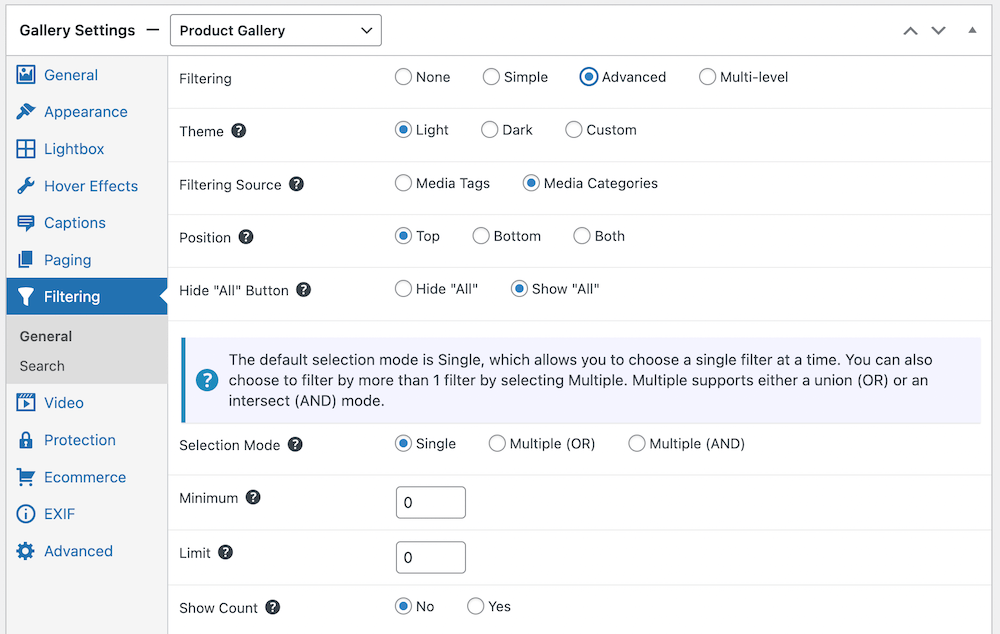
Step 7. Implement Advanced Features (Pagination, Filtering, etc.)
For PRO users:
- In the “Filtering” tab, enable and configure filtering options.
For PRO Commerce users:
- Configure image protection and watermarking.
- Set up sale ribbons and buttons or WooCommerce integration.
Step 8: Publish and Display Your Gallery in WordPress
- Click “Publish” to save your gallery.
- To add the gallery to a post or page:
- Use the FooGallery block in the WordPress block editor
- Or copy the provided shortcode and paste it where you want the gallery to appear
Check out our gallery demos to see how your product gallery could look with the help of FooGallery.
With the basic gallery setup complete, let’s explore how FooGallery’s features solve specific business challenges through specialized gallery types.
Creating Specialized Gallery Types with FooGallery
FooGallery excels at creating specialized galleries beyond standard image displays:
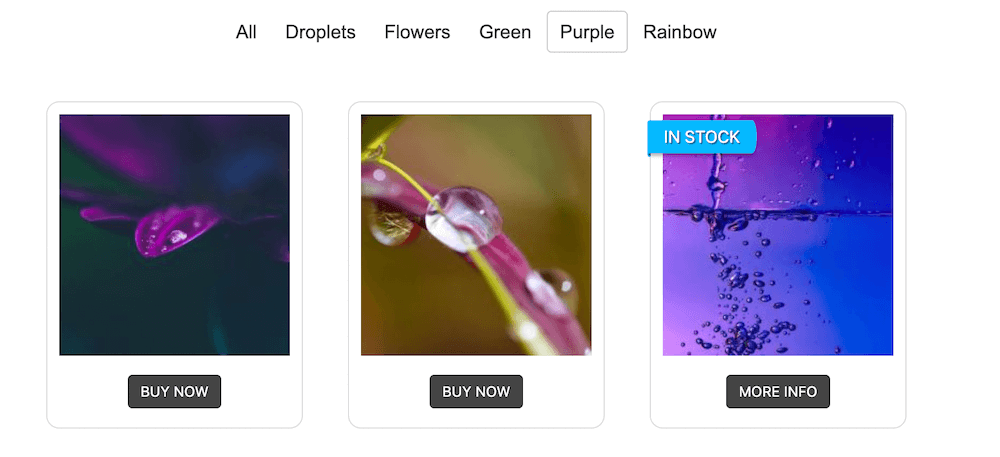
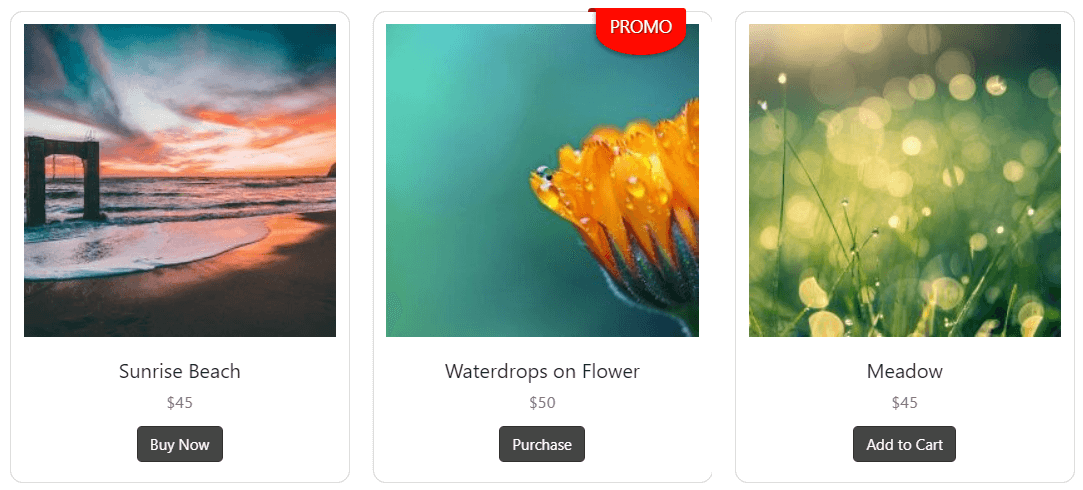
WooCommerce Product Galleries
With FooGallery PRO Commerce, create professional product galleries connected to your WooCommerce store. These visually appealing displays showcase pricing and include convenient “Add to Cart” buttons to enhance the shopping experience.
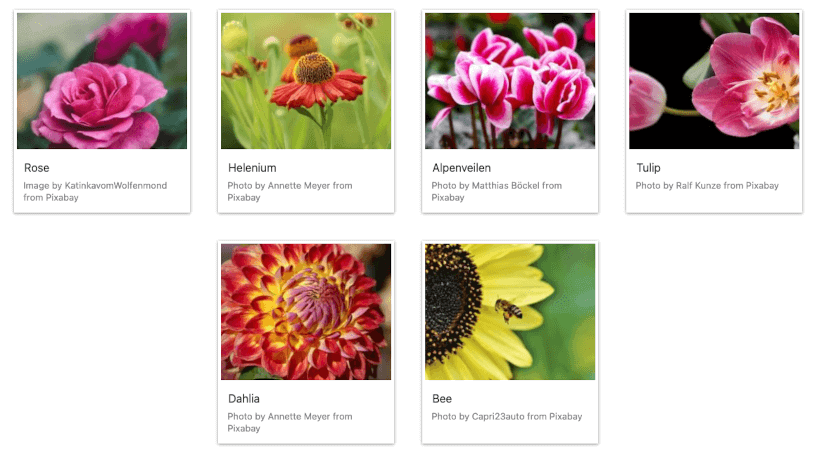
Portfolio Galleries
With portfolio galleries, showcase your work professionally. You will have access to filtering options that let visitors sort by category or tags. And hover effects and captions to provide context for each project.
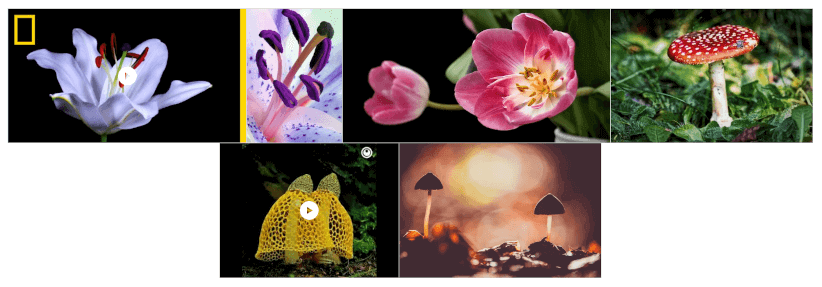
Video Galleries
Mix videos and images with FooGallery PRO Expert. Import from YouTube, Vimeo, TED, Dailymotion, Facebook, or host videos yourself. Video thumbnails play directly in the lightbox, keeping visitors engaged.
With FooGallery, the presentation possibilities are endless. You could create real estate galleries with property filtering options, event galleries with date-based organization, password-protected client approval galleries, or even team member showcases with biographical information. Whatever your visual presentation needs, FooGallery offers the flexibility to make it happen.
Advanced Gallery Features That Make a Difference
FooGallery transforms basic galleries into powerful visual tools through these professional enhancements:
Multi-level Filtering
Filter galleries by multiple criteria simultaneously – perfect for large collections where visitors need to narrow content by category, date, or custom tags.
Intelligent Performance Management
Prioritize visible content first for smoother, faster experiences even with image-heavy pages, eliminating frustrating slowdowns.
HTML-Enhanced Captions
Create captions with links, formatting, and custom shortcodes that provide context and interactivity for each image.
Professional Hover Effects
Add visual interest with multiple hover effects and transitions without custom CSS, making galleries feel polished and engaging.
Brand-Matched Lightbox
Customize the lightbox with your site’s colors, controls, and transitions for a cohesive visitor experience.
Copyright Protection
Safeguard your work with watermarking and right-click protection options—essential for photographers and content creators.
These advanced features solve real problems that serious WordPress users face when creating professional image galleries.
Optimizing Gallery Performance and SEO
Image galleries can significantly impact your site’s speed and search rankings. Follow these practical optimization tips:
Image Optimization Best Practices
- Compress images before uploading (aim for 100-200KB per image).
- Use modern formats like WebP when available.
- Maintain appropriate dimensions (avoid uploading 5000px images for 500px displays).
SEO Essentials
- Create descriptive ALT text for every image that includes relevant keywords naturally.
- Example: “Red fox photographed in Yellowstone National Park at sunset” rather than “fox image.”
- Remember that ALT text improves both accessibility and search visibility.
Performance Optimization
- Enable lazy loading to load images only as visitors scroll to them.
- Set appropriate thumbnail sizes (200-300px for most galleries).
- Use a Content Delivery Network or CDN for faster global delivery of gallery images.
- Verify mobile responsiveness by testing on multiple devices.
By following these optimization practices, your galleries will enhance rather than slow down your site –keeping both visitors and search engines happy.
Troubleshooting Common WordPress Gallery Issues
When gallery problems arise, quick solutions can save you hours of frustration. Here’s how to resolve common issues:
Images Not Displaying Properly
Check image paths in your Media Library and consider regenerating thumbnails to fix sizing inconsistencies.
Slow-Loading Galleries
Enable lazy loading in FooGallery settings and compress images before uploading – this single step can reduce load times by 50% or more.
Mobile Responsiveness Issues
Test your gallery using FooGallery’s responsive templates and adjust column settings specifically for smaller screens.
Lightbox Not Working
Check for JavaScript conflicts by temporarily disabling other plugins one by one to identify the culprit.
Style Conflicts
Use FooGallery’s custom CSS options to precisely control appearance without affecting the rest of your site.
Most gallery problems can be resolved in minutes with these targeted fixes, getting your visual showcase back on track quickly.
Create professional image galleries on WordPress with FooGallery!
While WordPress offers basic gallery functionality, FooGallery takes your image displays to the next level. Here’s why it’s the smart choice:
- Easy to use: Create stunning galleries in minutes, even as a beginner.
- Highly customizable: Tailor your gallery’s look and feel to match your site.
- User-friendly features: Filtering, pagination, and search improve visitor experience.
- Professional results: Impress your audience with sleek, responsive galleries.
Ready to transform your WordPress galleries? Choose the FooGallery plan that fits your needs today!
The Best WordPress Gallery Plugin
FooGallery is an easy-to-use WordPress gallery plugin, with stunning gallery layouts and a focus on speed and SEO.