
For any online store, a product gallery is essential. It’s the focal point of your store and a key factor in customer purchasing decisions. A well-designed WooCommerce product gallery can significantly boost your conversions and enhance your overall user experience.
In this guide, we’ll explore how to create and optimize a WooCommerce product gallery that showcases your products effectively and drives sales. We’ll cover:
- Improving your product photography
- Choosing and using the right gallery plugin
- Customizing your gallery to reflect your brand
- Implementing lightbox features
- Displaying product variations
- Setting up single product galleries
- Optimizing gallery performance
Whether you’re just starting out or looking to enhance your existing WooCommerce store, these tips and tricks will help you create a product gallery that stands out and converts.
1. Improve Your WooCommerce Product Photography
Your product images act as your storefront window. They’re not just pictures; they’re silent salespeople working 24/7 to convince browsers to become buyers.
Therefore, it’s worthwhile taking the time to do them properly. The first step in creating a product gallery is ensuring that you have great, high-quality product images.
Let’s dive into how you can make your WooCommerce product gallery a conversion powerhouse.
Mastering DIY Product Photography
First things first: lighting is your best friend. A well-lit space can transform your photos from amateur to amazing. Natural light is fantastic, but if that’s not an option, invest in some softbox lighting. It’s a game-changer for consistent, flattering illumination.
Next, let’s talk about focus. Blurry images are a big no-no. They scream “unprofessional” and can send potential customers running.
Play around with your camera’s ISO and shutter speed settings. It might seem technical at first, but mastering these can result in crisp, clear images that customers can zoom into without disappointment.
When creating your product gallery, you’ll be tempted to use hi-res photos to show off your products. But very hi-res generally means very big, which often results in a slow page load, which impacts both user experience and your SEO. The solution? Resize and optimize!
The Magic of Editing
Even the most basic editing can work wonders. Think of it as giving your products a digital makeover. Adjusting brightness, contrast, and sharpness can make your products pop off the screen. And don’t be afraid to experiment with presets or dive into Photoshop. A little color correction can go a long way in making your products irresistible.
There are plenty of online photo editors available that can help with this.
Setting the Scene
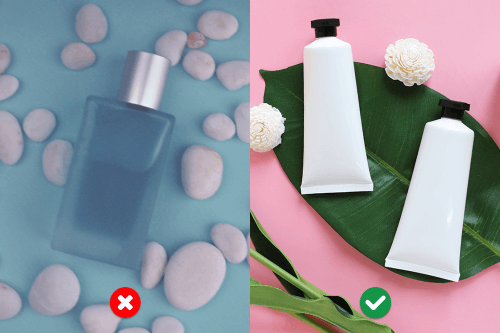
Your product’s background is like its supporting actor – it shouldn’t steal the show, but it should enhance the star. A neutral background often works best, allowing your product to shine. But don’t be afraid to get creative. Lifestyle shots, like those used by Intelligent Change, can help customers envision how your product fits into their lives. On the flip side, Anthropologie’s plain backgrounds let their products speak for themselves. Choose what aligns best with your brand’s personality.
Variety is the Spice of Sales
One angle doesn’t fit all. Capture your products from various perspectives. Show them in action, up close, from afar. This variety not only satisfies curious customers but also gives you more options for your WooCommerce gallery layout.
Optimizing for the Web
Here’s where we get a bit technical, but stick with me – it’s crucial. Web-optimized images can make or break your site’s performance. Aim for a sweet spot of 1000-2000 pixels on the longest side. This size maintains quality without slowing down your site.
Compression is your secret weapon. It reduces file size without noticeably affecting quality. There are plenty of WordPress plugins that can do this automatically, saving you time and headaches.
Here’s a look at an image compressed on Shortpixel – there’s a 75% compression for a much-reduced file size, without significant loss of quality.
The SEO Boost
Don’t forget about alt text and captions for your images. These aren’t just for accessibility (though that’s incredibly important). They’re also prime real estate for optimizing your gallery for SEO. Use descriptive, keyword-rich text to help search engines understand your images, potentially boosting your visibility in image searches.
Consistency is Key
Finally, maintain a consistent style across your gallery. This doesn’t mean every image should be identical, but they should feel like part of the same family. Consistent backgrounds, lighting, and sizing create a professional, cohesive look that builds trust with your customers.
2. Use a Product Gallery Plugin
Now that you have stunning product images, it’s time to showcase them effectively. While WooCommerce offers a basic product gallery, using a dedicated gallery plugin can take your product presentation to the next level.
A product gallery plugin offers more than just a pretty display. It can significantly enhance your customers’ shopping experience and potentially boost your sales. Here’s why:
- Enhanced customization: Gallery plugins often offer a range of layout options and styles, allowing you to create a unique look that matches your brand.
- Improved user experience: Features like zoom, lightbox, and 360-degree views can give customers a more detailed look at your products.
- Better performance: Many plugins are optimized for speed, ensuring your galleries load quickly and don’t slow down your site.
- SEO benefits: Some plugins offer built-in SEO features, helping your product images rank better in search results.
The Best Plugin WooCommerce Product Galleries
While there are a number of product gallery plugins available, we recommend using FooGallery PRO Commerce.
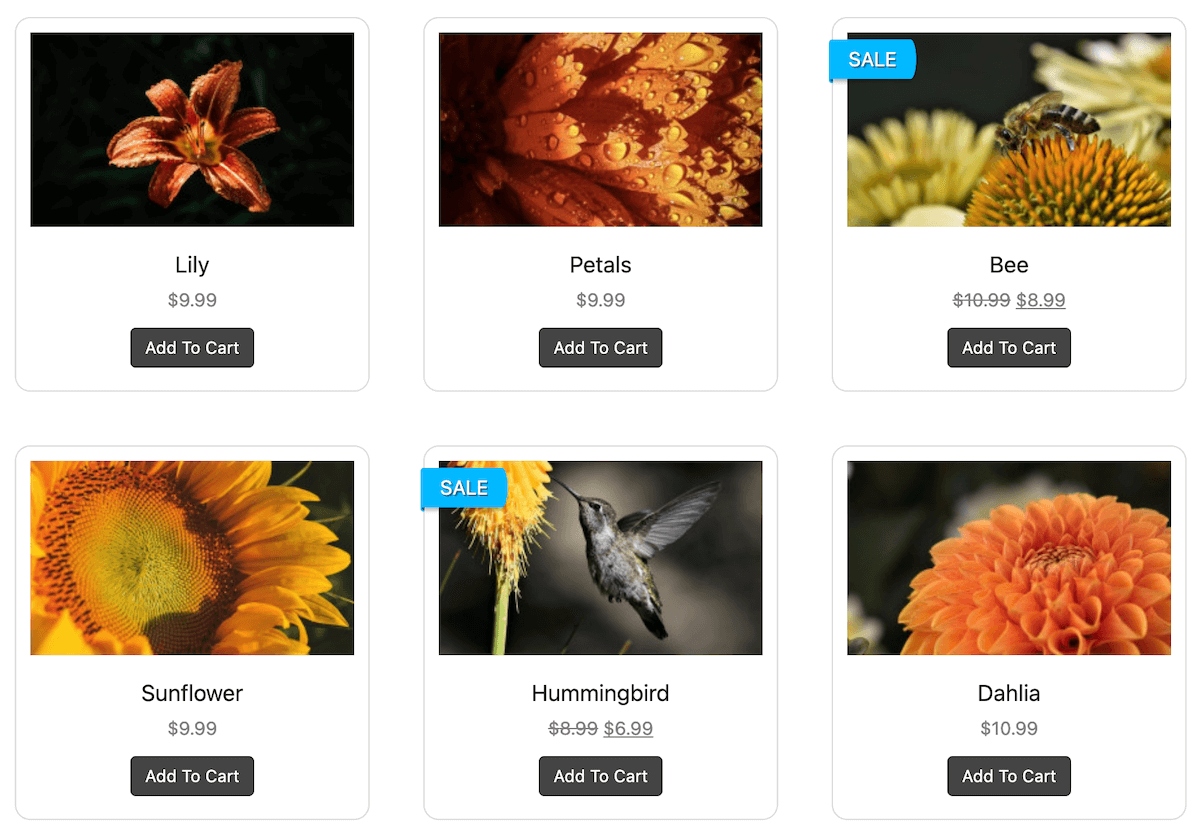
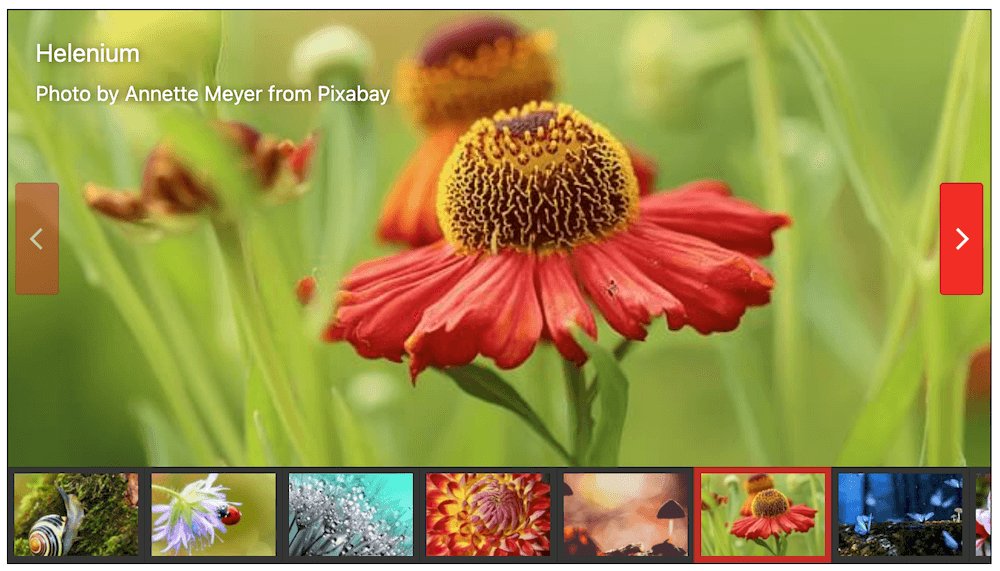
With FooGallery PRO Commerce, you can sync your galleries with the WooCommerce Product Database and select exactly which products you want to feature. You can then display products in the dedicated product gallery or choose from any of the templates, such as the horizontal image slider, which plays through products on an infinite loop.
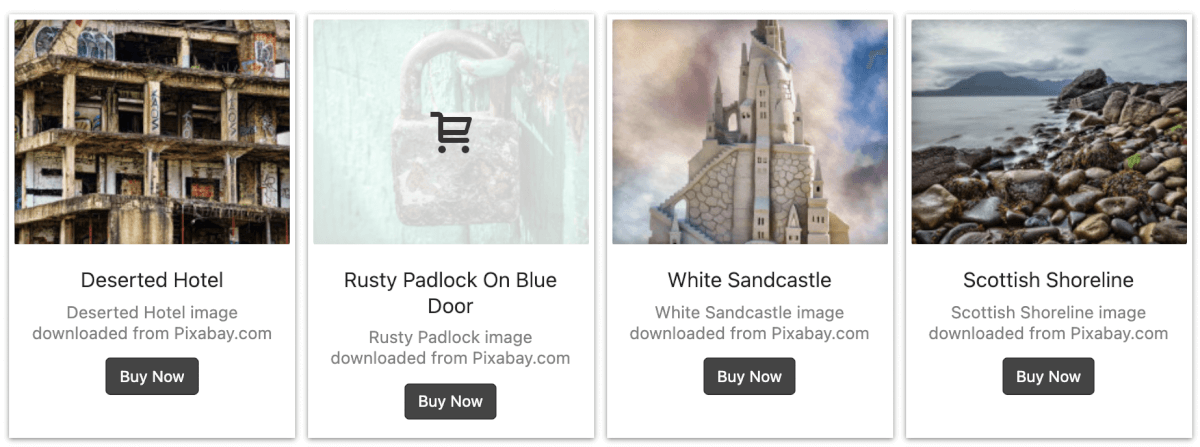
The plugin also allows you to add sales badges, such as out-of-stock and on-sale ribbons. Depending on how products are marked in the backend, these can be automatically added, though you can also add them manually. You can also add ‘View Product’ or ‘Add-to-Cart’ buttons and control their behavior.
Some of the other must-have features include:
- A built-in lightbox
- Video Integration (which is ideal for video galleries of product demos, how-tos, or testimonials)
- Advanced filtering options and multilevel filtering
- Gallery search
- A master product feature with File Downloads
Explore FooGallery’s range of product gallery demos to discover what you can achieve with the market’s best product gallery plugin.
3. Customize Your Product Gallery to Reflect Your Brand
Once you’ve chosen a gallery plugin, it’s time to make it your own. Customization is key to creating a product gallery that not only showcases your items effectively but also aligns with your brand identity. Let’s explore how you can tailor your WooCommerce product gallery to stand out and drive conversions.
Unique Styling Options
Most gallery plugins offer a variety of templates and layouts. FooGallery PRO Commerce, for example, provides several gallery templates, including a dedicated product gallery layout. This gives you a clean, uncluttered look that focuses on displaying your products. However, you might prefer a masonry or justified gallery layout for a more dynamic presentation.
When choosing a layout, consider your products and your brand aesthetic. A minimalist brand might benefit from a simple grid layout, while a more eclectic brand could use a masonry layout to create visual interest.
Hover Effects and Animations
Bring your gallery to life with hover effects and transitions. These subtle animations can make your gallery more engaging and interactive. For instance, you could use scaling effects when a user hovers over an image or add hover icons that provide quick access to product information or a quick view option.
Custom Captions
Captions are a powerful tool for providing additional product information directly in the gallery. With FooGallery, you can build custom captions that include product info, links, pricing, and more. This feature allows you to give customers key details at a glance, potentially increasing their interest and likelihood to click through to the product page.
Video Integration
Don’t limit yourself to static images. FooGallery allows you to integrate videos into your product gallery. This can be incredibly useful for showcasing product demos, how-to guides, or customer testimonials. You can typically add videos from various sources, such as YouTube or Vimeo, making it easy to incorporate existing video content.
Filtering and Search Options
If you have a large product catalog, consider using filtering options to help customers find what they’re looking for quickly. Tag filtering allows users to narrow down products based on specific attributes. Some plugins also offer a gallery search feature, making it even easier for customers to locate specific items.
Pagination and Loading Options
For galleries with many products, pagination can help manage the user experience. You might opt for traditional numbered pages or use a “Load More” button for a more modern approach. Another option is infinite scroll, which automatically loads more products as the user scrolls down the page.
Lazy loading is another valuable feature to consider. This technique loads images only as they come into view, which can significantly improve your gallery’s performance, especially for mobile users or those with slower internet connections.
Custom CSS
If you need additional styling options beyond what your plugin offers, most gallery plugins allow you to add custom CSS. This gives you the flexibility to fine-tune your gallery’s appearance to match your brand perfectly.
WooCommerce-Specific Features
When customizing your gallery for WooCommerce, look for features that enhance the shopping experience. For example, FooGallery PRO Commerce allows you to add Sale Ribbons to highlight items on promotion. You can also include Add to Cart or View Product buttons directly in the gallery or lightbox, streamlining the path to purchase.
Remember, the goal of customization is to create a cohesive, branded experience that makes shopping easy and enjoyable for your customers. Experiment with different options to find the perfect balance of aesthetics and functionality for your WooCommerce store.
4. Use A Lightbox With Your Product Gallery
Ideally, you want to set your gallery to open full-size images in a popup lightbox when a customer clicks on a gallery thumbnail. This gives your customers a chance to see the product in more detail.

The FooGallery lightbox opens the full-size images above the gallery page, allowing customers to scroll through the product images for all of the items in the gallery. The lightbox in the product gallery will also show descriptions of each item and include an Add to Cart button.
If you have product variations (which we discuss below), they are also displayed in the lightbox.
The built-in FooGallery lightbox is enabled by default. But if you need to enable it for your gallery, you can do so under the General settings. (Note that some of the templates, like the Slider or the Grid, use a panel in the gallery rather than the lightbox.)
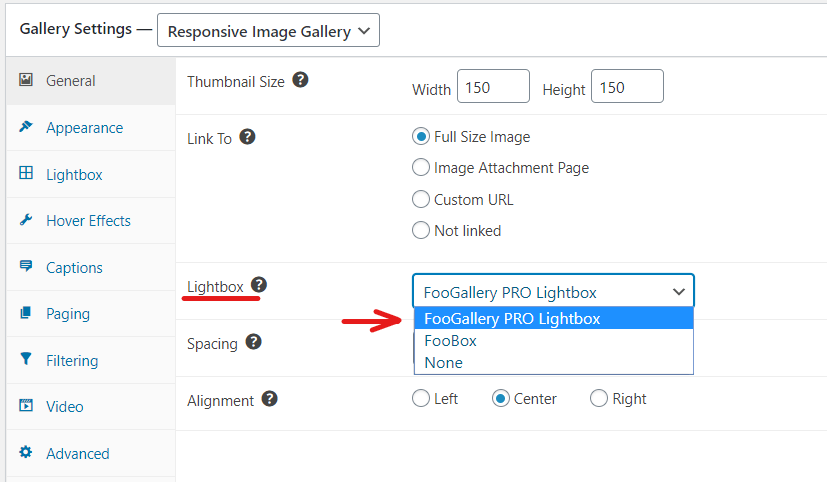
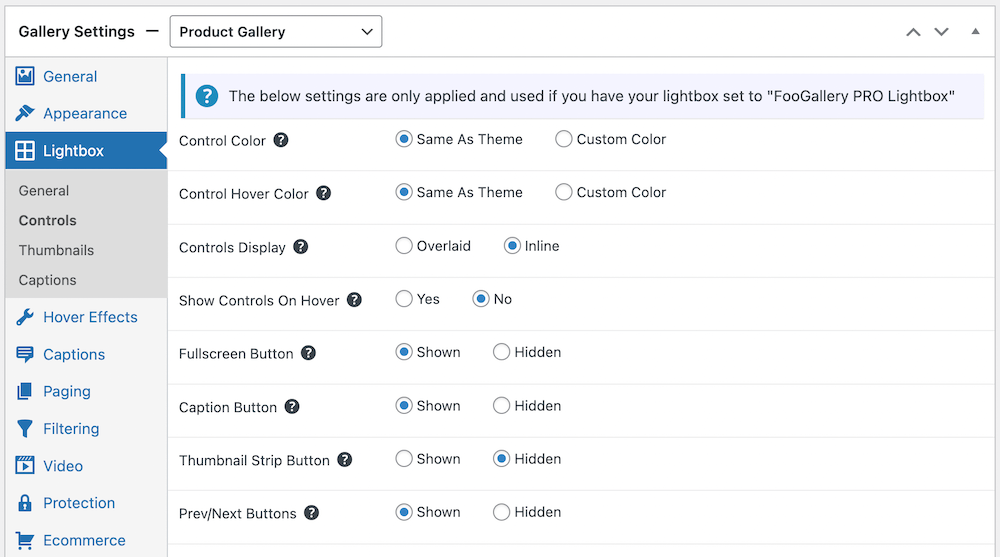
You can also customize the lightbox to match the theme and appearance of your gallery, creating a cohesive style for your online store.
5. Show Product Variations in Your Gallery
With WooCommerce, you can add product variations. This means that if you have the same shirt in four different colors, for example, or you have an image download in five different sizes, you can add these different options to a single product.

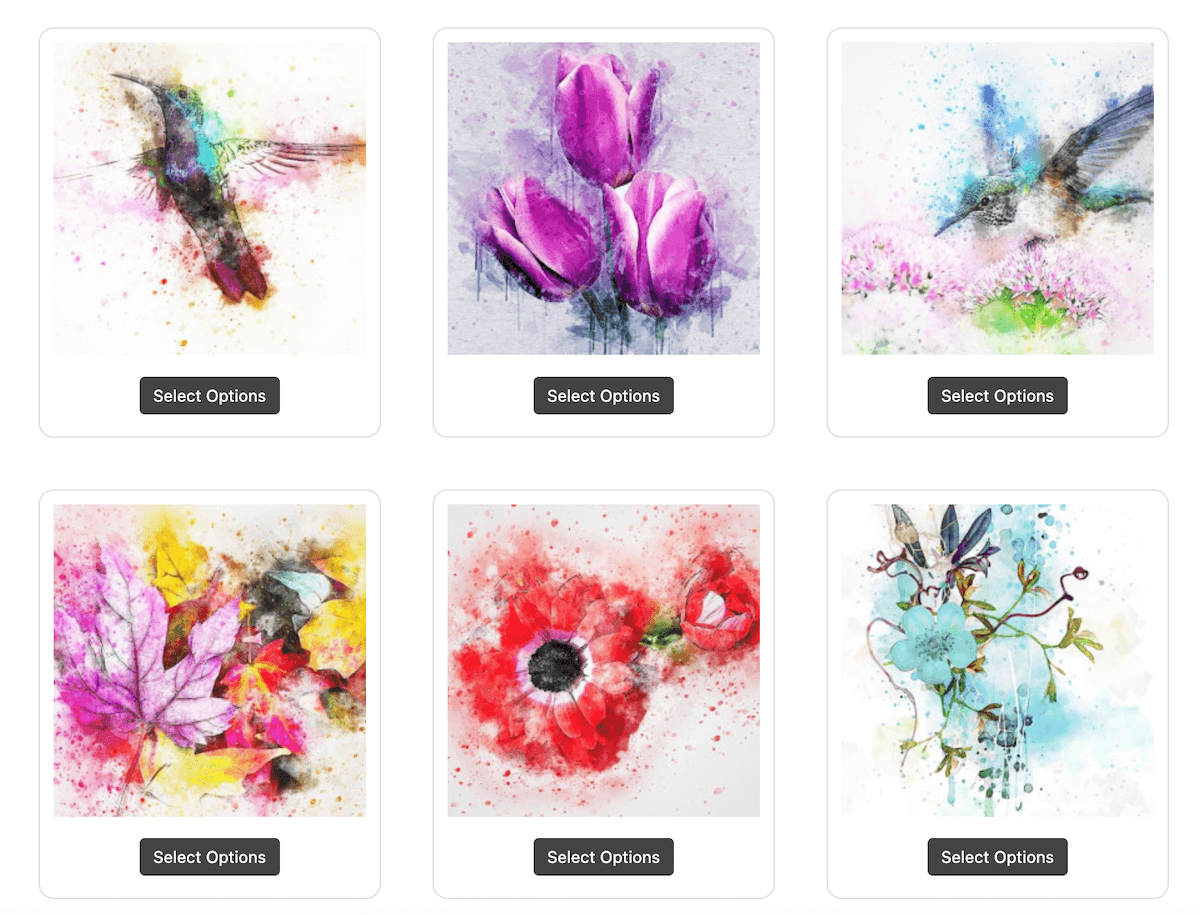
FooGallery PRO Commerce displays these variations in the lightbox. For any product with more than one option, the Add To Cart button will not display on the gallery thumbnail images – rather, customers will have to open the product in the lightbox, allowing them to choose the correct color, size, or other variation.
To do this, you can follow these steps:
- Set your product to be a variable product in WooCommerce, and then add the variations. You can add any variation for that product (for example, different sizes or colors) and then add prices for each.
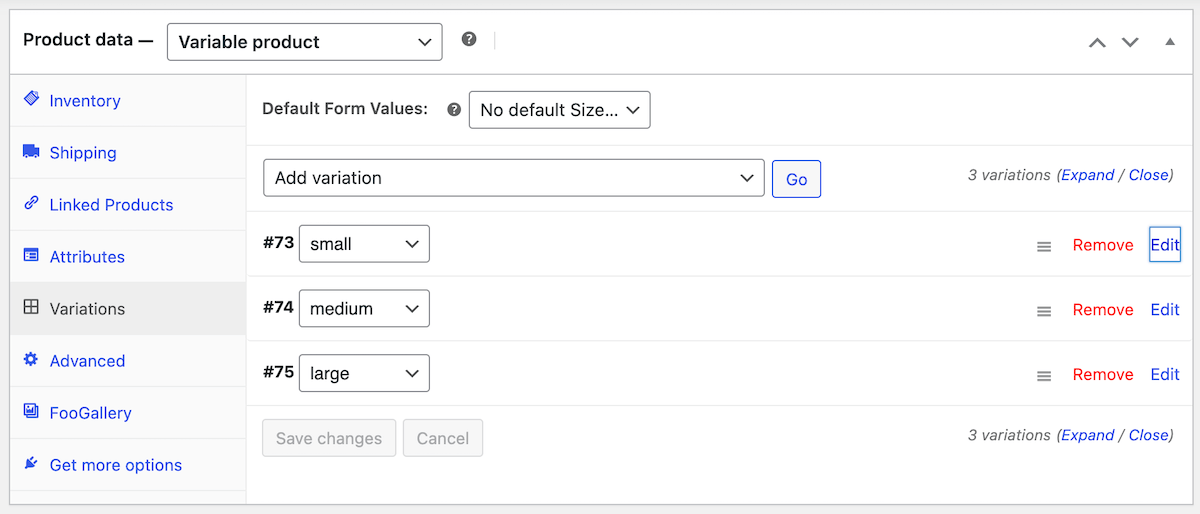
- Set up your product gallery using the WooCommerce datasource. Any products that have variations will display these in the gallery lightbox, where customers can select the size or color they want, and then add this directly to their cart.
This means that you don’t need to create separate products for each variation – which can save you a lot of time. But one of the main benefits ofto displaying variable products in your gallery is that customers don’t have to navigate away to a separate single product page to select the variation they want.
6. Set Up Single Product Galleries for Hero Products
A WooCommerce product gallery will typically display a selection of your products. But you may want to display several images of a single item in different colors. In this scenario, you could create a product gallery for each item and then combine your galleries into an album. In this way, you can group similar products while displaying multiple images of each product.
The obvious benefit here is that you can show different views or angles of your products, or even include a lifestyle photo. This will give your customers a deeper understanding and appreciation of your product, increasing the chance of them buying.
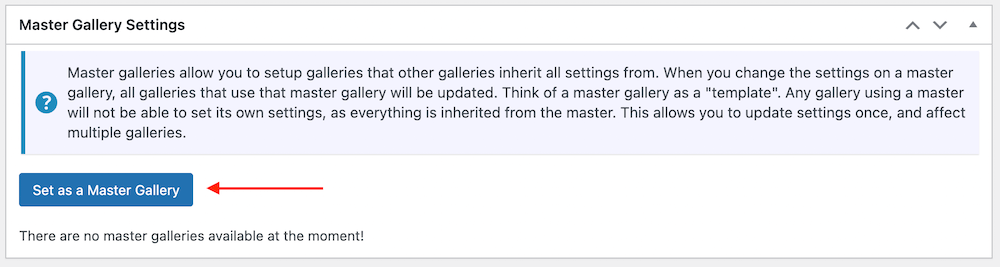
This may sound like a lot of work, but FooGallery PRO Commerce includes a handy feature to make this process much quicker: the master gallery.
Here’s how this works:
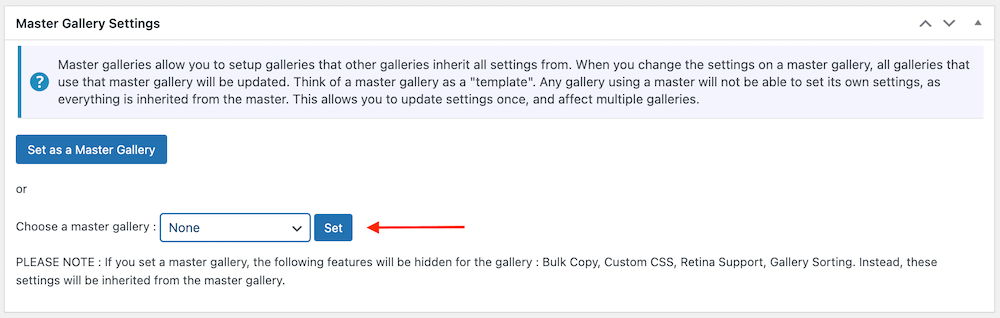
- Create a gallery, choosing the settings and style that you want to use for all or several of your other galleries. Now set this as your Master Gallery.
- Now when you create a new gallery, you can set it to use the Master Gallery as a template and it will inherit all of the same settings.
Then, once you have created all of your product galleries, you can simply group these into an album, giving you the ultimate WooCommerce product gallery.
7. Optimize Your Gallery’s Performance
The final step is to make sure your WooCommerce product gallery works as intended.
Responsiveness and Mobile User Experience
It is extremely important to have a mobile-responsive product gallery, considering the increasing number of people shopping on their mobile devices. For this, your gallery needs a responsive layout that automatically adjusts to different screen sizes for optimal viewing.
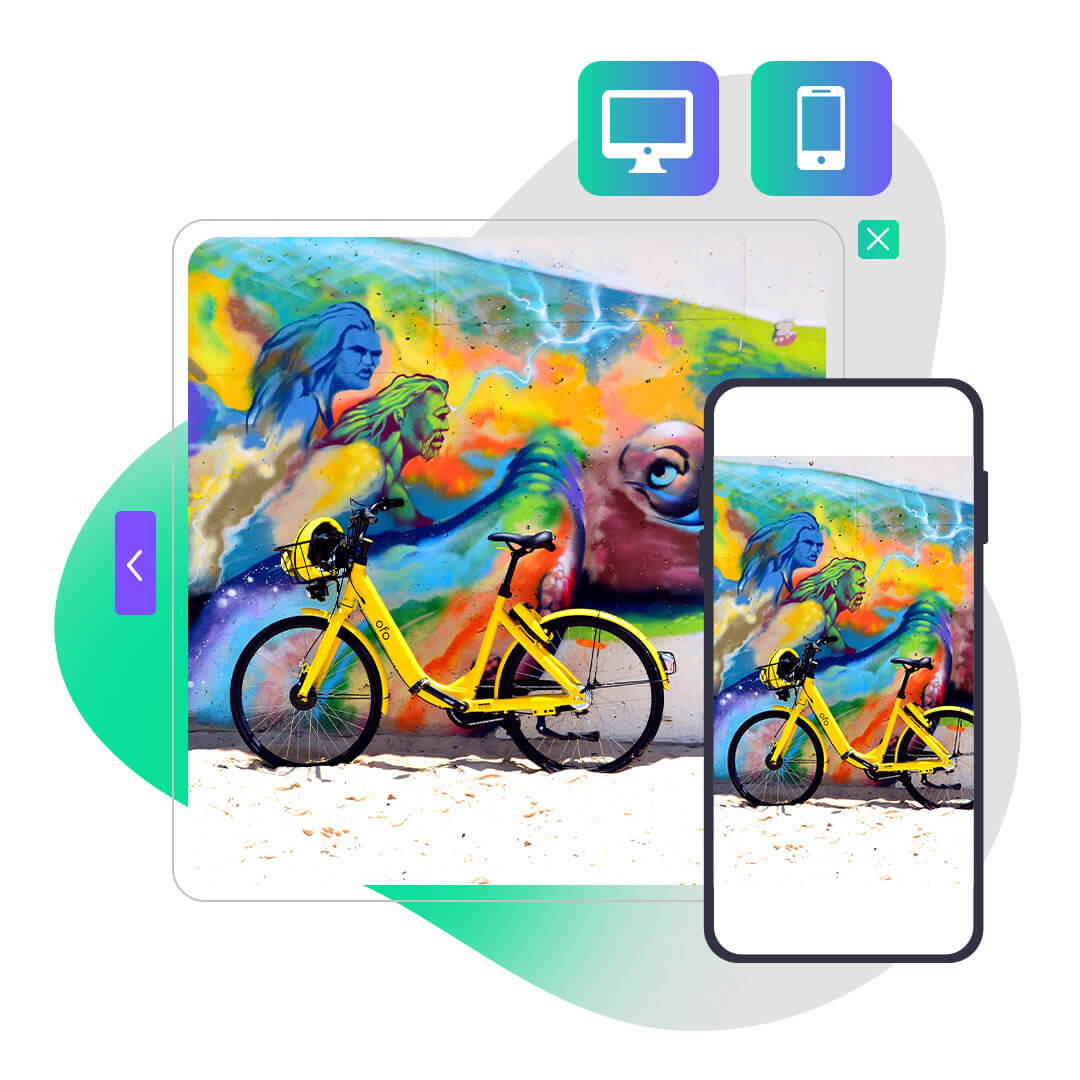
FooGallery utilizes a responsive gallery design for all of its gallery layouts, so the gallery (and the full-size image when opened in the lightbox) respond to the screen size from which it’s being viewed. This ensures that your product galleries are mobile-friendly.
Having a mobile-friendly, or responsive design, makes it easier for customers to view products and shop, regardless of the device they’re using. But it’s also beneficial for SEO – search engines prefer to rank websites that are mobile-friendly.
Testing Your WooCommerce Product Gallery with FooGallery
Finally, test your product gallery before launching, to ensure it works correctly and provides a good user experience. A quick, responsive gallery with good-quality images can help with user engagement, and the easier it is to purchase from your gallery, the higher the chance of conversion. Conversely, galleries that are sluggish, with too many steps in the buying process are more likely to deter potential customers.
Here are a few things to look for during testing:
- Loading speed: Use a tool like PageSpeed Insights to test the speed of your gallery page. It should load as quickly as possible, but longer than 3 seconds and you could start losing customers.
- Image quality: Images should be clear and of a good-enough quality to showcase your products. But at the same time, avoid very large images that are likely to slow down your site.
- Mobile responsiveness: As we discussed earlier, a responsive design is vital, so ensure the tools you are using are mobile-friendly.
And remember, FooGallery users who need help with implementation and testing can make use of our documentation (there’s loads of info and recommendations available for our free and Pro plugins). If you can’t find the answer you’re looking for, you can always contact us.
Maximizing Your WooCommerce Product Gallery Potential
There are clear benefits to using a product gallery in your ecommerce store. It’s an ideal way to showcase your products while streamlining how your customers shop and, ultimately, purchase your products.
For this, we recommend using FooGallery PRO Commerce for your WooCommerce product galleries. From its variety of templates and customization options to its advanced features like video integration and SEO-friendliness, FooGallery ticks all of the boxes. Plus, it comes with the all-important WooCommerce integration that makes setting up product galleries so much simpler.
Why not try FooGallery for yourself, and see the difference it can make in your online store?