You already know that the Add to Cart button is essential to the success of your WooCommerce store. While the default button works, customizing it can significantly boost your conversion rates and enhance your customers’ shopping experience.
There are several ways to customize your add to cart button: Plugins, coding, or shortcodes – the one you choose will depend on your technical skills and specific needs.
For beginners and those who prefer visual editors, plugins offer the easiest approach. Developers who need precise control will benefit from direct coding methods. Shortcodes provide a middle ground, giving you flexibility without requiring extensive technical knowledge.
Ready to make your store stand out? We’ve packed this guide with practical steps you can implement right away. So, if you want simple color changes or strategic button placement or advanced interaction patterns: follow along. We reveal the exact methods top-performing stores use to optimize their Add to Cart buttons for maximum impact and turn casual browsers into confident buyers.
Store owners and developers alike will find practical solutions to make their WooCommerce Add to Cart buttons stand out and drive more sales.
What are the Different Types of WooCommerce Add to Cart Buttons?
WooCommerce displays different Add to Cart buttons based on your product types, each with unique customization considerations.
Simple Products Buttons
These show a standard “Add to Cart” button that adds items directly to the cart. When customizing, you can:
- Change the text to “Add to Basket” for UK stores or “Get it Now” for urgency.
- Modify styling to match your brand – elegant buttons for fashion or bright designs for toys.
- Add quantity selectors so customers can buy multiple items without page refreshes.
- Include one-click purchase options for consumables.
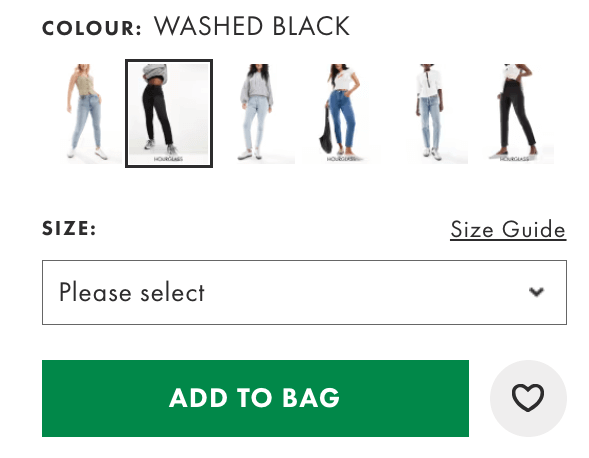
Variable Products Buttons
These display a “Select Options” button that directs customers to the product page. Consider:
- Showing size dropdowns directly on shop pages.
- Creating quick-view functionality to display color options in a popup.
- Highlighting popular variants like “bestselling configuration” on electronics.
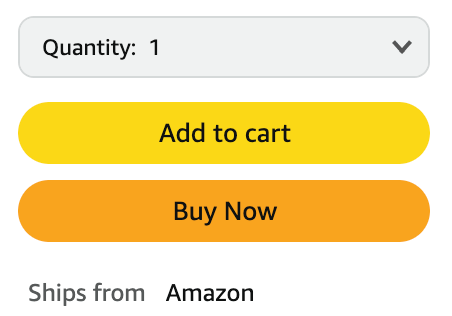
External/Affiliate Feature Buttons
These feature buttons that link to external sites. Focus on:
- Changing text to indicate an external navigation – “View on Amazon” instead of “Buy Now”.
- Styling these buttons differently – perhaps using outlines versus solid buttons.
- Adding external link icon symbols to signal a different shopping flow.

Group Products Buttons
These show a “View products” button. Consider:
- Modifying text to clarify multiple items are available – “Shop the Collection” for fashion bundles.
- Creating expanded views showing all grouped products.
- Implementing batch-add functionality for related product sets.


3 Ways to Customize Your WooCommerce Add to Cart Buttons
There are three main approaches to customizing your WooCommerce Add to Cart buttons. Choosing the best option will depend on your technical skills and your business specific needs:
| Method | Technical Skill | Best For | Key Benefit |
| Plugins | Low | Store owners with limited coding experience | User-friendly interfaces with no coding required |
| Code | High | Developers who need precise control | Complete flexibility for advanced customizations |
| Shortcodes | Medium | Users who need specific placements | Easy way to add buttons throughout your site |
For most store owners, plugins offer the simplest solution with powerful customization options. Coding provides maximum control but requires technical knowledge. Shortcodes strike a balance, letting you place and customize buttons without extensive coding.
Let’s explore each method in detail to help you choose the right approach for your store.
1. How to Customize the Add to Cart Button With FooGallery PRO Commerce
FooGallery PRO Commerce transforms how you display and sell products by letting you create beautiful product galleries with customized Add to Cart buttons. This plugin combines stunning visuals with smooth WooCommerce integration, making it easy to turn product browsing into purchases.
Adding and Customizing the Add to Cart Button
Setting up customized Add to Cart buttons with FooGallery PRO Commerce takes just a few minutes:
- Install and activate FooGallery PRO Commerce on your WordPress site and create a new product gallery with your WooCommerce products. If you haven’t done this yet, check the FooGallery PRO Commerce setup documentation.
- Navigate to the Edit Gallery page once your products are loaded.
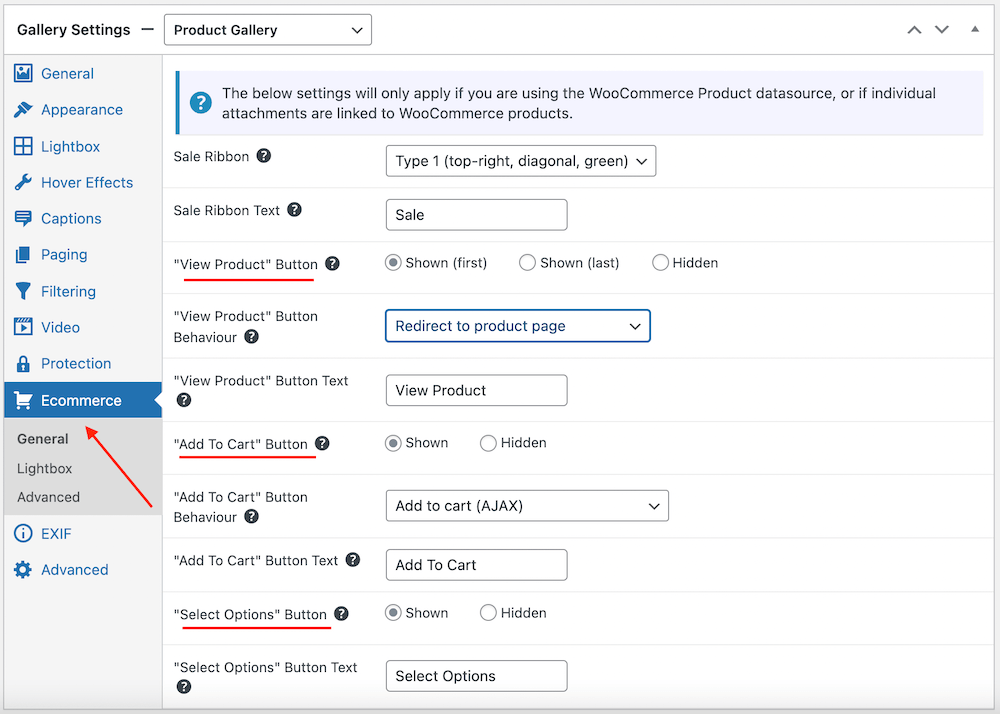
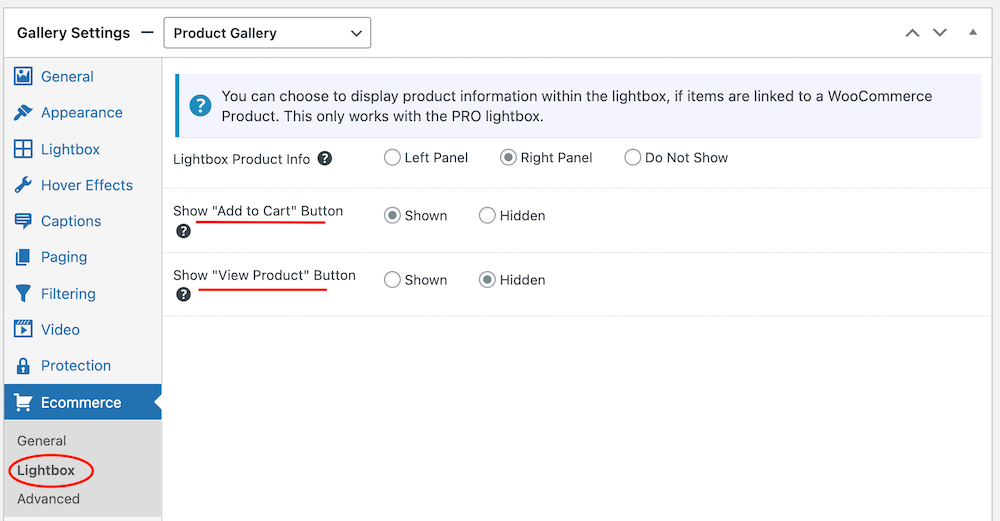
- Click on the Ecommerce tab in the settings panel to access button options.
The plugin gives you complete control over your Add to Cart buttons:
Button Placement:
- Display Add to Cart buttons directly beneath product images in your gallery.
- Show buttons in the lightbox view for a focused shopping experience.
- Place buttons in strategic positions where they catch the shopper’s eye.
- Adjust button priority and positioning relative to other buttons.
Button Styling Options:
- Display buttons directly on thumbnails and in the lightbox view for multiple purchase opportunities.
- Enhance product visibility with eye-catching sale ribbons (New, Limited Stock, On Sale, etc.).
- Create a cohesive visual experience that guides customers to purchase.
Button Behavior Customization:
The “Add to Cart” Button Behavior dropdown lets you choose what happens when customers click:
- Add to cart (AJAX) – adds products without page refresh.
- Add to cart and refresh page – updates the page after adding.
- Add to cart and redirect to cart – takes customers directly to the cart page.
- Add to cart and redirect to checkout – moves customers straight to checkout.
Button Text Customization:
Customize button text to match your call-to-action strategy:
- Change “Add to Cart” to “Buy Now” when redirecting to checkout.
- Use product-specific terminology like “Book Course” or “Download Now”.
- Create urgency with phrases like “Get it Today” or “Limited Stock”.
Multiple Button Options:
FooGallery PRO Commerce supports three types of buttons that you can show or hide. You can choose to Enable or Disable all three in your gallery’s lightbox view.
- Add to Cart button – The primary purchase action button.
- View Product button – Configurable to:
- Redirect to the single product page.
- Show a larger image in the lightbox.
- Redirect to a custom URL.
- Select Options button – For variable products with different sizes, colors, or other variations.
Product Gallery Integration:
Create immersive shopping experiences that boost conversion rates.
- Display products in beautiful, responsive gallery layouts.
- Add eye-catching sales ribbons to draw attention to special offers.
- Combine product images, information, and purchase options in one interface.
- Create immersive shopping experiences that boost conversion rates.
Here’s an example of a product gallery with Add to Cart buttons and ribbons:


2. How to Customize the Add to Cart Button Using Code
For developers and technically inclined store owners, customizing WooCommerce Add to Cart buttons with code offers complete control over appearance and functionality. This approach lets you implement precise modifications to match your store’s unique requirements.
Before you start customizing your Add to Cart buttons, make sure you create a child theme to avoid losing your button customizations when you update your theme in the future.
Then, follow these steps to make basic customizations:
Customize the Button Text
To change the default “Add to Cart” text to something more engaging, like “Add to Bag” or “Add to Basket”. Add the following code to your theme’s functions.php file:
// Change "Add to cart" text on shop/archive pages
add_filter( 'woocommerce_product_add_to_cart_text', 'change_add_to_cart_text_archive' );
function change_add_to_cart_text_archive() {
	return 'Add item';
}

// Change "Add to cart" text on single product pages
add_filter( 'woocommerce_product_single_add_to_cart_text', 'change_add_to_cart_text_single' );
function change_add_to_cart_text_single() {
	return 'Add item';
}
Code language: JavaScript (javascript)
Customize Button Class for Styling
To apply custom styles to the Add to Cart button, navigate to Appearance > Customize > Additional CSS from your WordPress dashboard and insert the following CSS snippet:
/* Change background color of "Add to Cart" button */

.woocommerce #respond input#submit,

.woocommerce a.button,

.woocommerce button.button,

.woocommerce input.button {

    background-color: #FF5733; /* Replace with your desired color */

    border-color: #FF5733; /* Replace with your desired color */

}

/* Change text color of "Add to Cart" button */

.woocommerce #respond input#submit:hover,

.woocommerce a.button:hover,

.woocommerce button.button:hover,

.woocommerce input.button:hover {

    background-color: #C70039; /* Replace with your desired hover color */

    border-color: #C70039; /* Replace with your desired hover color */

}Code language: CSS (css)
Add Custom Class to Button
Add the following snippet to your child theme’s functions.php file:
function custom_add_to_cart_class( $args, $product ) {

    // Append 'my-custom-class' to the existing classes

    $args['class'] .= ' my-custom-class';

    return $args;

}

add_filter( 'woocommerce_loop_add_to_cart_args', 'custom_add_to_cart_class', 10, 2 );Code language: PHP (php)
Then, from your WordPress Dashboard, go to Appearance> Customize > Additional CSS and add your custom CSS. Here’s an example:
.my-custom-class {

    /* Add your styles here */

    background-color: #f00; /* Example: change background color to red */

    color: #fff; /* Example: change text color to white */

    padding: 10px 20px; /* Example: add some padding */

    border-radius: 5px; /* Example: add rounded corners */

}Code language: CSS (css)
Add Custom JavaScript to Button
You can add custom JavaScript to enhance the button’s functionality. For example, to display a custom message when the button is clicked, add this code to your theme’s functions.php file:
function custom_add_to_cart_script() {

    if (is_product()) {

        ?>

        <script type="text/javascript">

            jQuery(document).ready(function($) {

                $('.single_add_to_cart_button').click(function() {

                    alert('Product added to cart!');

                });

            });

        </script>

        <?php

    }

}

add_action('wp_footer', 'custom_add_to_cart_script');Code language: JavaScript (javascript)
Want to implement AJAX-powered Add to Cart functionality for a smoother shopping experience? Check out our detailed guide on how to set up AJAX Add to Cart in WooCommerce for step-by-step instructions.
Redirect After Adding to Cart
You can redirect customers to a different page after they add a product to the cart. Add the following code to your functions.php file to redirect to the cart page:
// Redirect to cart after adding a product
add_filter( 'woocommerce_add_to_cart_redirect', 'redirect_to_cart_after_add' );
function redirect_to_cart_after_add( $url ) {
	return wc_get_cart_url();
}
Code language: PHP (php)
Or, to redirect to the checkout page:
add_filter( 'woocommerce_add_to_cart_redirect', 'redirect_to_checkout_after_add' );
function redirect_to_checkout_after_add( $url ) {
	return wc_get_checkout_url();
}Code language: PHP (php)
Add a Custom Button After Product Summary
To add a custom “Add to Cart” button after the product summary on single product pages, use the following code:
add_action('woocommerce_single_product_summary', 'my_extra_button_on_product_page', 30);

function my_extra_button_on_product_page() {

  global $product;

  echo '<a href="' . esc_url($product->add_to_cart_url()) . '" class="button">Add to cart</a>';

}Code language: PHP (php)
This code snippet adds a custom “Add to Cart” button after the product summary section on single product pages. It dynamically generates the URL for adding the current product to the cart and applies WooCommerce’s default button styling.
Always ensure you back up your site before making any changes to the code. Remember to test your changes thoroughly after implementation, especially across different devices and browsers.
3. How to Use WooCommerce Shortcodes to Customize WooCommerce Add to Cart Buttons
WooCommerce shortcodes offer a middle ground between plugins and custom code. They let you place Add to Cart buttons anywhere on your site with minimal technical knowledge. Perfect for adding purchase options to blog posts, landing pages, or custom layouts.WooCommerce provides several shortcodes that allow you to add Add to Cart buttons anywhere on your site. Here’s how you can use them:
Display an Add to Cart Button for a Specific Product
To display an Add to Cart button for a specific product, use the [add_to_cart] shortcode with the product ID. Add this shortcode to any page, post, or widget:
[add_to_cart id=”99″]
Replace ‘99’ with the actual ID of the product. This creates a standard Add to Cart button that functions just like the one on your product page.
Display Add to Cart Buttons for Multiple Products
You can display Add to Cart buttons for multiple products by listing their IDs:
[products ids=”99,100,101″]
Replace ‘99,100,101’ with the actual IDs of the products you want to display.
Customize the Add to Cart Button Text Using Shortcodes
To change the text of the Add to Cart button using shortcodes, you can use the add_to_cart_text attribute:
[add_to_cart id=”99″ add_to_cart_text=”Buy Now”]
This changes the text only for this specific button instance, without affecting other buttons on your site.
Add a Custom Class to the Button
To style the button using a custom class, you need to add a wrapper div or span around the shortcode and then style it using CSS:
<div class="custom-add-to-cart">

    [add_to_cart id="99"]

</div>Code language: JavaScript (javascript)
And then, in the Additional CSS section from your theme’s customizer:
.custom-add-to-cart .button {

    background-color: #ff6600;

    color: #ffffff;

    border-radius: 5px;

    padding: 10px 20px;

}Code language: CSS (css)
Shortcodes provide a flexible way to add purchase functionality throughout your site without extensive technical knowledge, making them ideal for marketing campaigns and content-driven sales strategies.
Ultimately, we recommend using a plugin like Foo Gallery PRO Commerce for most users, as this route offers a balance of ease of use, powerful customization options, and reduced risk of errors.
Best Practices and Troubleshooting
Implementing custom Add to Cart buttons effectively requires attention to design, mobile optimization, and technical details. Follow these guidelines to avoid common pitfalls and create buttons that drive conversions.
Add to Cart Button Design Guidelines:
- Maintain visual hierarchy: Make your Add to Cart button the most prominent call-to-action on the page. Use contrasting colors that stand out against your site’s background.
- Size appropriately: Buttons should be large enough to tap easily on mobile devices (at least 44×44 pixels) but not so large that they overwhelm other content.
- Use clear, action-oriented text: Phrases like “Add to Cart,” “Buy Now,” or “Get Yours” clearly communicate the button’s purpose.
- Add visual feedback: Include hover effects and click states so users know the button is interactive.
- Maintain brand consistency: While your Add to Cart button should stand out, it should still match your overall brand aesthetic.
Specific Mobile Optimization for your Add to Cart Button:
- Test on multiple devices: Ensure your buttons display correctly on various screen sizes and orientations.
- Implement touch-friendly spacing: Leave adequate space around buttons to prevent accidental taps on nearby elements.
- Optimize button placement: Position buttons where they’re easily reachable with thumbs when holding mobile devices.
- Check loading times: Large JavaScript files or complex CSS can slow down mobile experiences.
Add to Cart Button Creation: Common Issues and Solutions:
- Buttons not working after customization: Check for JavaScript errors in your browser console. Ensure your code doesn’t conflict with theme or plugin scripts.
- Styling inconsistencies: Use browser inspector tools to identify which CSS rules are overriding your customizations.
- AJAX issues: If AJAX Add to Cart isn’t working, verify that your theme supports WooCommerce AJAX actions.
- Redirect problems: Test redirects thoroughly, especially with variable products or products with required fields.
Add to Cart Button: Performance Tips
- Minimize CSS and JavaScript: Excessive code can slow down your site. Only include what’s necessary.
- Use image sprites for button icons: This reduces HTTP requests for better performance.
- Leverage browser caching: Set appropriate cache headers for static resources.
Monitor cart fragmentation: Heavy use of WooCommerce cart fragments can impact performance. Consider optimizing or disabling them if not needed.
Create Custom Add to Cart Buttons With FooGallery PRO Commerce
Let’s recap: Customizing your WooCommerce Add to Cart button can significantly boost your sales and enhance the user experience. While coding and shortcodes offer customization options, FooGallery PRO Commerce provides an easy-to-use, powerful solution.
With FooGallery PRO Commerce, you can:
- Set up multiple button types (Add to Cart, View Product, Select Options) with different functions.
- Easily create dynamic product galleries that showcase your items in their best light..
- Add customized Add to Cart buttons directly beneath product images.
- Control button behavior, from AJAX cart additions to direct checkout redirects.
- Include eye-catching sales ribbons to highlight special offers.
- Display product information alongside purchase options in an intuitive interface.
- Set up multiple button types (Add to Cart, View Product, Select Options) with different functions.
This powerful combination of visual appeal and shopping functionality helps convert browsers into buyers. Rather than piecing together custom code or managing multiple plugins, FooGallery PRO Commerce provides an all-in-one solution that enhances both the appearance and functionality of your WooCommerce store.
Why settle for ordinary when you can transform your WooCommerce store into something extraordinary? Elevate your store’s appeal, captivate your customers, and drive more sales with FooGallery PRO Commerce. Get started with FooGallery PRO Commerce today!
FAQs
To change the Add to Cart button text, add a filter to woocommerce_product_add_to_cart_text and woocommerce_product_single_add_to_cart_text in your theme’s functions.php.
To change the Add to Cart button in HTML:
- Step 1: Create a child theme or use an existing theme
- Step 2: Override the WooCommerce template file add-to-cart.php in your theme’s folder
- Step 3: Edit the HTML structure within this file to suit your needs
To change the Add to Cart button color:
- Go to Appearance > Customize > Additional CSS
- Add custom CSS:
/* Shop page */
.woocommerce .products .button {
	background: #0073aa;
	color: #fff;
}

/* Single product page */
.woocommerce .single_add_to_cart_button {
	background: #0073aa;
	color: #fff;
}Code language: CSS (css)To add a quantity selector on shop pages:
- Use a product display plugin like FooGallery PRO Commerce.
- Or override the loop/add-to-cart.php template in your theme to include the quantity field.
To redirect customers after clicking Add to Cart: use the woocommerce_add_to_cart_redirect filter in your functions.php file to set a custom URL, like the cart or checkout page, for redirection after adding an item to the cart.
Redirecting to checkout can boost sales by reducing the steps to purchase. Want to improve your checkout even further? Read our guide on advanced UX tips to optimize your checkout process.