
The Ultimate Guide to Creating Your Own Online Portfolio
As a photographer, artist or designer, you want your work to get noticed. One way to showcase your skills is to create an online portfolio. Sounds simple enough, but where do you start? And what should you do next?
Whether you are a trying to sell your work or your services, you need people to see your portfolio. Without this, you’re finished before you even get started. You could pay someone to do this for you. But this means parting with a significant portion of your profit. The other (often better) solution is to do it yourself.
Relax; with WordPress it’s really not that hard. And we’re going to walk you through each step of the process. We’ve outlined the basic steps below. We then go into a lot more detail for each step, and give you some of our recommendations along the way.
Table of Contents
Why Do You Need An Online Portfolio?
It’s no longer possible to rely on word-of-mouth or traditional advertising to bring in new clients. Most people will do an online search if they want to find anything, including a photographer or designer. This means you need to be online for new customers to find you. You also need to have an amazing portfolio to convince new customers to buy what you’re selling.
In other words, your online portfolio needs to showcase your images. But more than that, it needs to be easy for people to find what they’re looking for.
If your specialty is wildlife photography, you’d probably want to separate your images according to type of wildlife: predators; birds; insects; and so on. If you’re selling bespoke design work, you’ll want a portfolio to show the type of design in which you specialize. You may want to allow customers to easily book and pay for appointments. Or maybe you want to make it simple to select and buy prints, all online.
All of this is possible with WordPress and the right plugins. We’ll touch on plugins a bit later. But first…
Why WordPress?
WordPress makes it simple for anyone to build and manage their own site. You don’t need to have any technical expertise or know anything about web design.

With WordPress, you can start your own site easily. It’s then just a matter of adding content and choosing the theme and design elements you want to use. You can then install the plugins that give you the functionality you need. For the most part, all of these elements will be customizable and easy to configure to suit your needs.
You can also manage your own site. You decide what content to include, how to structure your pages, what posts to add, and when to make it happen. The best thing about this, is that you don’t have to pay someone else to do it for you.
Is it really that simple? Yes, it is. All you need to get started, is this guide to help you through each of the steps.
5 Easy Steps to Make An Online Portfolio
We’re going to take you through each of these steps in a lot more detail later on. Plus, we’ll be giving you some tips and recommending plugins and tools to help you on your way. But let’s first have a quick look at the basics of what you’ll be doing.
Step 1: Setting up your site
The first thing you’ll need to do is set up your site. You can go for a WordPress.com site, which is free. But these come with certain limitations, such as the fact that you can’t add plugins to these sites. The solution then is to use WordPress on a hosted site.
There are various hosting providers, all offering various packages, just like Cloudways pricing. You’ll obviously need to choose the best one for you, in terms of pricing, space, support and so on. This is a fairly big consideration for a portfolio website, as your main focus is on images – hopefully lots of them. This can have a negative impact on your site (in terms of speed and space), and will therefore play a role in your decision-making when it comes to choosing a host.
Step 2: Installing the right plugins
Next, you’ll install the plugins you need. Start with the basics; then add new plugins as and when you need them. It’s important to remember that adding too many plugins can slow down your site, so only include the essentials.
For an online portfolio, you’ll definitely need image optimization, a gallery and caching. Then you’ll probably want plugins for security, analytics and SEO. You might also want to look at options for eCommerce, scheduling, and so on, but these will largely depend on your individual needs.
Step 3: Finding the right theme
With your plugins in place you can start creating content – galleries and pages that outline your work.
Once you’ve worked on your content, you’ll start to get an idea about how you want your site to look. As tempting as it is to start your site by looking for a theme, we recommend holding off on that until after you’ve created your content. You’ll have a better idea of what you’re looking for, which means you can avoid having to change themes halfway through, this can be a big time waster.
Step 4: Creating an efficient workflow
Part of building a portfolio website is creating an efficient workflow for you and your clients. You might want to make it easier for clients to book your time. You may want to add marketing mechanisms. Or perhaps you want to automate invoicing. Whatever your needs, you’ll need to find the right tools to help you create a workflow that works for you.
Step 5: Selling online
There is a good chance that you’re creating on online portfolio to make money. You can add to the efficiency of your website by adding a payment gateway or by integrating with an eCommerce platform. This will allow you to sell your work directly from your website.
So Let’s Get Started
These are the basic steps you’ll need to follow to start your own online portfolio. It sounds simple, and it is … when you know what to do. So we’re going to walk you through each step in a bit more detail, making recommendations as we go.
The focus of this ultimate guide is on creating your own website using WordPress, and giving you the tools to manage it for yourself. We’ll look at using the right tools, to save yourself time and money, so that you can focus on what you love: your work.
Let’s get started…
Step 1: Starting your Online Portfolio
The first thing you will need when starting a portfolio website, is hosting. Let’s take a quick look at what hosting is, why you need it, and which option is best for you. Then we can talk about how to get started with a host provider, using WordPress.
What is Hosting?
If you’re new to this idea of running your own site, you might be asking what exactly do we mean by hosting? To explain it super-simply, a host is a company that keeps your site on its server/s. In other words, you don’t have to provide the actual computer storage space required for a website. Your host does this for you.
When you start looking for a host, you’ll see that there are various types of hosting. Themeisle has a great comparison of the different hosting options, but in a nutshell, there are four main types: Shared, Virtual Private Servers (or VPS), Cloud Hosting and Dedicated Servers.
Shared hosting is where most people start as it’s generally the cheapest and easiest. However, it does mean that you’re sharing your server (where your website is hosted) with other websites. A good option is to start with Shared Hosting and then upgrade as the need arises.
When you upgrade you can consider your other options: a VPS can be managed or unmanaged, and gives you more resources and space. Cloud Hosting is similar to a VPS, but the virtual space on which your site is hosted is spread over multiple servers. This makes this option more expensive, but more stable. Finally, a dedicated server is your most expensive option, as you get a server to yourself.
Each hosting provider will also offer different packages. These will usually tell you how much space you’ll be allowed, how many users you can have, the number of visitors you can have in a month, and so on. Most providers will explain that if you go above these limits, you’ll need to pay extra. (So it’s important to read the fine print.)
What Should You look for in a WordPress Host?
Important considerations for anyone choosing a host include things like uptime and support. If your host can’t maintain their servers, and they keep going down, your website will go down as well. Support is also critical, especially if you’re new to running your own website. You want to be able to call, email or chat to someone, and get a speedy response.
Something else to consider is where your images are stored. Kinsta, for example, serves images to users through a CDN (Content Delivery Network). This sends users a cached version of the image, stored on the hosts servers, rather than on your website. This makes your site faster as well, which means your users don’t get too frustrated with slow page load times.
Essentially, you need to find a host that caters to your needs. As a portfolio is likely to be quite visual, you’ll want to find a package that is generous with their server space. If you’re an agency (as opposed to a freelancer) you may need even more space as you’ll need to cater for more visitors.
These are just some of the things you need to think about before deciding on your host. So it’s useful to research your options before you sign up. As you’ll soon find out, these considerations can impact on the cost.
How Much Does Hosting Cost?
This will depend on the package you take and the features included. Cheap packages may look appealing, but they don’t always live up to expectations.
Something else to watch out for (as with any plugins or services that you use) is the initial cost compared to the cost after the first year. Many hosting providers offer spectacular sign up prices, but once the year is up you’re charged considerably more. In our experience, most hosts do this, and most cost about the same, but it’s good to know what you’re in for. You can of course, change hosting companies but this isn’t always worth the effort.
Another thing to remember is that it’s often cheapest to pay for a whole year at once. Some hosting services do offer monthly payments, but at such a high rate that it just isn’t worth it. So it’s a good idea to have access to the annual amount before signing up.
Our Recommendations
We recommend (and use) Kinsta. They’re efficient, have great support and our uptime is really good. We may not be photographers, but we have a lot of images on our site. Kinsta has helped us keep our uptime up and our page speed down.
Other hosts that have a good reputation include:
You can opt for a cheaper host provider, but in our experience, they don’t often offer the same benefits and in the long run, it just isn’t worth it. Going for a cheaper option usually means that you have to do a lot of the grunt work yourself – like registering a domain (see the next section) or setting up your site’s security yourself. Rather pay a bit more and save yourself the time and frustration.
If you’re still trying to decide which host to use, it’s often useful to take a look at the reviews. A great place to look is WhoIsHostingThis. Here you can find user reviews of the different hosts and see how they stack up against one another. WebsiteSetup has also put together a comprehensive guide on some popular hosts that’s worth a read.
Now You Need a Domain Name
Once you’ve decided on a host, you can sign up. At this stage, you’ll need to register your Domain Name. If you already own your domain, then you can use it now, or transfer it, as the case may be. Alternatively, you can register your domain once you’ve signed up for hosting. For this, you can perform a domain name search.
Tip
Quick Tip
Quick Tip
This is also something worth looking at when choosing a host, as some packages will include a free domain registration and/or a free domain transfer.
As there are so many websites out there, it isn’t always possible to find the name you want. This may be easier if you’re using your name, as the photographer or designer, for the website. But it’s handy to have a few ideas as back up, just in case. You can also try your luck with a domain name generator.
You’ll now also have to decide if you want a .com, .net, or some other website suffix. If you’re local, it can be cheaper and easier to go with your geographical option, with something like co.uk. If you’re dealing with international clients though, you may want to try for a .com or .net domain.
Once you have selected and registered your domain name, you’re almost ready to start creating your own photography portfolio. First, you need to install WordPress.
How Do You Install WordPress?
This is actually one of the easiest steps in the whole process. Because you’re using a host provider, you’ll have what is called a CPanel. This is basically a dashboard from which you can set up your site, add files, and so on.
Don’t confuse this with the WordPress dashboard – which you access from your site. Your CPanel is your way of logging into the controls provided by your hosting company. Once you have signed up for hosting, you’ll be given access to this, and from here you can set up your site.
All you need to do is find the section or page that asks which CMS (Content Management System) you want to install. You may have some other options like Joomla or Drupal available. Avoid those and hit Install WordPress.
You’ll be taken through this (very quick) process step-by-step. Then you’re done. You’ll now be able to log into your site and get started on the creative process.
Step 2: Installing WordPress Plugins
One of the reasons WordPress is so user-friendly is because you can select and add plugins to your site. These plugins do certain jobs for you, or add specific elements to your site. Best of all, they do this without you having to write any code or develop them yourself.
WordPress itself will come with basic functionality – you can write posts or add images without the need for plugins. WordPress, or your website host, may also recommend or provide a number of basic plugins.
For example, your package may include plugins like JetPack or Akismet. Both of these improve the basic performance of your site. You’ll be able to activate and use these or, if you find a different plugin you prefer, you can deactivate these.
As soon as you’ve installed WordPress, you’ll need to get a few essential plugins. These will take care of things like security, caching and so on. But then you’ll also want to add a few more specific plugins for your online portfolio.
We’re going to take a quick look at how to install WordPress plugins, before diving into which plugins you’ll need to install.
How To Install Plugins
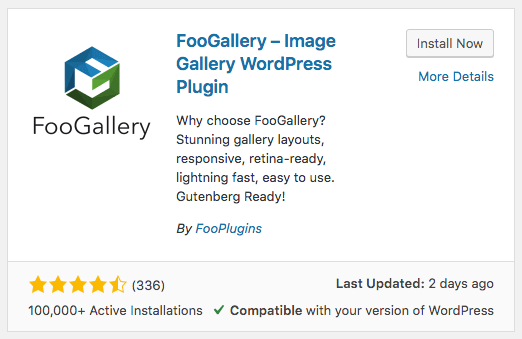
Installing a plugin is very simple, especially if you’re using a free plugin on WordPress. To do this, simply go to the Add New page under Plugins. You can then search WordPress for the free plugin you’re looking for. A range of options will appear, each looking something like this:
Once you find your plugin, click on Install and then Activate. Your plugin will then be installed. You may have to click on the settings link on the plugin page or you may be navigated away to the setup page for you plugin.
For a premium (or paid) plugin, you will need to find the one you want online and purchase it. You’ll then be sent a .zip file. On the Add New plugin page, you’ll be able to upload this file to install and activate.
We’ve outlined the steps you would need to follow for installing both free and paid plugins, for FooGallery. The process would be much the same for other plugins.
Tips For Choosing Plugins
WordPress is a popular platform and, because of this, there are a lot of plugins available to you. In fact there are thousands of free and paid-for plugins out there, which can make it difficult to choose the best one.
Here are some pointers for selecting the best plugin for the job:
- Check when the plugin was last updated, and with which version of WordPress it is compatible. You want one that has been updated recently (at least in the last few months) and that has been tested with the latest version of WordPress.
- Take note of the reviews. Read the good and the bad ones, and see if the developer has tried to resolve any issues.
- You should also take a look at the support forum for the plugin on WordPress.org – free plugins don’t always include support, so it’s a good sign if the developer takes the time to respond to support queries there. If you’re going for a paid plugin, take note of the support offered.
- For plugins with free and premium versions, it’s good to acquaint yourself with the available features. Sometimes you’ll want to pay for the advanced features, but there’s no need to do so if you can find a good plugin that gives you the features you need for free.
Must-Have WordPress Plugins
Now that you know how to install your plugins, the next step is to choose the right ones. Here are the ones we recommend getting right away.
Coming Soon
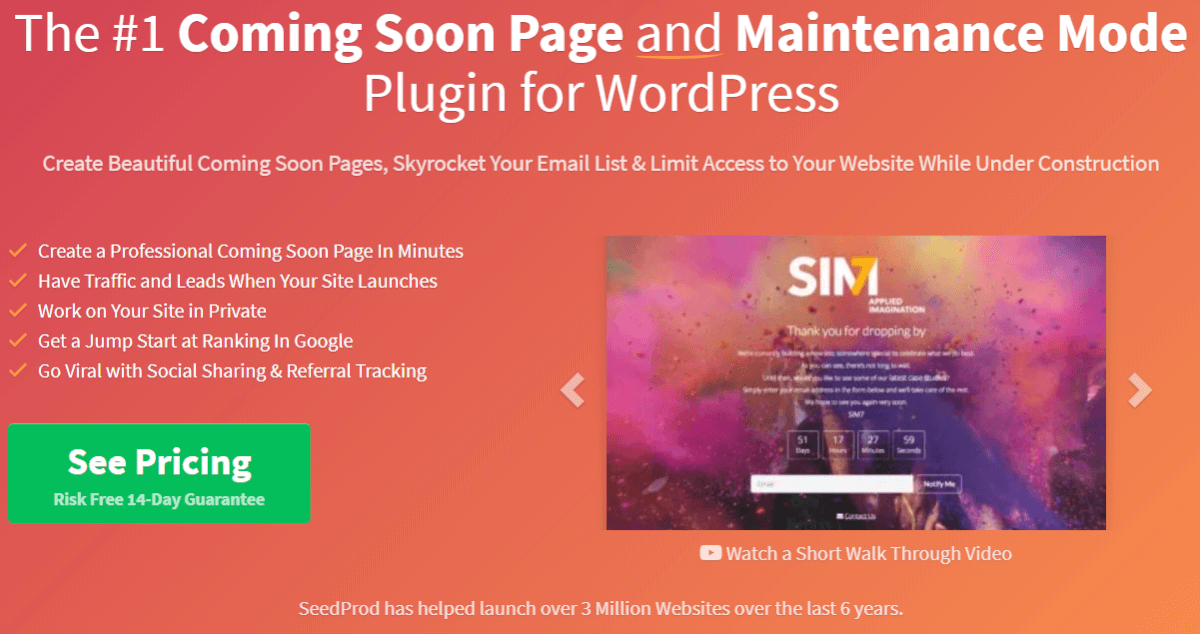
When you start your site, you will want to work on the content before you go live. You can do this by using a production or staging site, but it’s probably easier to use a Coming Soon plugin. This will allow you to create a landing page for your website, from which you can announce your launch or collect email addresses of potential clients.
While the landing page is active, you can work on the content and appearance of your site. Visitors to your site will only be able to see the landing page – nothing else. Then, once your site is ready to go live, you can remove the Coming Soon page so that visitors can see your actual portfolio.
We recommend the Coming Soon and Maintenance Mode plugin from Seedprod. You can create a simple but effective landing page with the free version of the plugin. There is also a premium version which gives you more advanced settings.
Security
It is essential to add some security measures to your site. While WordPress will include some, a good plugin can add to this by protecting your site from malware and malicious traffic.
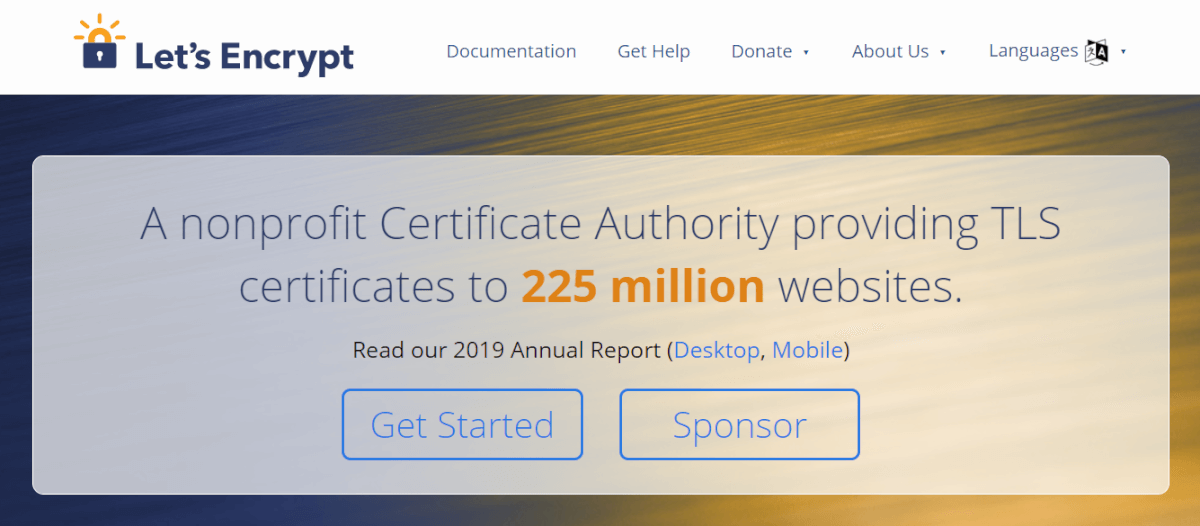
You’ll want an SSL certificate for your site – this adds a layer of privacy to your site, and tells your visitors it is secure. Most people won’t make purchases from an insecure site and, besides this, Google doesn’t like sites without this level of security. Many host providers will include this in their offering, or you can try something like Let’s Encrypt.
Akismet Anti-Spam is a good choice for preventing spam. Other worthwhile security plugins include Sucuri Security, WordFence and iThemes security. These are all available as free plugins, or you can choose the premium plugins for added security.
Caching
A good way to improve your site’s performance is by using a caching plugin. With this, the server saves a cached version of your pages and delivers this to your visitors. By doing this, it saves the download time and improves the page speed. This is particularly important for image-heavy sites.
Depending on the package you choose, some hosts will manage your caching for you. You can also read this article on Kinsta, which explains caching and why you need it, in a lot more detail.
Your other option is to use a caching plugin. We would recommend WP Rocket – it’s easy to use and quick to set up. But it is a premium plugin, so you will need to pay an annual amount for it. For a free plugin, W3 Total Cache is a widely-used and popular choice.
Image Optimization
Using images has it’s benefits, but it can have disadvantages as well. If you’re creating an online portfolio, then we can assume that you’ll be using a lot of images. You’ll want to ensure that your image quality is good, but this can result in large files which can impact your page speed.
One solution is to use an image optimization plugin. This will compress your images, making them smaller, often without a noticeable difference to the quality. There are various types of image optimization and your choice will ultimately depend on your needs. Themeisle takes a comprehensive look at some of the top options in this post.
We use, and recommend, Tiny PNG. But other good options include EWWW Image Optimizer, Smush, Optimole and ShortPixel.
Analytics & SEO
It’s always a good idea to keep track of how your site is performing. If your site is healthy, then you won’t have much to worry about, other than improving your performance even more. But if something goes wrong, then you want to know about it quickly so that you can fix any issues.
An analytics plugin can be used to sync with your Google Analytics account to give you feedback about the number of visitors, traffic sources, bounce rate and so on. For this, MonsterInsights is a popular choice, but many of the features are only included in the premium version. We also like GAinWP Google Analytics Integration for WordPress. This free plugin gives you a quick snapshot of your analytics account from your dashboard, so you can monitor traffic, bounce rate, unique visits and so on.
An SEO plugin can help you tailor your content to improve your SEO. This can help you create content that is more likely to rank in the SERPs. We use RankMath. This free plugin includes some great features, including a detailed overview of your page content with suggestions to help you improve each page. Another widely-used SEO plugin is Yoast, which also offers helpful suggestions.
Page speed is another important consideration. If you find that your page speed isn’t what you want it to be, consider spending some time working on that. Here’s some advice from HostingNinja on improving mobile page speed.
Gallery and Lightbox
Because you’re building a portfolio website, you’ll want a plugin that helps you showcase your images. A gallery and lightbox will help you build the portfolio galleries that will make up a large part of your content.
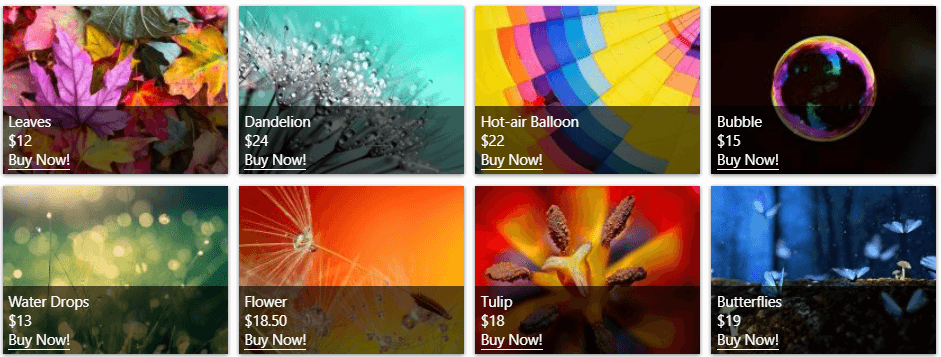
For this, FooGallery and FooBox are your best options. There are a number of other photo gallery plugins available, but FooGallery Free includes a wide range of features which will enable you to create unique galleries from the start. It works seamlessly with FooBox, which opens the fullsize images in a lightbox. FooBox Pro also has the added benefit of social sharing.
Here’s a quick example of FooGallery in action. To see how FooBox works just click on one of the images – it will open up in the lightbox.


If you’re looking for more advanced features, or you want a built-in lightbox, then FooGallery PRO is a good option. With the premium plugin, you can also add videos to your galleries or build dynamic galleries from sources like Instagram or Adobe Lightroom.
Media Library Management
With an online portfolio, you’re probably using hundreds of images. But this can make your media library bulky and difficult to work with. To overcome this, you can make use of a media library management plugin.
These can help you organize your media files, while giving you the ability to search for or locate specific images easily. We recommend Real Media Library; this plugin also works with FooGallery PRO, allowing you to create dynamic galleries from your library. But there are plenty of options available to you.
Privacy and Cookie Consent
It’s always a good idea to include a Privacy Policy on your site. If you’re based in the EU, or have EU customers, then the GDPR makes this essential. WordPress does provide the basics for a privacy policy page, but you can improve on this with a plugin. Here are two you can try: WP Legal Pages and WP AutoTerms.
Likewise, if you use cookies on your site then you need to notify your customers about this. Your privacy policy generator may include cookie consent, but if not, you can try the GDPR Cookie Consent Plugin.
Step 3: Finding the right theme
With your plugins in place you can begin working on your content. For a online portfolio, this is likely to be light on text and heavy on images. You may, for example, have an About Us page or a brief description of your services.
However, as you want your photos, art or designs to be the central focus, your content will predominantly be your image galleries. It is advisable to set these up first and include them on your home or portfolio pages. You can find out more about creating galleries in these posts:
- How to create a WordPress gallery
- How to create a WordPress gallery with Lightbox popup
- Getting started with FooGallery
Once you have made some ground with your gallery, choose a theme that works with them. In this way, your theme will complement your work, rather than the other way around.
What Should You Look For in a Theme?
Your choice of theme will depend a lot on the style you are going for, along with the color palettes and basic design. But there are several things you want to make sure of:
- Your theme needs to be Responsive! In other words, it has to resize the elements on the page to fit the screen (mobile, tablet or desktop), from which it is being viewed. Having a mobile-friendly site is important.
- Choose something that is easy to customize. You don’t want to have to rely on Custom CSS styling to get the look you want.
- It needs to be compatible with the plugins you want to use. As your portfolio site will rely mostly on your photo galleries, choose a theme that works with your core plugins, rather than looking for plugins that work with your theme.
Something else to consider is that WordPress is now focusing on the use of blocks, via the Gutenberg editor. There are plenty of great block plugins available which allow you to add a variety of elements to your pages.
With the use of blocks, you could use a simple theme to customize the colors and font for your site, and then rely on core WordPress blocks to add the elements you need. A lightweight block-based setup gives you a clean foundation and reusable sections that can be customized to suit your needs.
However, if you are looking for a theme with templates or preset designs, then you will probably need to buy one. Do a search for ‘portfolio theme’ and you’ll find plenty of options.
We did a quick search and found a couple that you may want to look into:
- Apress – Responsive Multi-Purpose Theme
- Studio 8 WordPress Theme
- Kalium – Creative Theme For Professionals
- Divi
You can also take a look at this WPMayor post or CompeteThemes Post which lists several one-page portfolio WordPress themes.
Styling Your Online Portfolio
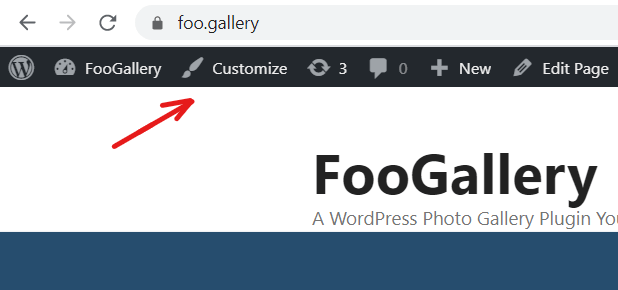
Once you have your theme installed, you can start creating the look and feel for your portfolio website. If you’re logged into your site, you’ll see a Customize link at the top of any of the pages on the frontend. Clicking on this will allow you to customize the colors, fonts, spacing, and so on.
At this point, you’ll also start putting together your page and menu structure. For a portfolio website, you can opt for a single page with several galleries or even an album of galleries. You could also create a single portfolio gallery and use filters to differentiate between different areas of your work.
You may also want to add a Contact Us page, or use a widget to provide contact details. If you’re adding a blog to the site, then you could use a widget to access this or have a blog posts block below your galleries. One of the potential dangers with a single page site is that it can get quite long. But you can combat this by using anchors in your headers and linking to these from an easily-accessible menu.
Another alternative is to use different pages for different areas of your portfolio. You can then also add a blog page, Contact Us page and so on.
For either site structure, it is essential to make navigation as easy as possible. Key information (such as contact details or pricing) should be easy to find and access. So give some thought to setting up your menu. And of course, your portfolio should be clearly visible.
You’re Ready To Go Live!
Once you’re happy with how everything looks (and you’ve double-checked that everything is working as it should) you are ready to go live.
You may need a few more plugins or tools, depending on your specific needs. For example, if you want to improve your workflow by adding a booking plugin to your site. Or you may need to integrate with an eCommerce platform to sell your images. We go into more detail about these tools in the Step 4 and Step 5 below.
However, if you’re simply setting up a portfolio, or plan to integrate tools or eCommerce down the line, then you can go live now. If you’re using a Coming Soon plugin, then all that you need to do is to deactivate it. Visitors will now see your portfolio website, instead of the landing page you were using.
Step 4: Optimize Your Workflow
Having a website is one thing. But in all likelihood you’re setting up your online portfolio to generate income. This means staying on top of things like your bookings, orders, marketing and so on.
Adobe Lightroom Sync
If you make use of Adobe Lightroom, then you can use a plugin like WP/LR Sync. This plugin allows your lightroom to communicate with your WordPress site, so that you can access images and data in your lightroom. You can also use this plugin to create dynamic galleries with FooGallery, which makes it much easier to keep your galleries current.
Booking or Scheduling
Coordinating your timetable can be a lot easier with a scheduling plugin. A lot of these sync with your Google calendar, saving you time and helping to improve your workflow. We’ve got a list of options for you to try.
Forms
It’s important to stay in touch with your customers, while also providing them with a way to stay in touch with you. Using forms is a great way to do both.
You can create a simple ‘Contact Us’ form, through which your customers can ask questions and get the help they need. You can also build more complex forms, designed to get feedback and insight from your visitors. For example, a survey or questionnaire could target questions based on users’ previous responses.
There are a number of form plugins available. Gravity Forms is a great option, as it allows you to create anything from the simplest to more advanced forms.
Here are a few other options for you to try:
- WPForms: a drag and drop WordPress form builder.
- Ninja Forms: user-friendly WordPress forms.
- Formidable Forms: solution-focused forms for WordPress.
Invoicing
If you’re building an online portfolio to generate income, then you’ll probably want an easy way to invoice your customers. Instead of doing this manually, it would be simpler to use a plugin to do this for you.
If you’re using WP Forms, then you can create forms for donation, payment collection and more. Some other options include WP Invoicing, Sprout Invoices and WooCommerce PDF Invoices. This last option may make more sense if you’re using WooCommerce, which we discuss in our next section.
Social Marketing
Staying on top of your communication is key to building a solid relationship with your customers. One good avenue for communication is through email marketing. For this, Mailchimp is probably the most well-known and widely used email marketing tool. With Mailchimp, you can set up marketing campaigns, follow up emails, automations and more, to help you stay on top of your email communication.
It’s also a good idea to generate a social presence. It takes time to post on all of your social networks all of the time. To begin with, it’s probably best to focus on two (maybe three) social networks – those that your customers are most likely to use. You can, for example, use a tool like Bulkly to schedule Instagram posts. Social posts can help generate a social presence and build your relationship with your audience.
It’s also handy to include social sharing buttons on your site. FooBox PRO is a great solution for this as it includes social sharing icons when images are opened in the lightbox. This means your visitors can share your images to their networks. Here are some other suggestions for social sharing plugins.
Workflow in a nutshell
The tools mentioned above can help you optimize your workflow – so you work smarter, not harder. Having an online portfolio means that you can generate business from your website. But you don’t want to spend all of your time doing basic admin.
The solution is to find the tools that work for you. If you can optimize your workflow, then you will have more time to do what you enjoy!
Step 5: Selling Online
An online portfolio can easily be transformed into a marketplace, through which you can sell your photos, art or designs. Probably the easiest way to do this is by using digital downloads. Your customers can then purchase and download your images or artwork. Of course, you can also create a marketplace for actual goods, that you could then ship to your customers.
For either scenario, you can use an eCommerce platform. This can be integrated into your WordPress site, thereby turning your online portfolio into a marketplace.

There are three options that we would recommend: WooCommerce, Easy Digital Downloads, or Fotomoto.
WooCommerce
This is a widely used eCommerce platform which gives you the ability to tailor-make your eCommerce solution. As you’re using WordPress for your portfolio, you would use the WooCommerce plugin.
This is free to download, and you can find a lot of complimentary plugins on WordPress.org. There are also paid plugins and tools available to you, if you need something more advanced. (In our experience, it’s often better to start with the free version, and then pay for advanced features when you find you need them.)
The base WooCommerce plugin gives you product, cart and checkout pages. There are various payment and shipping options. Plus you can customize the design, and integrate with other tools like Google Analytics, Mailchimp or Facebook.
Easy Digital Downloads
As the name suggests, this platform is great for selling downloads of digital products. It’s also free to use, so if you’re just starting out, this is a good option for you. Of course, you do get added functionality with the paid-for plans, but you can upgrade to these as you need.
Easy Digital Downloads gives you access to a shopping cart, discount codes and data reporting. You have control over file downloads, and access to files. You can track downloads as well. Plus you can integrate with services like Paypal, Stripe, Mailchimp and Dropbox.
Fotomoto
This is a service that integrates with your website, allowing you to print, sell and ship images to your customers. You simply set up your account with Fotomoto. Once an order comes in, they handle the rest. You then receive the payment, which is processed by Fotomoto.
It’s quick to set up and you have a lot of control over what gets printed and how it gets delivered. You can opt to deliver items yourself, or even add digital downloads to your shop. Another bonus is that Fotomoto integrates with FooBox, so you can sell images directly from your lightbox.
Going Forward
After Step 3 (Finding a theme and styling your site) you should be ready to go live with your online portfolio. Steps 4 and 5 are more about fine tuning your workflow and building your business. You can always establish your portfolio first, before integrating these tools.
Once your online portfolio is live, it’s time to get your name out there. Make use of email and social marketing to build your brand. Keep your galleries current and up-to-date. (A good way to do this is by using dynamic galleries, which load from sources like media tags or Instagram).
It’s also important to keep your website up to date. Make sure your plugins and WordPress itself are regularly updated, to ensure that everything keeps working smoothly. If you find that a plugin or your theme isn’t working as it should, or a better option comes along, don’t be afraid to move to something new.
And finally, keep an eye on your analytics. The goal is for traffic to increase steadily. So watch out for irregular dips in your website traffic, as it could indicate a problem with your site. You can also look at ways to boost traffic, such as through social or content marketing.
Let’s Sum Up
After following the 5 easy steps outlined above, your online portfolio should be up and running. By now, you should be showcasing your work, building an audience, taking bookings or selling your photos.
It may seem like a difficult job at first, but if you follow these steps, it really is quite simple. Here’s a quick breakdown of the steps, and our recommendations, one more time:
Step 1: Set Up
- Find a WordPress host. Our recommendation: Kinsta.
- Choose a Domain Name.
- Install WordPress.
Step 2: Install Plugins. Here’s what you’ll need:
- Coming soon – we like Coming Soon and Maintenance Mode from SeedProd.
- Security – try Akismet Anti-Spam.
- Caching – WP Rocket or W3 Total Cache are good options.
- Image Optimization – we use Tiny PNG.
- Analytics and SEO – we recommend GAinWP Google Analytics Integration for WordPress and Rankmath.
- Gallery and Lightbox – give FooGallery and FooBox a try.
- Media Library Management – we like Real Media Library.
- Privacy and Cookie Consent.
Step 3: Theme and Style
- Create your content.
- Add image galleries.
- Find a lightweight block theme that works with your content and customize it with core WordPress blocks.
- Customize and style your portfolio.
Step 4: Optimize Workflow
- Create an efficient workflow using tools for scheduling, forms, invoicing or social marketing.
Step 5: Start selling
- Set up an eCommerce platform using WooCommerce, Easy Digital Downloads or Fotomoto.
That’s it, you’re done. Remember to keep your site up to date, and most of all, enjoy creating your own online portfolio!
Note: We have used affiliate links for some of the recommended plugins / services. But we still believe in (and use) these for our own websites.