The WooCommerce Free Shipping Bar is included in FooBar PRO and allows you to promote free shipping for your WordPress products. It works with WooCommerce to pull in shopping cart information and show the customer when their cart has reached a high enough total to qualify the customer for free shipping.
The bar is made up of three parts. The first informs the customer that there is a free shipping offer, the second shows the progress made towards free shipping (as products are added to the cart), and the final one notifies the customer once they have reached the correct amount.
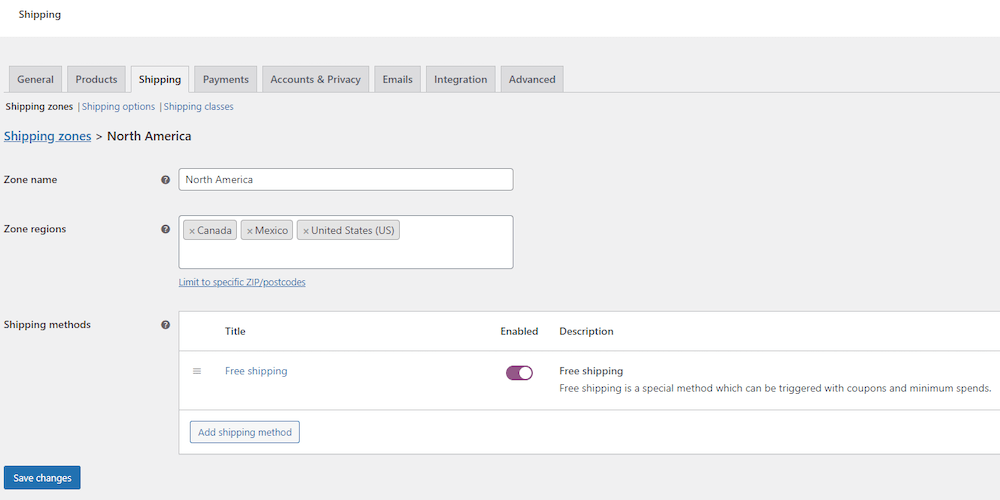
Before you set up the bar, however, you need to configure the shipping in WooCommerce so that the bar can show the correct information to the correct customers. Below are the steps to do this:
- Go to your WooCommerce -> Settings -> Shipping tab.
- Create or edit the shipping zone/s for which you want this notification to display. Here you can add a Zone Name, and then add the countries or zones for which you will offer free shipping.
- Edit or add a free shipping method to the shipping zone/s from Step 2 and make sure that the value of Free shipping requires… is set to a A minimum order amount. A value must also be supplied for the Minimum order amount input.
- Ensure the shipping method from Step 3 is enabled and Save Changes.
Here is an example of how these settings would appear in WooCommerce:
Once this is done, you can move onto creating your bar.
Creating The WooCommerce Free Shipping Bar
The first step is to create a new bar. Once you click on Add New or Add Notification in FooBar PRO, you will see a selection of bar types. Click on Free Shipping, then publish the bar. Note that the bar will not appear anywhere until you have set up the visibility.
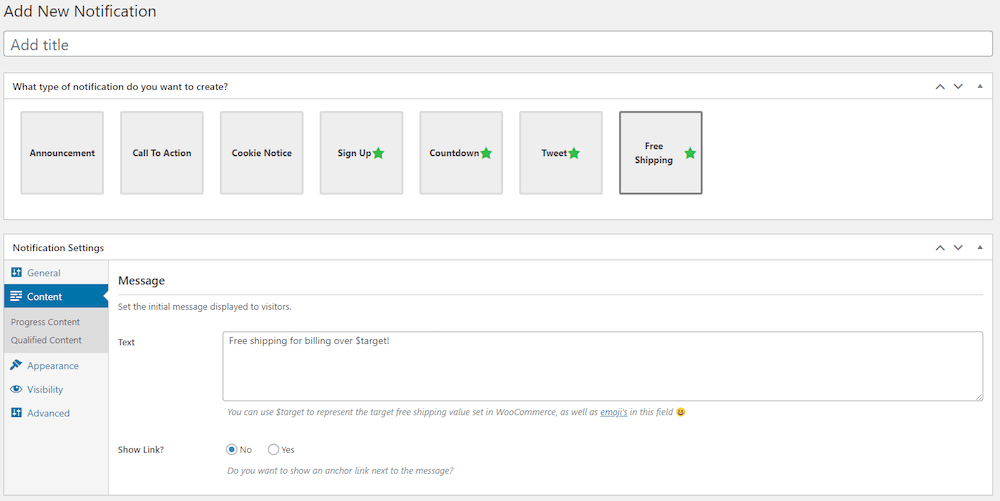
The message that you first see will appear on the first slide of the bar and will, by default, show the $target in the message. This pulls in the free shipping value that you have set up in WooCommerce. You can adjust the wording if you like, or add a link to the bar.
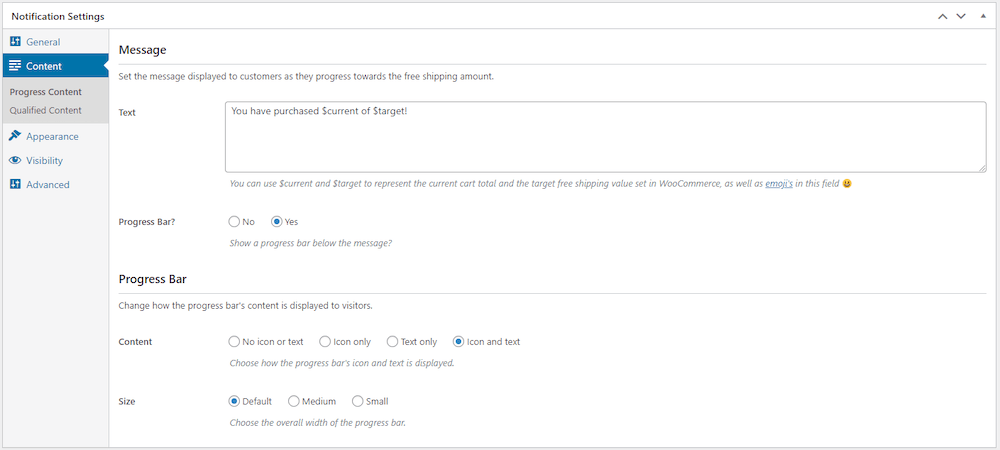
If you click on the Progress Content tab, you will be able to set up the message for the Progress slid. This shows customers the current value of their cart, and can include a progress bar to show customers how much more they need to spend.
The bar, again by default, will pull in the amount spent in WooCommerce, as well as the target amount Here you can opt to show the progress in a bar below the message. You can have the bar by itself, or add an icon and/or text in the bar. You can also adjust the size of the bar; by default it will stretch across the length of the screen. Not that on mobile devices, the default size will apply.
Once your customer has reached the minimum required value, the final slide of the bar will appear, letting them know that they have qualified for free shipping. To adjust the content of this final slide, click on the Qualified Content tab. Here you can adjust the message that appears once customers reach the target amount.
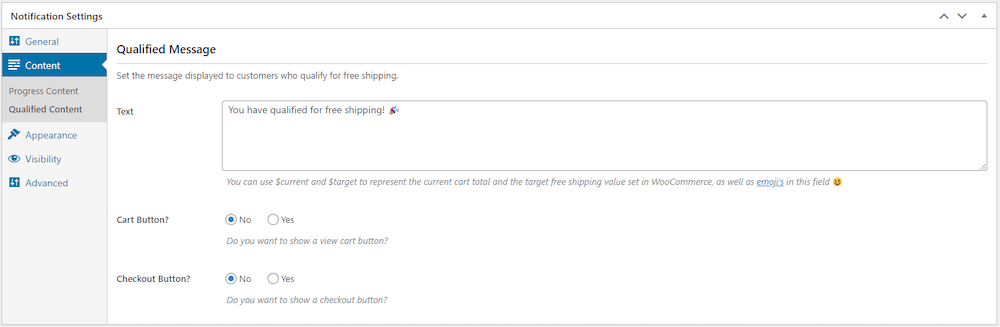
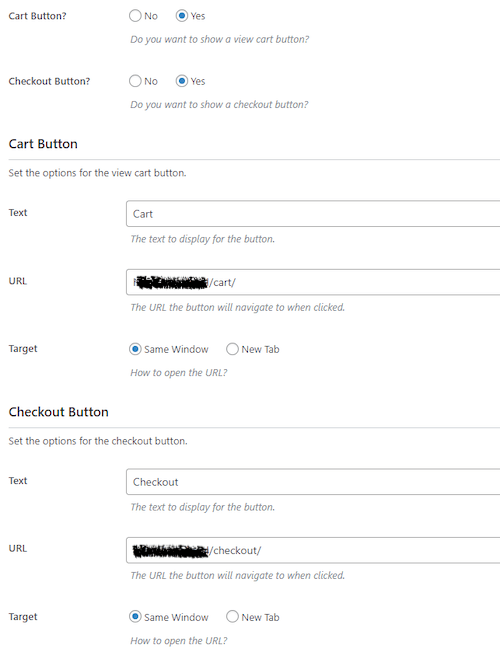
As you can see in the above screenshot, you can add buttons to the Qualified message bar. You can add a Cart Button and/or a Checkout button, depending on where you want to direct your customers.
You can enable these buttons by clicking on Yes for either option. The URL should direct customers to the cart or checkout, respectively, but you can change these options. you can also set the URL to open in the same window or a new tab.
Customizing Your Bar
Once you have set up each of the slides, you can customize your bar. As this bar type is part of FooBar PRO, you will also have access to other Pro features, like the bar customizations, gradient colors and additional icons.You can find out more about customizing your bar in this article.
Note that for the WooCommerce Free Shipping Bar, you will also be able to customize the progress bar colors (for the bar itself and the background), and the button colors. You can also adjust the height and corner radius of the progress bar.
Visibility and Position
As with any FooBar PRO notification, you can set the visibility of the bar, by choosing to display it everywhere, just on pages with the shortcode, or on specific pages on your site. You can find out more about setting the visibility in this article. At the very least, we recommend including the bar on any pages where customers can purchase your products.
You can also choose the position of the bar. A sticky bar at the top of the page works well for this bar type, but you can also choose to display it at the bottom of side of your page. You can read more about setting the bar position in this article.
Once you have made the necessary changes to your bar, click on update. Once everything is configured and saved, any visitors from eligible shipping zones will be able to see this notification (based on its visibility settings).