The Sign Up Bar is a great way to collect email sign-ups from any page on your site. The bar currently integrates with Mailchimp, allowing you to save emails directly to your Mailchimp lists.
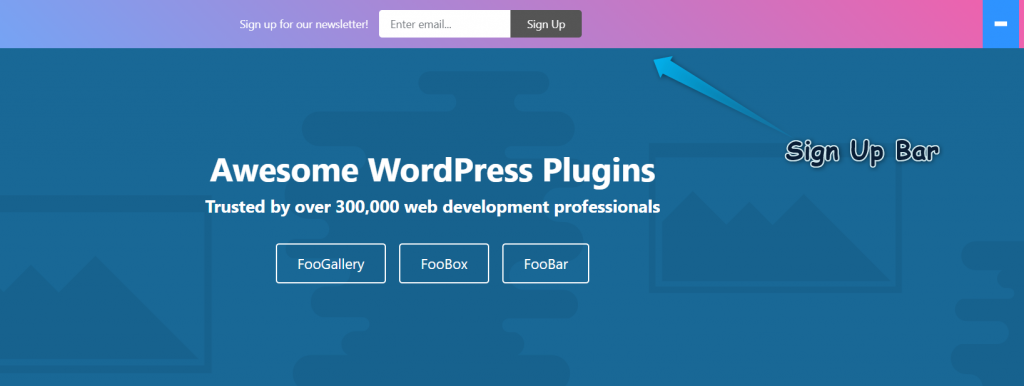
Here’s a look at a basic Sign up bar:
Setting Up Your Lists
When creating a Sign Up bar, the first thing you will need to do is integrate FooBar Pro with your Mailchimp account. For this, you will need a Mailchimp API key.
You can find this by logging onto Mailchimp. Then goto Account -> Extras -> API keys. Then click on Create Key, below the section called Your API Keys. A key will be generated for you. Copy this key.

Now go to your website and navigate to the FooBar Settings page. Here you can set up your Mailchimp integration. To do this, simply select Mailchimp, and add your API key to the field provided. Click on Save changes.
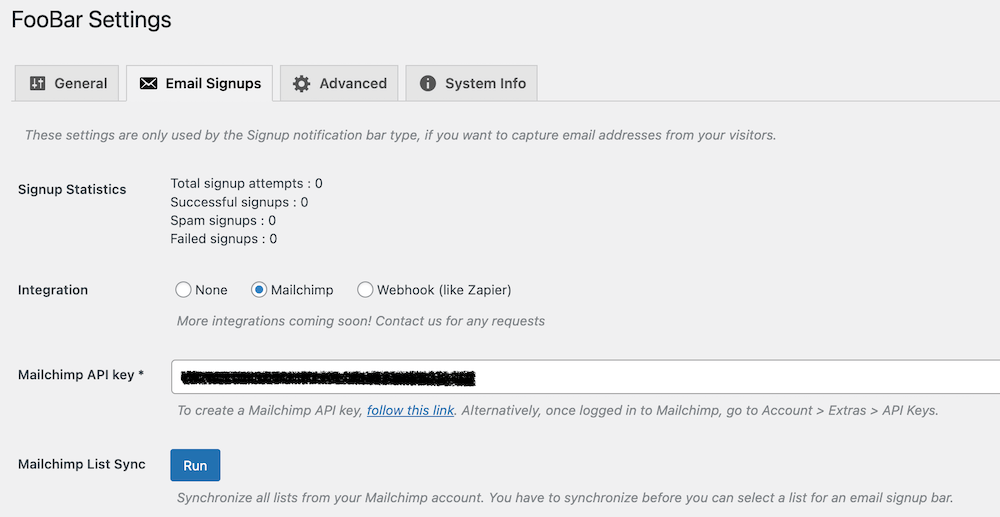
You will now have Mailchimp integration. To Sync your lists with FooBar, click on the Run button. Following this, you should see a list of all associated Mailchimp lists appear in your settings. You will then be able to select the list to which you want people to subscribe when setting up your Sign Up bar.
From the settings page, you can also enable reCaptcha for advanced security measures.
What If You Don’t Have Mailchimp?
We will be integrating with more email platforms in the future. For now, if you don’t have Mailchimp, or you don’t make use of a mailing service, you can still make use of the Sign Up bar.
You can set up individual bars to collect emails by enabling Save Subscribers in the bar settings. Once people subscribe, their emails will appear in the Subscribers meta box below the settings.
Creating a Sign Up Bar
To get started, click on Add Notification under FooBar. Select Sign Up from the notification types.
Once you’ve selected your bar type, you will be able to customize the content of the bar. Here you will be able to add a message to the bar, along with the text you want to appear in the email field and on your button. You are also able to add a link to your bar.
Once someone submits their email, you can choose to show a success message, and select the duration for which the message will show. Likewise, you can create an error message for when a submission fails.
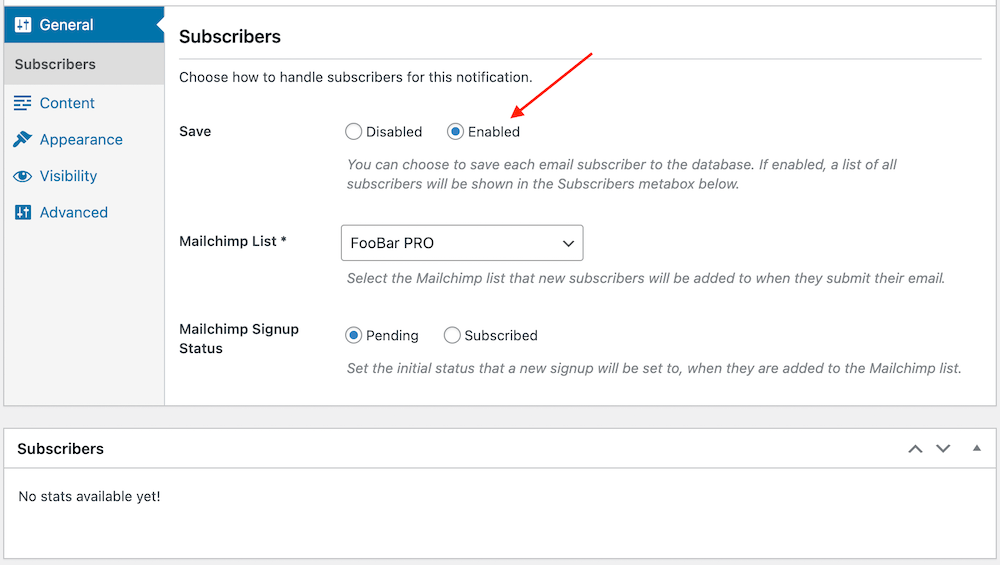
It’s also important to select the list to which you want to subscribe people. As you can see in the above screenshot, you can find your lists in the Subscribers tab under general settings. Here you will find a drop-down menu of all the lists available in the integrated Mailchimp account. Select the list you want to use for this particular Sign Up bar.
Note: if you have not integrated your Mailchimp account, you will not be able to select a list. For the Mailchimp lists to appear, you must add your Mailchimp account API key in the FooBar settings.
Finally, you can set your Sign up status to Pending or Subscribed. Selecting subscribed will automatically add new emails to your list. However, if you want to add an extra level of authentication, you can select Pending. Subscribers will then be sent an email, from which they can confirm their subscription.
Customizing your Bar
Once you have created the content for your notification, you can then customize your bar. You can adjust the color settings, the position of the bar, and select the pages on which it will show.