
The rich smell of a new leather bag. The feel of a silk garment. The heft of cast iron cookware. These things can compel customers to buy something inside a high street store – but they don’t exist on an ecommerce website. If you’re selling anything online know that image is everything, and the quality of your product photography has a profound impact on sales.
What Is Ecommerce Product Photography?
Product photography is the practice of capturing images of products that showcase them in the best possible way; considering influencing factors like resolution, lighting, shadows, distance and perspective. There are different types of product photography including white background, lifestyle, photography for Amazon or eBay and even 360° photography. For the purposes of this article, we focus mainly on white background photography, which is how most product galleries are created online.
Why Is Ecommerce Product Photography Important?
Photographs are the only way that visitors to your ecommerce site can engage with your products – which are competing with similar products on competitors’ websites – so your product photographs need to be compelling. Just look at these statistics:
- Research from Forbes showed that 50% of online shoppers feel that “large, high-quality product images are more important than product information, descriptions or even reviews”.
- High-quality product images can increase ecommerce sales by up to 60%.
- Large-size product images can encourage up to 63% more engagement.
- 75% Of online customers rely on product images in deciding whether to buy them.
- People remember 80% of what they see but only 20% of what they read.
Having established how essential professional product photography is, let’s run through some tips for getting it right.
How To Take Great Product Photographs For Ecommerce
The easiest way to have compelling product images for your ecommerce website is to hire a professional photographer – but we’ll take it, for the purposes of this article, that budgetary constraints negate that possibility. Here are some ways you can take great product photographs, consistently and affordably.
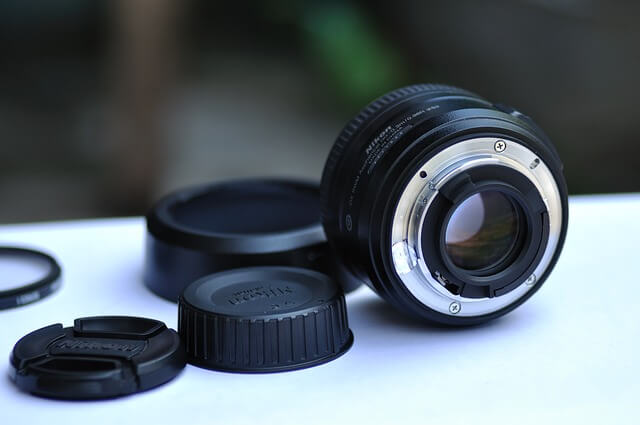
Choosing The Right Camera
Online shoppers need to see every detail of your products in crystal clarity, so having high-resolution product images is a must. You might think that would require investing in an expensive Digital Single Lens Reflex (DSLR) camera – the professional’s choice – but there are more affordable options, like Canon’s popular G Series of compact cameras, that take great high-res images. Here are some more recommendations.
Shooting Against A White Background
Most online stores show products isolated against a white background, and the reason is simple. It presents the products without clutter or distractions.
To shoot products in this manner, you would normally use a white backdrop on the floor or a table, set against a wall. The white background can be made from a large sheet of white postcard paper, taped to the wall. It should be curved down onto the floor or table in a soft L-shape to prevent the paper marking – like this (yours may be smaller). Products to be photographed are placed centre stage against the all-white background, always in the same place, for consistency.
Using A Tripod
Get yourself a budget-friendly tripod, so that you can always take your main “hero” product shots from the same distance, height and perspective. For most products, a slightly elevated 45-degree angle is best, as it shows more than one side of a product. In your online galleries, this image can take pride of place, but you should also take several supporting shots from different angles (front, top, back etc).
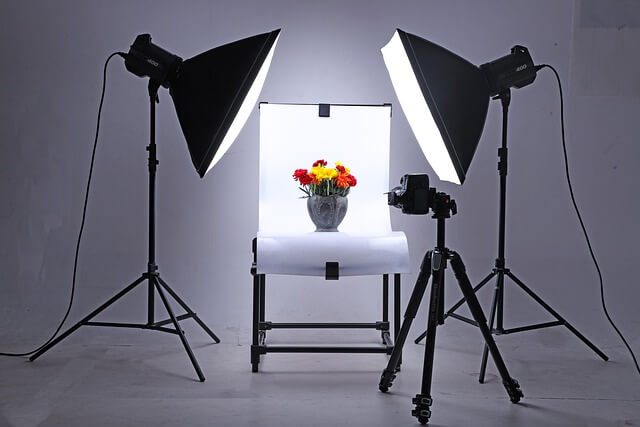
Getting The Shot Right
It’s always best to shoot products in natural light if possible, however most interiors do not have sufficient lighting, whether natural or artificial, and you will probably need additional artificial lighting to capture products properly and to avoid distracting shadows. It’s worthwhile investing in a portable photography lighting kit. An alternative, if your products are on the smaller side, is to purchase a simple lightbox or make one yourself, to both act as your white background and give your products consistent lighting from all sides.
It’s always a good idea to take a few test shots – you want to check that the product has enough light on it but is also not overexposed and washed out. It’s easier to brighten pictures when you edit them, than to darken them.
Always photograph the whole item – not doing so will give your products shots an amateurish look – and always have enough white space around the item.
Try to capture all images at a similar scale, so that your online product galleries won’t be shifting distractingly between differently sized products. This may require shooting closer in on smaller products, to bring them “up to scale”.
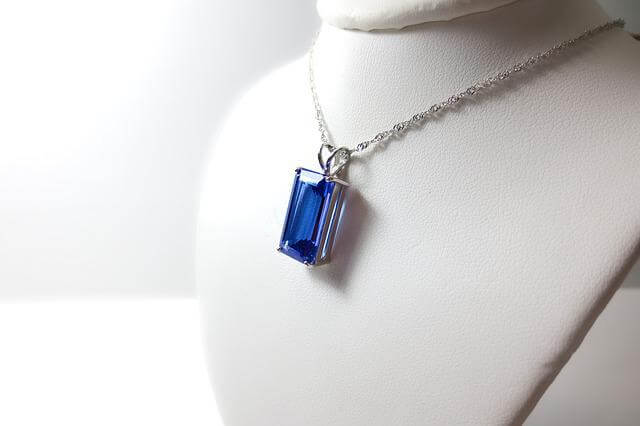
Using Mannequins
If you’re selling jewellery online, it’s not always appealing to show it lying flat against your white background. You may want to invest in a partial mannequin, like the one shown in the image below. Using a mannequin gives viewers a better idea of the size of the product and how it would sit on them.
If you are photographing clothes, the most popular technique is something called “ghost mannequin”, in which you photograph the item both on and off a human model’s or mannequin’s body, and then combine the images through digital trickery, to result in an accurately fleshed out garment – with no body in it. It requires a bit of work, but it’s not as complicated as you think. This effect allows the garment to hold the viewer’s attention, rather than the model wearing it.
For a simpler alternative, you can hang garments, like this.
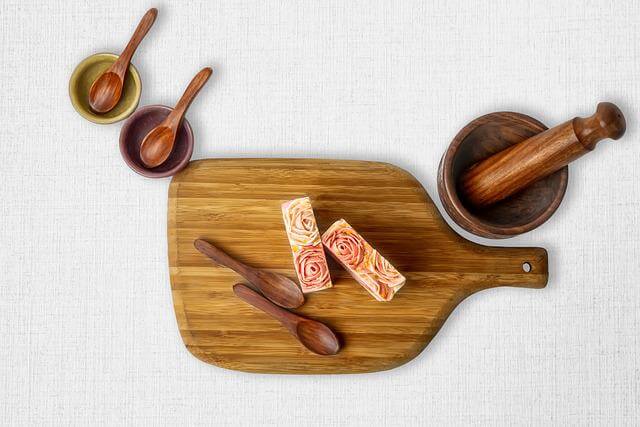
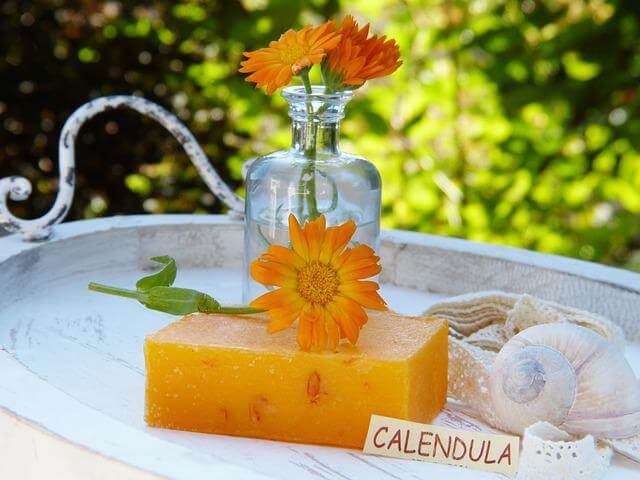
Using Props
Props can enhance the appeal of your product shots but if you add too much into the frame, they can be a distraction from your products. You can use simple elements of nature to complement certain products, like stone, foliage or even fake “ice”, that complement the character of the product you are photographing. Here’s a guide to some simple product prop hacks you can try.
For certain products, especially home décor items, you might want to take a couple of in-situ lifestyle shots as well e.g., a lamp at the bed side or a glass vase on a windowsill.
360° Product Photography
360° Product photography is becoming popular, because it maximises the one sense visitors use to engage with your ecommerce products: sight. Being able to show every aspect of a product also lets you do less work with text descriptions.
360° Product photography is a process in which products are placed on a turntable, inside a circular lightbox. As the turntable slowly rotates, photos are taken from multiple angles. All of the photos are then transferred to software that cleans them for any imperfections and converts them into a 360° view motion graphic. Products shown in this way have shown a 30% higher conversion rate than those without. Although creating images in the round may sound very complicated, it isn’t really. Here’s a guide to 360° DIY product photography and here are some product examples to inspire you.
Managing Product Images On Your Ecommerce Site
Once you have taken product images at high resolution, you need to upload them to your ecommerce website at the right resolution. Most online stores work with three versions of the same product image:
- Thumbnail images, which pop up in online searches – aim to make these about 200 x 200 pixels.
- Product page images, which sit alongside product information – these should be about 640 x 640 pixels.
- Large-size images for when product page images are viewed in a lightbox – aim for about 1 000 x 1 000 pixels.
Here is some more information on image sizes for ecommerce. Of course, if you’re using a gallery plugin like FooGallery, you can set your thumbnail size in the gallery. This means your full-size images open in the lightbox, but are automatically scaled down for the thumbs.
Uploading Multiple Images Of Your Products
If you want to show visitors as much detail of your products as possible but find 360° photography too challenging, it’s a good idea to simply bank multiple images of each product, taken from different angles. By installing a gallery plugin like ours (if you’re on a WordPress website), you can then create multiple-image galleries for different products, and then create an album to house the galleries.
The Finer Details
Given the increased engagement they generate, you definitely want to have large-size product images that showcase your products in all their glory – and we highly recommend you make them viewable in a digital lightbox, like our FooBox. Lightboxes focus the viewer’s attention on an image without any background distractions.
If you sell products with small and intricate details, you can go a step further for your online customers, by enabling zoom functionality on your product images. WP Image Zoom is a great WordPress plugin for this purpose.
Preventing Digital Shoplifting
Having gone to the trouble of populating your ecommerce store with high quality product images, you will want to keep them out of the hands of lazier competitors, who might want to appropriate your product images to sell similar products on their websites. To prevent this, we highly recommend adding a subtle digital watermark to your product images, as most professional photographers do. In this article, we cover image watermarking in detail.
Don’t Forget About Image SEO
SEO is important for increasing your online traffic, and images play a key role in your SEO performance, because they take up the bulk of any website’s bandwidth. It’s important to take care of basic SEO housekeeping: giving your images descriptive file names, captions, descriptions and alt text – and ensuring that images are mobile responsive and load briskly on both PC and mobile. In an earlier article, we go into the details of optimising images for SEO (for all of your website’s images, not just products).
If you sell great products online, at a fair price, you’re off to a great start. If you also have great product images supported by effective SEO, you are well on your way to your next successful sale. Good luck from us, as always.