When a visitor logs on to your ecommerce website, you want them to do two things: stay, and perform an action – buy a product, subscribe to your newsletter or something else. Notification bars are a great way to encourage visitors to do these things. Here we discuss what they are, the benefits they offer and how to add them to a WordPress website.
What Are Notification Bars?
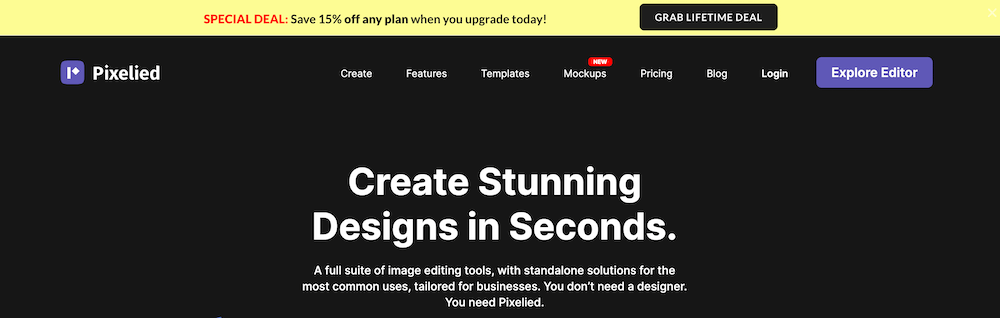
A notification bar may also be called an announcement bar, hello bar, welcome bar, banner bar, floating bar, sticky bar or simply, bar. It’s a web page element that carries a message and it usually sits at the top, bottom or side of the page – like this example on the Pixelied homepage.
Two things to note about a notification bar: firstly, it often “floats” independently above the web page – that is, even if you scroll up or down, it will stay in the same place in your browser window (it may even stay there when you click through to other pages). You also get “sticky” bars, though, as well as bars set to appear or disappear when a certain section of a web page is browsed.
Secondly, although a notification bar usually catches one’s eye, it doesn’t feel intrusive or disrupt the browsing experience. Most notification bars are rendered in colours that align with, rather than clash with the website they’re on, and they usually only take up about 5% of a webpage – again with the intention being to not disrupt your browsing, yet still get your attention.
In this way, a notification bar is quite different from a “popup”, which is a notification window that overlays a website – lightbox style – and prevents you from browsing further, until you either respond to what it’s asking or click an “X” in the corner to close it (in examples like this one you can’t close it, only respond to it or leave the site).
Benefits Of Using A WordPress Notification Bar
A notification bar can be used to carry any message you don’t want website visitors to miss, but in ecommerce it is mostly used to grow e-mail leads, or to stimulate sales – whether by highlighting a new or popular product, offering visitors a discount on purchases or advertising free shipping on purchases above a specific amount.
A notification bar may display a countdown timer for discounts or special offers, increasing the urgency of the CTA and further encouraging action. Using this tactic, Cosmetic Capital increased its database of leads by 300%. Some other examples of strategic notification bar uses (you will see that it’s quite versatile):
GAP has a site-wide notification bar at the bottom of its site, notifying visitors that it uses cookies (on many websites, cookie notifications are displayed via a popup). Above it is a small sale notification – click on it and up pops a popup (which you don’t mind, because you chose to click on the notification bar).
UKTechStore Values customer reviews, so there’s a notification bar about Trustpilot reviews at the top of the home page, designed to grow consumer trust and, as a result, sales.
Milletts uses notification bars to promote two compelling offers at the top of its website.
Floom uses a small notification bar (bottom left) to offer help to visitors – a potential booster to customer retention.
Sunglass Hut has a notification bar with multiple messages about special offers, shipping and delivery times.
CMC Markets uses a notification bar on every page, to carry a cautionary message about Spread bets and CFDs; possibly a legal requirement.
From Elfsight, here are some great examples of different types of countdown timers to create urgency around offers.
Finally, from us, here are some quick demos of different, creative ways you can use notification bars to inform visitors, build brand loyalty or stimulate conversions – a notification bar need not be boring.
Sometimes, notification bars are used simply to make sure visitors spot need-to-know information like updated terms and conditions, updates on system faults or, during a global pandemic, adjusted business operations. At times of the year when delivery becomes of paramount importance, such as in the run-up to Christmas, many ecommerce brands highlight order deadlines and delivery timelines via notification bars.
Not making sure visitors see such notices could lead to frustration later on – and lost prospects or customers.
Now that you’ve seen how useful and versatile notification bars can be, you may well want to add this functionality to your WordPress ecommerce website. We’ll tell you how, in a few simple steps.
A Step-By-Step Guide To Adding Notification Bars To Your WordPress Site
Adding a notification bar to your WordPress site. Below we’ve taken you through the process, using FooBar Pro as an example.
Step 1: Install Your Notification Bar Plugin
If you’re using a free plugin, you can install and activate this from the Add New tab under Plugins on your WordPress site. As FooBar Pro is one of the paid notification bar plugin options, you would need to install the plugin .zip file once you’ve purchased it. After installing and activating the plugin, you’re ready to get started.
Step 2: Add A Notification Bar
To add a bar, you’ll simply click on the Add Notification tab under FooBar. This will bring up a new notification page, where you can select the type of bar you want to create. (FooBar does also come with several pre-made bars that you can use as inspiration or tweak to suit your purposes.)
As you can see in the screenshot below, there are a variety of bar types from which to choose, including Sign Up and Countdown bars, available in FooBar Pro.
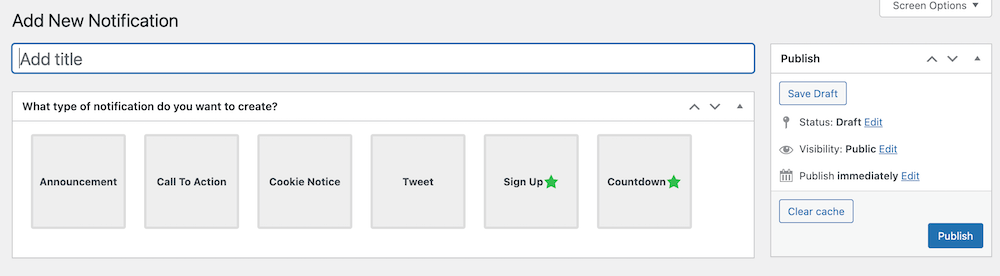
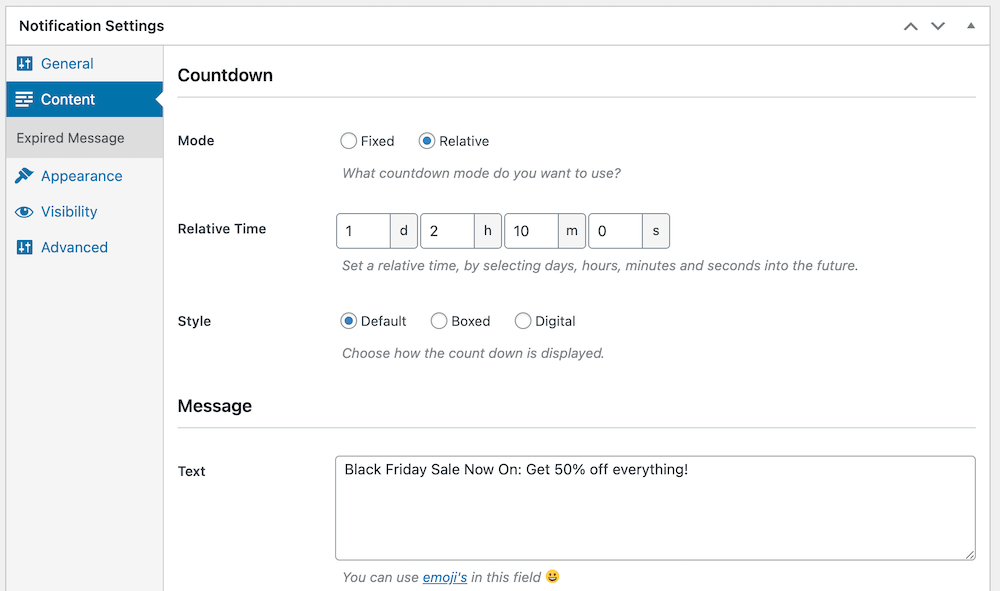
If you’re looking for a way to create FOMO and generate sales, a countdown bar is ideal, so let’s use this as our example. Once you’ve clicked on the Countdown bar, you can publish the bar. This will open up your bar settings, allowing you to add content and style your notification bar.
For a countdown bar, you can advertise a sale and count down to the end of the promotion. Or you can promote a product launch and count down to the launch date and time. You can also add a CTA button or set up the message that shows when the time runs out.
Step 3: Customize
Once you’ve set up your content, you’ll want to make it stand out. A notice bar, especially one focused on generating leads or sales, needs to grab your visitors’ attention. Luckily FooBar Pro makes it easy for you to do this.
To start with, you can change the color of your bar – FooBar comes with several options, while FooBar Pro allows you to custom pick the colors you use for the bar, the buttons, the links and on hover. You can also play around with gradient colors that will really make your bar pop.
Here’s an example of how you can use custom colors in your bar:

You can also add attention-grabbing effects to your buttons, to help draw the eye. For example, you can make your button bounce, pulse or wiggle.
In the above screenshot, you can also see a toggle on the side of the bar, which allows customers to close it. It’s a good idea to include this, so that customers don’t get frustrated or annoyed. But you can set the bar to show a toggle button when it’s closed, allowing visitors to reopen the bar. FooBar Pro includes a bunch of great icons that you can use to motivate users to open the notification, such as a shopping bag or a price tag.
Step 4: Placement and Visibilty
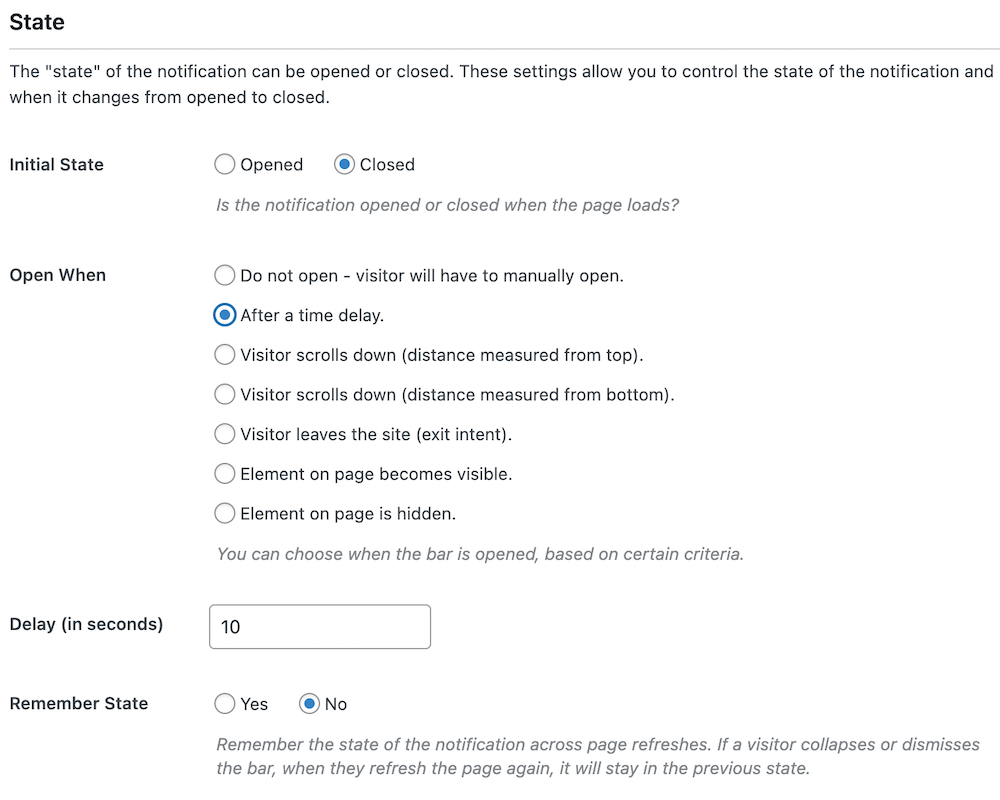
All that’s left to do now is decide on how the bar behaves and where it appears. For example, you can choose whether the bar should be opened or closed when a visitor first comes to a page.
FooBar Pro includes additional settings that let you choose when to open or close the bar. So you can choose to have the bar closed when the page loads initially, and then open it after the user has been on the page for a set amount of time. Here’s a look at how you would set this up, and as you can see, there are plenty of ways you can apply this to meet your specific needs.
Once you have set up how the bar behaves, you can choose where to show the notification. For a sitewide sale, you could set it show on all pages. However, if your bar is tailored to specific products, you can set it to show on just those pages using the conditional visibility available in FooBar Pro. Another handy feature is the scheduling tool, which lets you set up your bar to show (or not show) from a specific date and time.
You can also choose to show your notice at the top of the page (a good choice for a promotional bar), or on the bottom or sides.
Final Thoughts
As you can no doubt tell, there are a wide variety of uses for notification bars, especially when it comes to ecommerce. Using a notice bar plugin to generate leads and sales is an effective way to grow your business.
But it’s important to find a plugin that allows you to create bars that grab the attention of your customers. You can do this with animated effects, bright colors and thoughtful placement of your bars. This all translates into massive potential to build your customer base and convert users into customers.