What’s the average time spent on one of your pages? How long is the average session? There’s a good chance that neither of these numbers are very high. In fact, the average time spent on a page could be as little as 15 seconds.
This doesn’t give you a lot of time to make an impression or drive new business.
A well-placed notification bar, however, can make all the difference. Using a notice bar can help get your user’s attention, encourage interaction, generate leads, and convert users into customers.
So we’ve put together a detailed guide on how to set up countdown notification bars using FooBar PRO, so that you can boost your business.
Countdown Notification Bars
The countdown bar is a great option for increasing interactions and improving conversions. It works by motivating customers to make a purchase (or take some other sort of action) before the time runs out.
No one wants to miss out on a sale. Or be the last person to find out about an event. Or miss out on a product launch. And you can make the most of this impulse by using a countdown timer in your notifications bars.
The countdown timer creates an urgency, encouraging users to hit the button before time runs out. You can build on this urgency by using content to back it up. Words like ‘End of Range’, ‘Last Chance’ and ‘Never to be repeated’ all give the impression that this is a limited opportunity. All of this can increase your audience interaction and boost your customer conversions.
To get you started, we’ve put together a guide on how to create an effective Countdown notification, using FooBar PRO.
Setting Up Your Countdown Bar
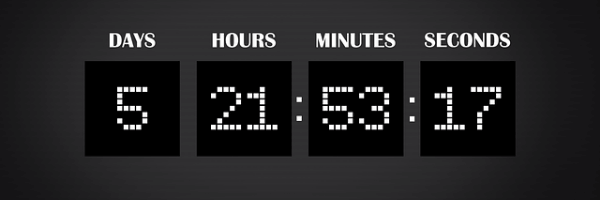
You can see an example of a countdown bar at the top of this page. Below, we’ve outlined the steps we followed to create this bar. (By the way, this countdown notification took less than 3 minutes to create.)
The first step is to create a new bar and select Countdown as your notification type. Once you’ve done this, you’ll see all of the relevant settings for the countdown notification bar, starting with the Content.
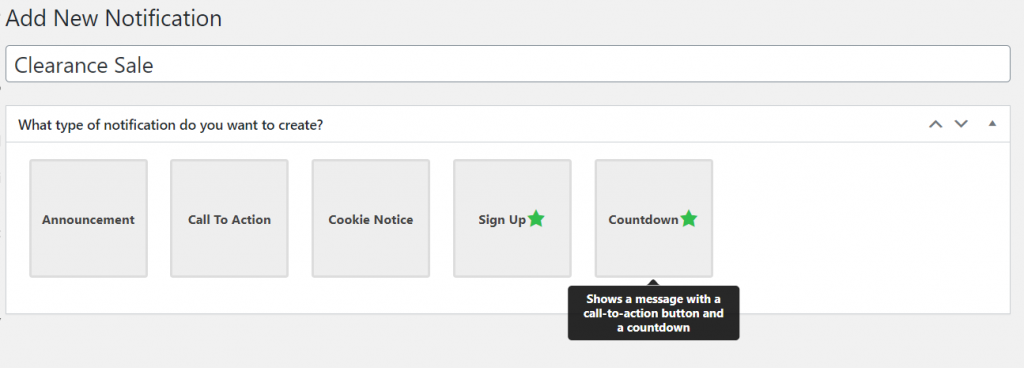
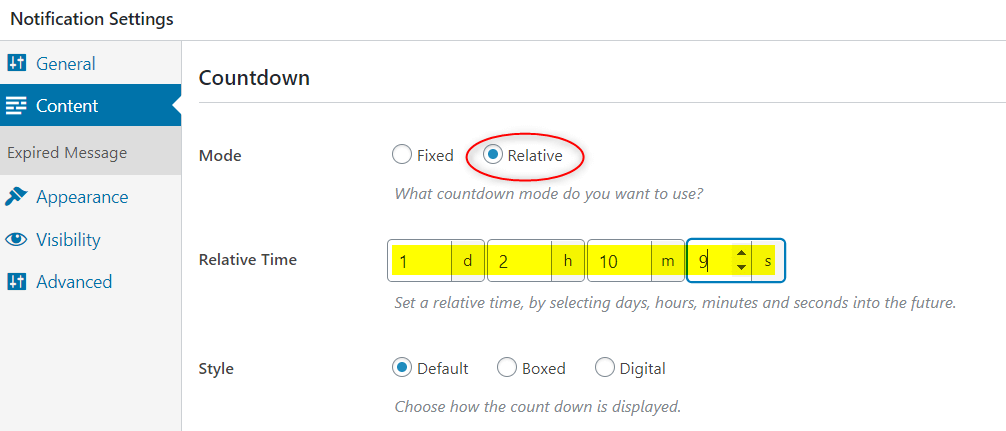
The first thing you will need to do is set up your countdown timer. Here you are provided with 2 options: fixed or relative. The fixed timer counts down to a specified date and time, while the relative option counts down to a time in the future.
If you’re running a Black Friday sale, for example, it will most likely run for a limited period of time. In this scenario, you would use the Fixed countdown, as it would tick down to the end of the sale, after which the bar would no longer appear. However, if you were running a promotion for an indefinite amount of time, then a relative timer would be the better choice. An example of this could be a clearance sale, but you only want the sale to end once the stock has sold out. You can then use the relative timer to build FOMO and encourage purchases, without limiting the period of the sale.
For our bar, we’ve used a relative countdown. New users will therefore see the bar counting down from the set time (as displayed in the below screenshot).
Once you have set up your countdown, you can move onto the rest of the content. For your message, it’s recommended that you use strong action words, to encourage your visitors to take action. You can do the same for the button text. You’ll see in the content, that you are able to add a link to your text as well; you can make use of this but remember that with countdown and CTA bars, the focus should be on the primary action that you want people to take.
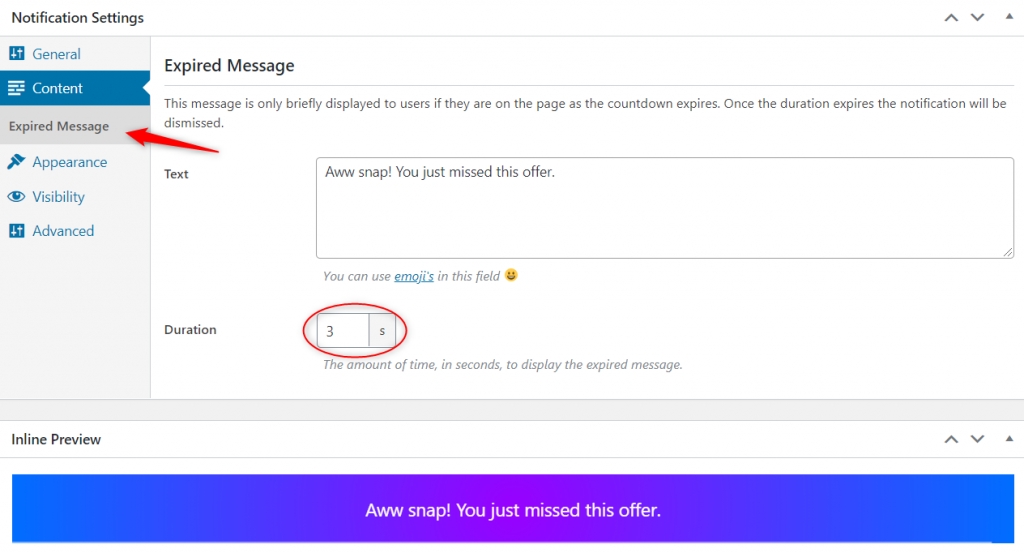
You’ll also want to set up your Expired message. This will display to customers who are on your website when the timer runs out, for just a few seconds. You can set the message that shows and the time for which it will display.
Customizing the Appearance
The aim of your countdown notification is to grab your visitors’ attention and encourage them to take action. So you want your bar to stand out. So you need to customize the appearance.
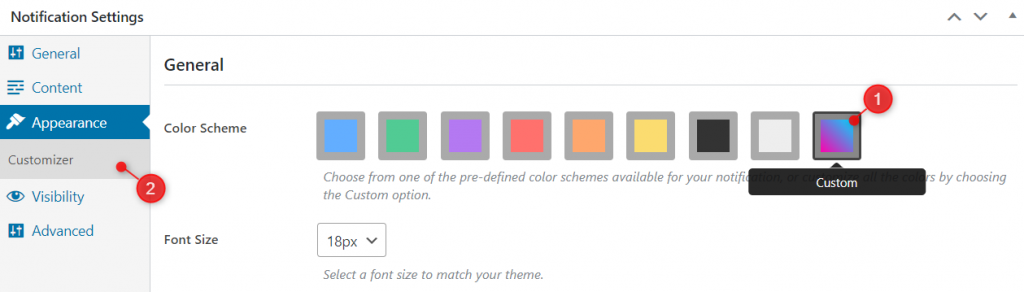
The first thing to do is choose the bar’s color. We suggest using a bright, contrasting color scheme, to help make an even bigger impact. To do this, select the Custom color scheme as shown in the screenshot below. Then go to the Customizer panel in your menu.
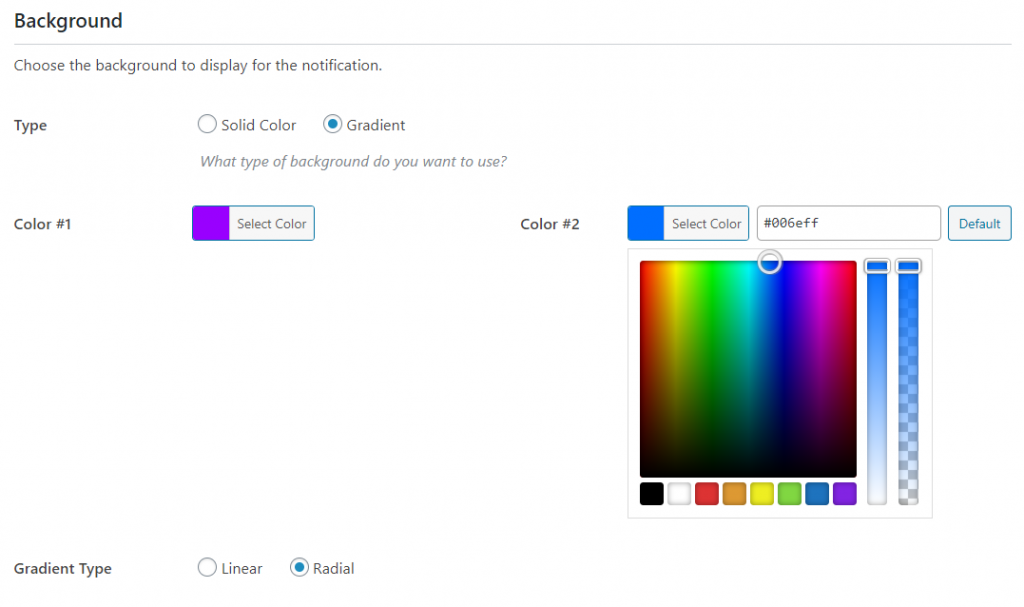
In the customizer, you can select a single color or use gradient colors. We’ve gone for a radial gradient using blue and purple, to help the bar stand out. You are also able to change the color for the text, link, toggle and button, as well as the hover colors for these items. For each item, you’ll be able to select a color or add the hex code for the color.
Under the appearance tab you can add further customizations to your bar. For example, you can change the font size and add a transition effect. You can also select a more specific icon for your toggle button, such as a price tag for a sale, or a pen for a sign up bar.
Finally, you’ll want to add some attention-grabbing effects. These are designed to be eye-catching, so as to improve the rate of interaction with the bar. You can add a wiggle, bounce, pulse, ripple or heartbeat, to both the button and/or toggle. We used a heartbeat effect for our button, and if the bar is collapsed, you can see the wiggle effect in the toggle.
Position and Layout
Once your countdown notification bar is designed, you can look at where you want it to appear on the page, and on which pages you want it to show.
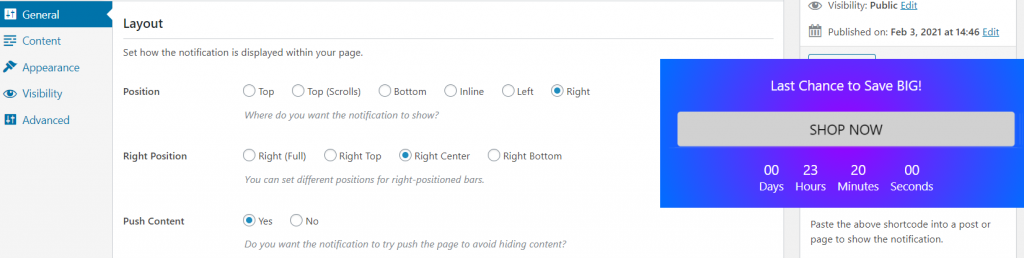
For the Layout, go to the General tab in your bar’s settings. From here, you can select the position and determine how the bar will behave. For example, you can set your bar to show on the right of the page, and in the center. For our demo bar, we used the Top position, so that it stays visibile at the top of the page.
Your layout also includes settings for State. Here you can set your bar to be open or collapsed when someone arrives at the page. Bars are also set to remember their state; this means that if a user closes the bar, then it will remain closed if they come back to the page. This can help prevent customers from getting annoyed by the bar popping up when they have already closed it. (For the demo bar on this post, we’ve set it to not remember the state, simply so that the bar remains visible when you visit the page.)
Visibility
Finally, you need to determine where your notification bar will appear on your site. Luckily, FooBar PRO makes this easy for you, giving you several options for the visibility of your bar.
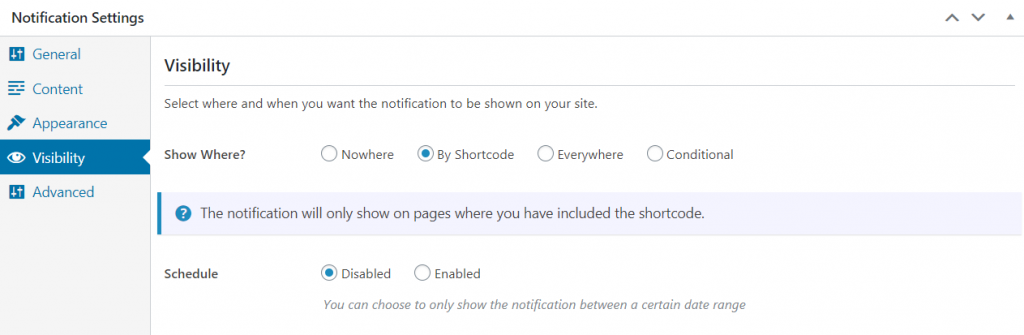
As we’re only using our demo bar on this page, the easiest option was to use the Shortcode. This allows you to copy and paste the bar’s shortcode onto any page where you want the bar to display. This is a good choice if you’re only showing the bar on one or two pages; it’s also the only option for inline bars.
Other options include displaying the bar Everywhere, in which case it will display on every page and post of your site. Or you can be more selective by opting for Conditional visibility. This will allow you to set up the exact page or post types on which you want your bar to appear.
Once you set your visibility and publish (or save) the bar will display on your site. If you’re not ready for the bar to show just yet, you can leave it set to Nowhere. Alternatively, you can schedule the bar to start and end at a specific time.
Final Thoughts
We’ve gone into quite a bit of detail about how to set up your countdown notification bars. But as you can see for yourself, it really is very easy.
With features like the countdown timer, the gradient colors, and the attention-grabbing effects, your bar will certainly get the attention of your visitors. This is going to make it easier for you to convert customers, drive sales, and generally boost your business.
But the great thing about FooBar is that it is so easy to use. It’s quick to set up notifications, so it doesn’t take time away from your day-to-day business. Plus, with the visibility and scheduling features, you can set it up to have maximum impact.