
Choose required fields, collect extra information, customize labels and appearance, and preview the form safely.
User Uploads guides
- Getting started
- Who can upload
- Links, QR codes and upload pages
- File limits and optimization
- Fields, labels and appearance (this guide)
- Moderation and approvals
- Receipts and email notifications
On this page
Open your gallery’s User Uploads settings. Use Fields for information you collect, Labels for visitor-facing names, and Appearance for the upload area.
Choose fields and required details
For each available field, choose Hide, Show or Required. Keep the form focused on details that help your submission workflow. Required fields must be completed before the visitor can upload.
- Name and Email identify the contributor and allow configured email confirmations.
- Caption, Description and Alt text collect image details. Other available controls include tags, custom URL and target.
- Additional Info is a short text field; Additional Long Info is a textarea. Both default to the label Additional, so give them distinct labels when using both.
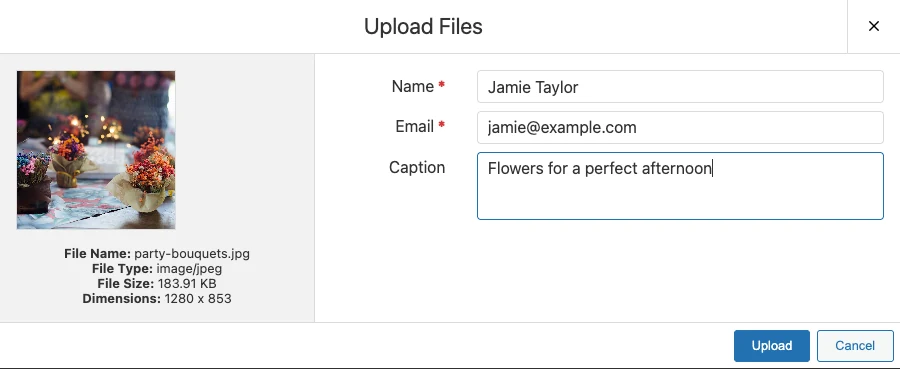
Additional information is sanitized, shown during moderation and retained as attachment metadata after approval. Long-field line breaks are preserved. Contributor information can be reviewed in the attachment’s Upload Info tab. See Moderation and approvals.
Make labels specific to your use case
Open Labels and replace the default labels where needed. For example, use Guest name and Photo caption for an event, or Entry title and About this entry for a competition. Save the gallery and check the resulting form. Collecting an email address for a submission does not itself add someone to a mailing list.
Style the upload area
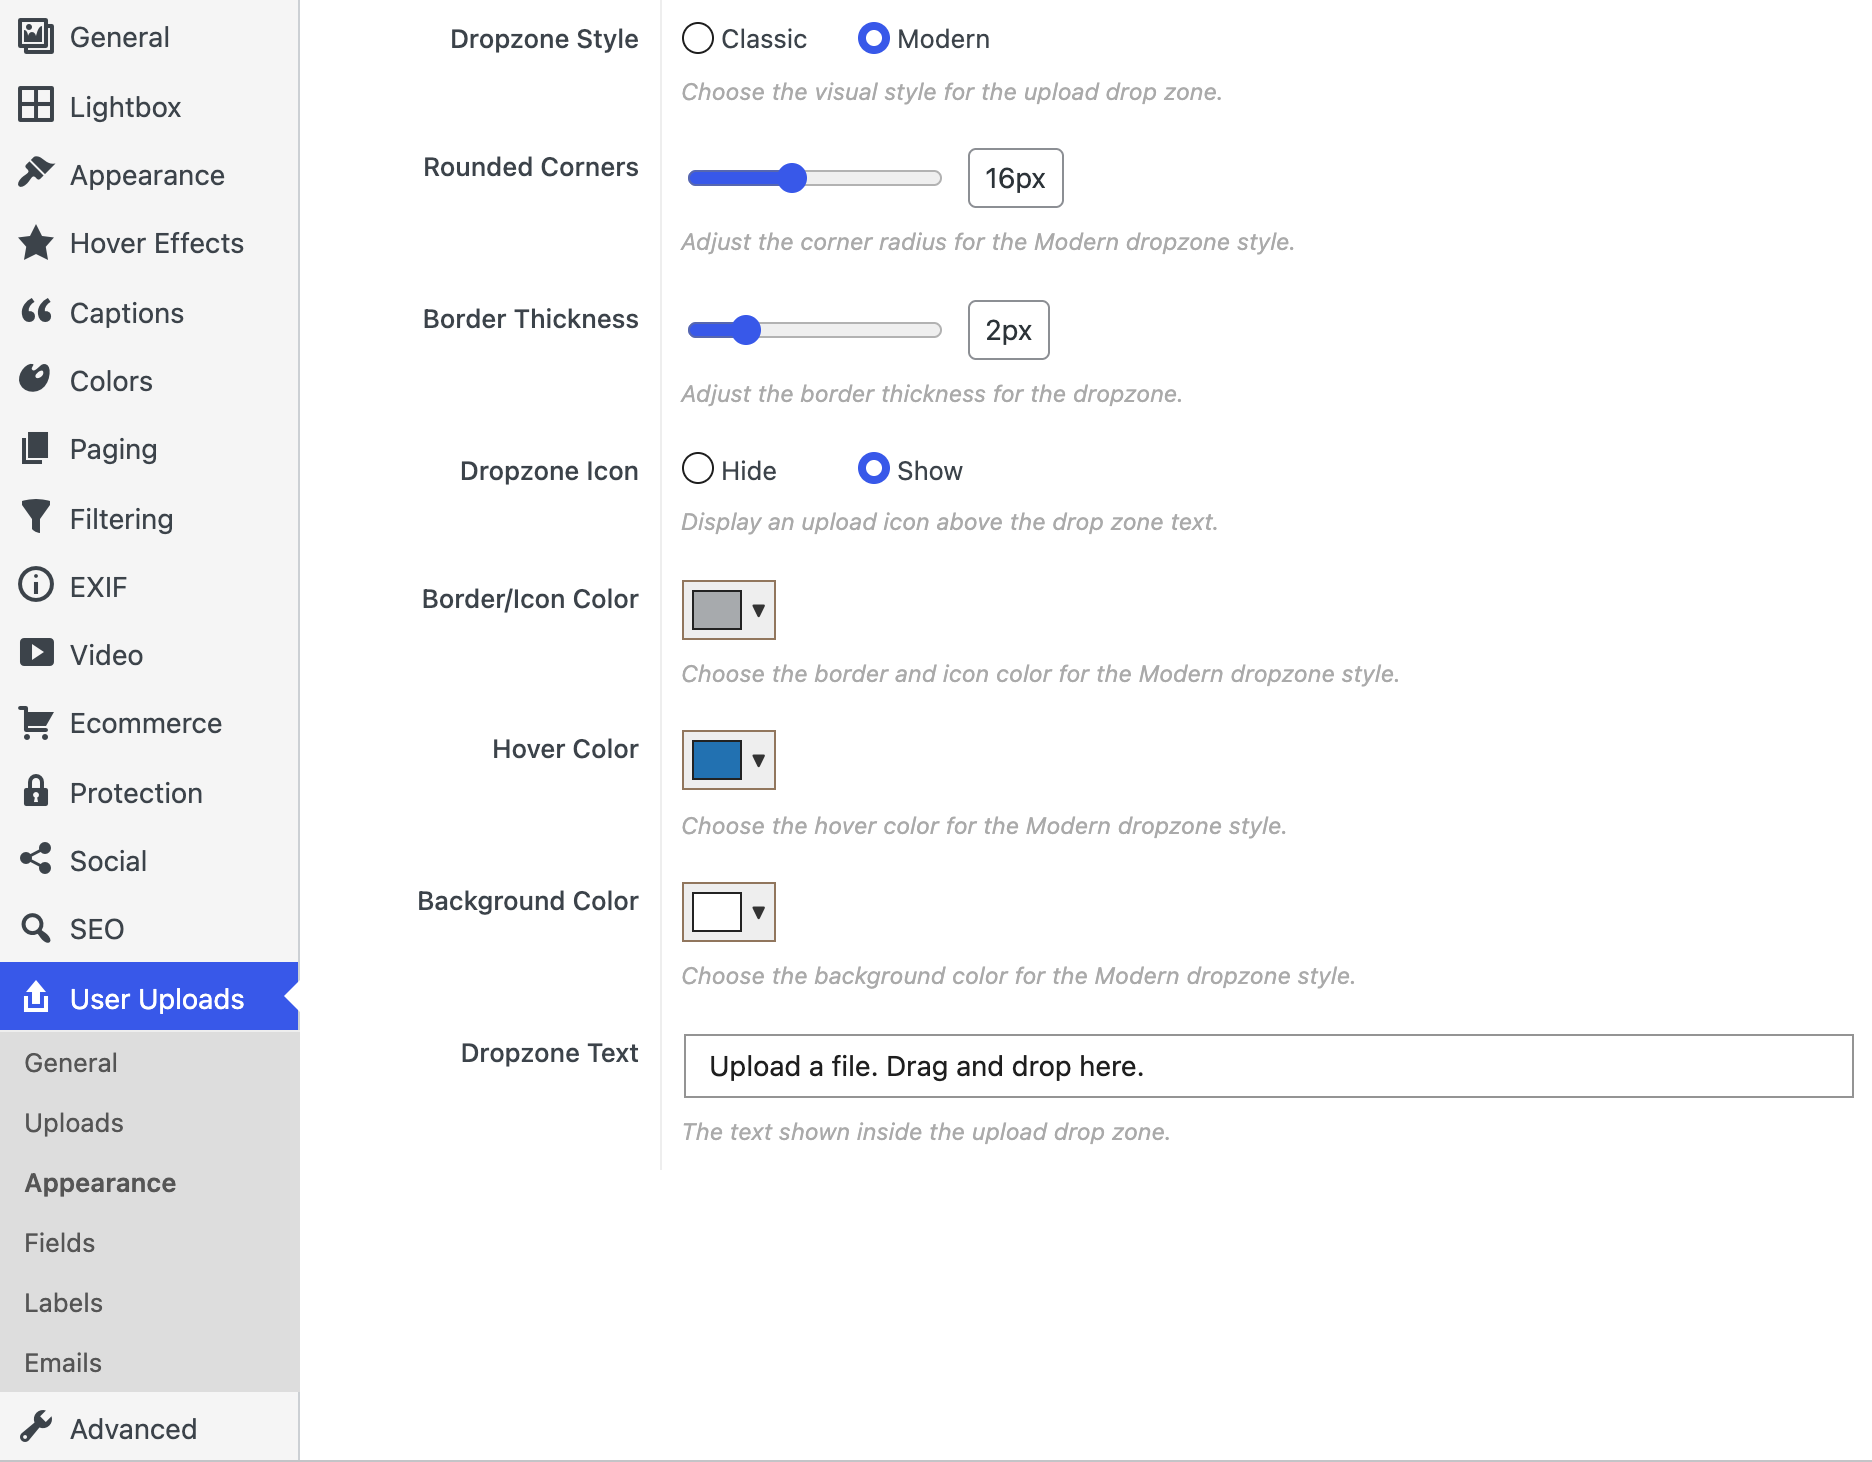
In Appearance, choose Modern or Classic. Modern is the default for new galleries; existing saved Classic choices remain unchanged. Configure the dropzone text, icon, border, corner radius and colors. Use clear text such as Choose photos or drag them here, and keep labels and limits readable against the background.
Preview without uploading
In General, choose Preview Upload Form, or click the upload area in the gallery preview. The preview uses a dummy image and your current unsaved field settings, custom labels and required indicators. It also works when the front-end form is hidden or uses a shortcode. Upload is disabled and nothing in the preview is uploaded or saved.
The preview checks the form design. Save the gallery, then test permissions and a real submission from the published page in a private browser window. For a phone check, use an actual narrow viewport or phone as well as the gallery editor.
If a field or label is missing
Check the setting is Show or Required, the label belongs to the correct field, and the gallery has been saved. Confirm the page uses that gallery’s upload form. If you changed email collection, also review email settings.
Related: Getting started and all guides · Try the upload demos.


