
Want to display eye-catching announcements on your WordPress website? Then you need an announcement banner plugin. In this article, we introduce you to the popular FooBar plugin and run through the steps of using it to add announcement banners to your site.
What Are Announcement Bars and Why Use Them?
An announcement banner is a notification bar that displays important messages on WordPress websites. These eye-catching elements help capture visitor attention and drive conversions. To add them to your site, you have two main options:
- WordPress Plugins: The easiest method, plugins let you create professional banners without coding. Easy Notification Bar offers basic text announcements with simple color options. Simple Banner creates standard notification bars with link functionality. For more advanced needs, plugins like FooBar provide multiple banner types, positioning options, and conditional display rules.
- Theme Customizer: Some WordPress themes include built-in announcement bar functionality. You can find these options in the WordPress dashboard under Appearance > Customize.
An announcement banner may also be called a notification bar, welcome bar, or hello bar. Although WordPress doesn’t include announcement banner functionality by default, it’s an extremely useful feature to have, especially if you run a WooCommerce store on your WordPress site, as it increases revenue by capturing leads before visitors leave
The average time visitors spend on a website is less than fifteen seconds, so you need a way to try and keep them on yours and, ultimately, perform the action you’d like them to – whether that’s to subscribe to your newsletter or buy one of your products. Announcement banners can help.
Most announcement bars appear as narrow, site-wide strips in the header of your homepage. However, you can place them anywhere: on specific pages, along the sides, or at the bottom of your site. The key is finding the right balance: your banner should complement your site’s design while still catching the eye.
“Sticky” banners take this a step further by following visitors as they scroll, ensuring your message stays visible throughout their visit. This persistence pays off. By keeping your message front and center, you’re more likely to drive immediate action.
Want to boost engagement even more? Add dynamic touches like emojis or subtle motion effects that draw the eye without overwhelming visitors.
WooCommerce store owners find these bars particularly valuable. They’re perfect for:
- Highlighting sales with countdown timers.
- Announcing new product launches.
- Offering discount codes to visitors.

Often, these timely prompts are what convert a casual browser into a paying customer. But announcement bars aren’t just about sales. They’re equally useful for important housekeeping tasks like displaying cookie policy notifications or sharing service updates. With a versatile plugin, you can adapt your banner for virtually any purpose.
Here’s what makes announcement bars particularly effective: unlike popups that block content and force interaction, these bars let visitors browse freely. This respectful approach actually leads to better engagement. When people choose to interact rather than being forced to, they’re more likely to follow through with your desired action.
Method 1: How to Add an Announcement Bar Using Theme Customizer
Some WordPress themes include built-in announcement bar functionality, such as Blocksy, Astra Pro, and OceanWP. This method requires no plugins:
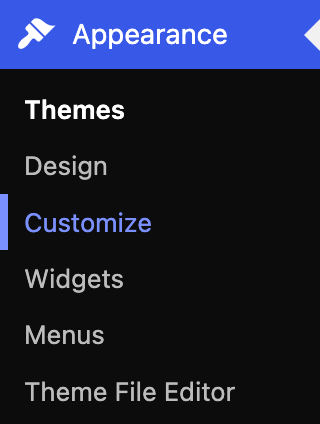
- Navigate to Appearance > Customize in your WordPress dashboard.
2. Look for “Announcement Bar” or navigate to Header > Top Bar in the customizer menu and enable it.
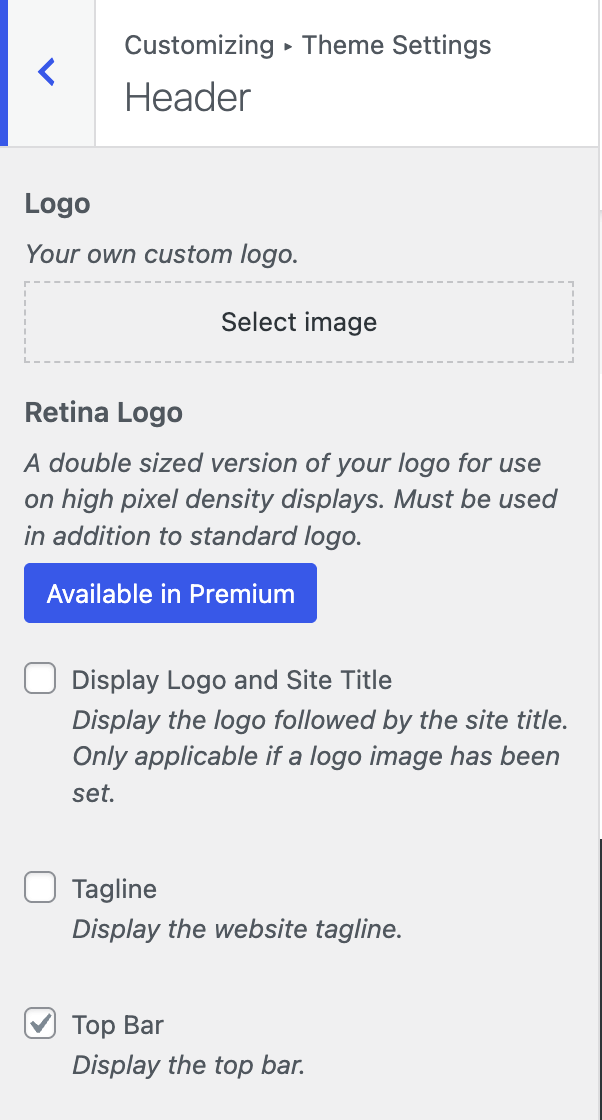
3. Enter your message and choose display settings, like the position and color.
4. Publish your changes.
👉 Note: This method only works if your theme includes announcement bar features. Most themes offer basic text and color options without advanced functionality like countdown timers or conditional display rules.
Method 2: How to Add an Announcement Bar with Plugins
While theme customizers offer basic announcement bar functionality, plugins provide significantly more flexibility and features. You’ll get advanced targeting options, better design controls, and the ability to create multiple banners for different purposes – all without touching your theme’s code.
Among the available options, FooBar stands out as the most comprehensive solution for WordPress users who want professional-looking announcement bars with minimal setup.
Introducing FooBar for Announcement Banners
FooBar is a versatile announcement banner plugin for WordPress. It displays various message types with customizable CTA buttons and works seamlessly with most WordPress themes.
The plugin comes in both free and PRO versions. While the free version covers basic needs with three notification types, the PRO version unlocks seven specialized bar types and advanced features:
Notification bar types
- Free Version: Announcement Bar (simple messages), Call-to-Action Bar (with CTA button), Cookie Notice (with “Accept” button).
- PRO Only: Countdown Bar (creates urgency), Tweet Bar (social media growth), Sign Up Bar (newsletter subscriptions), WooCommerce Free Shipping Bar.
PRO features
- Flexible Positioning: Place banners in 12 different positions (top, bottom, inline, left, right) with unlimited banners per site.
- Design Customization: Custom colors, fonts, sizes, toggle icons, and transition animations.
- Smart Display Rules: Schedule banners for specific dates or show them only on certain pages.
- WooCommerce Integration: Target specific WooCommerce pages (shop, cart, products, categories).
- User Experience Controls: Remember visitor preferences with open/close states and timed resets.
- Easy Implementation: Shortcode support for quick banner placement.
For WooCommerce stores, the PRO version offers targeted banner display. Select specific page types where your banners should appear – whether that’s your shop page, cart, individual products, or category pages. This precision targeting ensures your messages reach customers at the right moment in their shopping journey.
The plugin also respects user preferences. Set triggers for opening and closing banners, and the system remembers each visitor’s choice. You can even configure banners to reset after a specific time period, giving visitors another chance to see important messages.
Implementation is straightforward thanks to shortcode support. Simply paste the generated code wherever you want your banner to appear.
Perhaps the most powerful feature for ecommerce is the Countdown Bar. Nothing creates urgency quite like a ticking timer showing when a sale ends or a special offer expires. The psychology is simple but effective: visitors seeing a countdown typically click through just to check what they might miss. They don’t want to risk overlooking something valuable.
The Best WordPress Notification Bar
FooBar is an easy-to-use WordPress notification bar plugin, draw attention, boost conversions and capture leads.
How to Add an Announcement Bar in WordPress with FooBar
Now that you’ve got the general idea about what can be done with the FooBar plugin, you’re probably eager to get started on your first announcement banner. Let’s go through the basic steps.
Step 1: Install and Activate FooBar
Choose the current FooBar PRO plan from the pricing section, then complete checkout.
- Once you’ve processed payment, check your purchase and activation email for the download link, as well as your FooPlugins license key.
- Download the .zip file containing FooBar and save it to your computer.
- On your WordPress dashboard, go to Plugins > Add New. At the top of the screen, click on the option to Upload Plugin, and the below screen will appear.
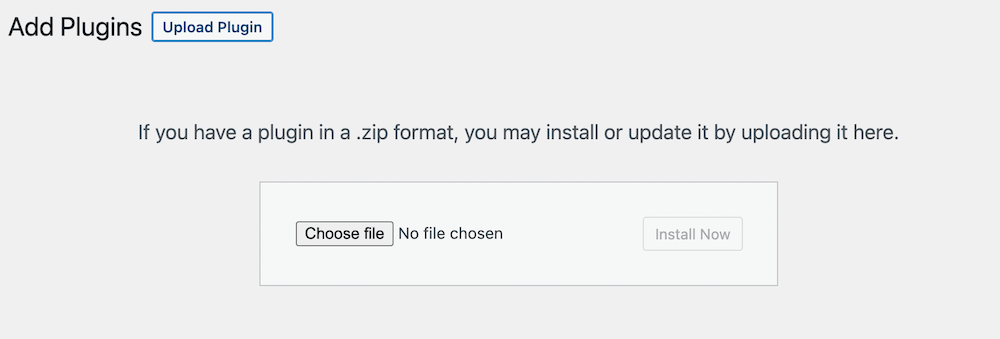
- Either drag and drop the .zip file into the area provided or browse for it. Once it’s uploaded, click on Activate now and enter your license key from FooPlugins when prompted (for the PRO version). Then you’re ready to start announcing!
Step 2: Create your Announcement Banner
In your WordPress dashboard go to Plugins > FooBar > Add Notification.
This displays different bar types down the left panel. Click on a bar type to see its overview and use cases. Choose your bar type carefully as each includes specific settings. For example, the Countdown bar includes time and date configurations.

Step 3: Customize Colors, Transitions, and Effects
For each of the notification bar types in FooBar, you can adjust the basic appearance of the bar. The below image shows you the basic appearance settings for FooBar PRO.
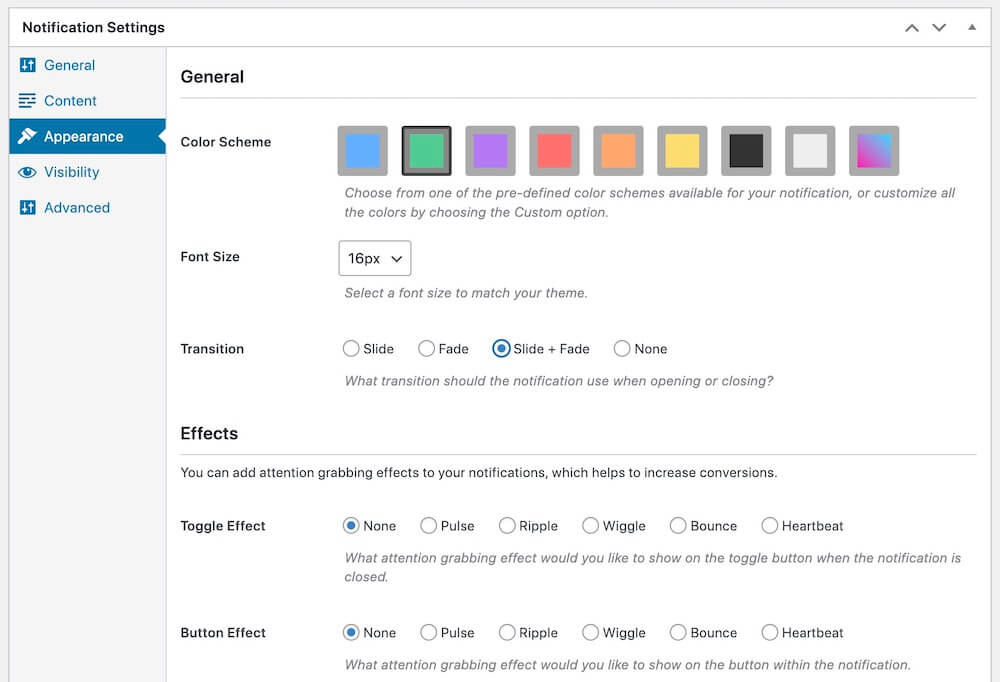
First, you can choose your bar’s color from a choice of six, as well as black and white (in FooBar PRO, you can customize your own colors and add gradient colors).
Next you can set your transitions, which is how the bar behaves when it opens or closes.
The toggle is the small button at the side of the bar with an icon. You can set what happens if it’s clicked, and its position on the bar.
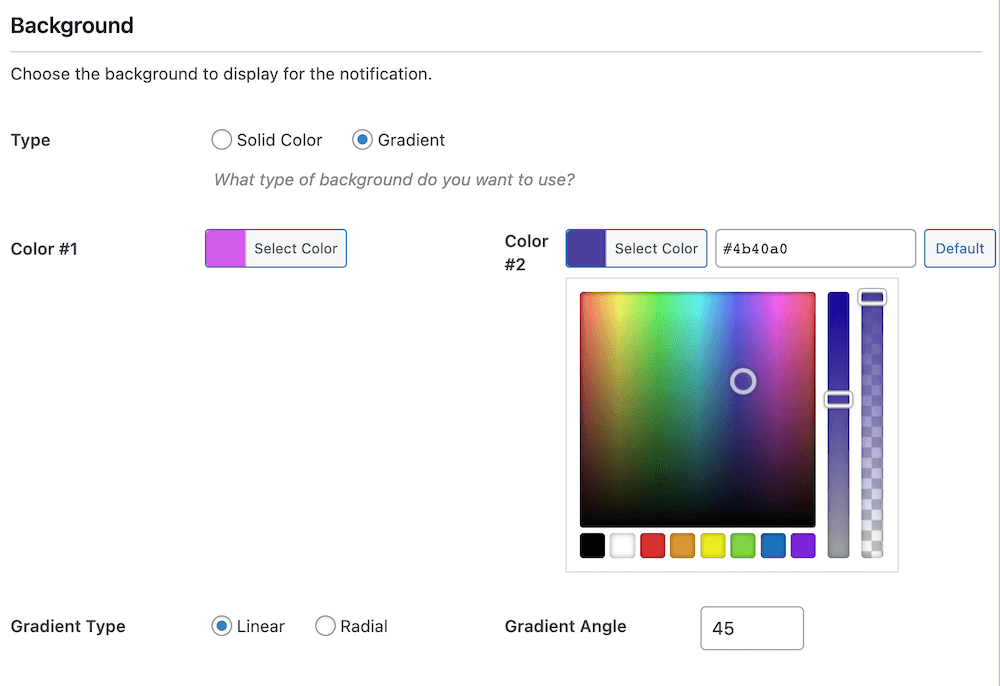
In the below image you can see FooBar PRO’s more advanced appearance customization options. You can create the color of your liking and adjust your banner’s text size.
In the next image, you will see that FooBar includes a variety of icons, such as for the expand or collapse function, or to dismiss the bar. FooBar PRO lets you select the icon used in each instance – you might want to use the price tag icon for a sale, or the email icon for a sign-up bar.
In the Appearance settings for your bar, you can add attention-grabbing effects to your banners with FooBar PRO. Have a look at the example notification bar below:

You can set an effect for the toggle, the button, or both. The effects you can choose from include:
- Pulse – a single pulse of the element.
- Ripple – several consecutive pulses.
- Wiggle – the element moves up and down and side to side.
- Bounce – the element moves up and down.
- Heartbeat – the element expands and contracts twice.
When customizing your banners for maximum conversions, keep these principles in mind:
- Effects: Less is more. A subtle pulse on your CTA draws clicks without annoying visitors. Always test on mobile where animations can impact performance.
- Colors: Use red or orange for urgent sales, green for positive messages like free shipping. Strong contrast is essential – banners that blend in don’t convert.
- Messaging: Keep it under 10 words with value upfront (“50% OFF Today”). Your CTA should command action. For instance, “Claim Discount” beats generic “Learn More.”
- Timing: Display banners after 3-5 seconds, not immediately on arrival. Include a dismiss option – visitors who feel in control engage more with your offers.
To maximize your banner’s conversion potential through customization, follow these best practices:
- Keep banners under 100px in height to avoid overwhelming visitors. Top-of-page placement typically converts best for important announcements, while bottom placement works well for cookie notices.
- Use font sizes between 14-18px for body text and 16-20px for CTAs. Maintain a clear hierarchy with bold headlines and regular weight body text.
- Add adequate padding (15-20px) around text and buttons to improve readability and clickability, especially on mobile devices.
- Test your banner across different screen sizes. Ensure text remains readable and buttons are easily tappable (minimum 44x44px touch target) on mobile devices.
- Optimize any images or icons to keep banner load times under 1 second. Slow-loading banners can hurt both user experience and conversion rates.
Step 4: Configure Your Display Settings and Preview Your Banner
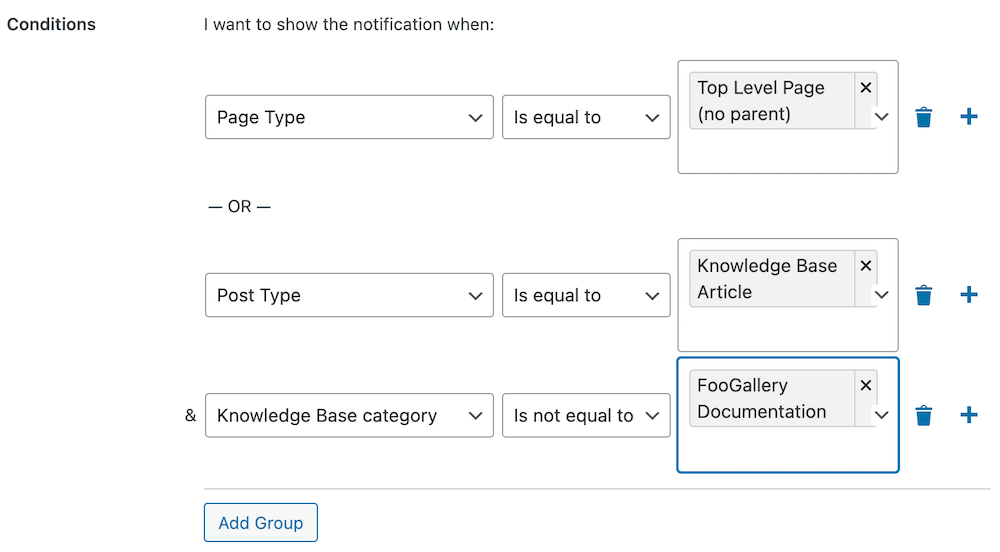
The visibility settings, shown below, let you specify where each of your notification bars appear on your site. By default, FooBar notification bars are set to Shortcode, meaning they won’t appear on the frontend of your site until you have pasted the shortcode onto a page or post on your site. You can find the shortcode for each bar on the right side of your FooBar settings, under the Publish options. Simply copy this code and use the Shortcode block to insert it onto a page.
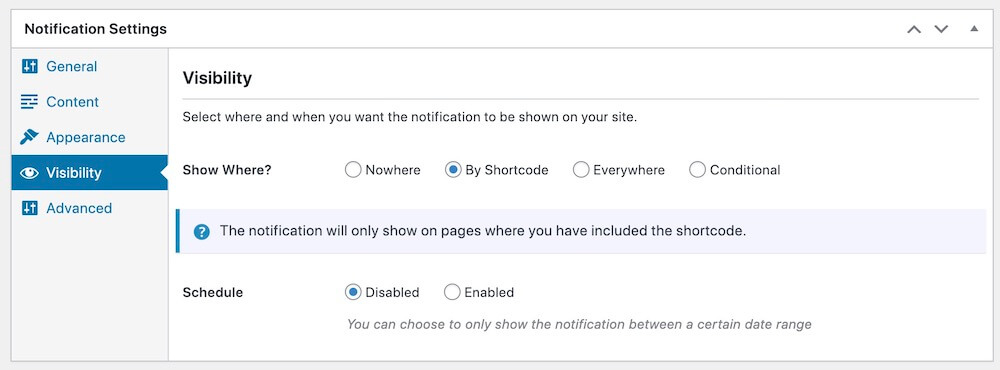
But you can also choose to display your bar on all pages, or select options. If this is a feature that interests you, follow our guide for an overview of FooBar PRO’s more advanced visibility settings.
While configuring your settings, FooBar provides a real-time preview of your notification bar, showing changes as you make them. The preview appears on the edit page in your selected position (note: for Inline positioning, it displays below your settings in an Inline Preview field).
Once satisfied with your setup, click publish to make your banner live in your chosen position. With FooBar PRO, you can also schedule banners to appear at specific times.
Advanced Conversion Options with FooConvert
FooBar handles announcements effectively, but what happens when you need comprehensive conversion funnels that go beyond basic notification bars? This is where many site owners find themselves asking: “How do I scale beyond simple announcements to full conversion optimization?”
FooConvert addresses this exact pain point by providing advanced conversion tools that track which widgets generate the most revenue, allowing you to optimize accordingly. While FooBar focuses on announcements, FooConvert delivers a complete conversion optimization platform.
Understanding the Product Relationship
FooBar and FooConvert are separate products within the FooPlugins ecosystem, not bundled together. They serve different purposes and require separate purchases:
- FooBar: Specializes in announcement bars with basic display options.
- FooConvert: Offers bars, flyouts, and popups with detailed analytics and advanced conversion features.
The overlap exists in bar functionality, but the difference is significant. FooBar’s bars are designed for announcements and notifications. FooConvert’s bars are conversion-focused with sophisticated targeting, A/B testing capabilities, and revenue tracking.
When to Use FooBar vs. FooConvert
- Use FooBar alone for straightforward announcement needs like welcome messages, sale notifications, or cookie notices.
- Use FooConvert instead when you need comprehensive conversion funnels with detailed analytics showing visitor behavior and revenue attribution.
- Use both together for maximum flexibility. FooBar handles ongoing announcements while FooConvert manages targeted conversion campaigns.
If you’ve just set up FooBar, you don’t automatically need FooConvert unless you’re ready to dive into advanced conversion optimization with detailed performance tracking.
The migration path is straightforward: start with FooBar for basic needs, then add FooConvert when you’re ready to scale your conversion efforts with data-driven insights and advanced targeting options.
Best Practices for WordPress Announcement Bars
1. Craft Conversion-Focused Messages
Every word counts, so focus on clear, compelling messages that communicate value instantly. Instead of generic text like “Sale Now On,” use specific offers like “Save 20% Today Only.” Visitors should know exactly what you’re offering and what they need to do next without having to think about it.
2. A/B Test Different Offers
Test different discount percentages, messaging approaches, and call-to-action buttons. Small changes like “Get 20% Off” versus “Save $50 Today” can significantly impact conversion rates.
3. Time Your Announcements Strategically
Display promotional banners during your audience’s peak browsing hours and align seasonal offers with natural buying patterns.
To prevent announcement fatigue, rotate your messages regularly so nobody ends up seeing a “limited time” offer for three months straight. For global audiences, consider timezone differences when scheduling your announcements.
4. Optimize for All Devices
Most of your visitors are probably browsing on their phones. Ensure your text remains readable with a minimum font size of 14px on smaller screens. All interactive elements should be easily tappable on mobile devices, and banner heights should adjust appropriately across different screen sizes.
5. Choose the Right Banner Type
Different messages require different approaches. Use countdown timers when you need to create urgency for limited-time offers.
Reserve cookie notices for first-time visitors, and position free shipping bars where they’ll have the most impact, typically on product pages. Think about timing with email signup forms, too – showing one immediately feels pushy, but waiting until someone’s read a blog post or browsed products feels more natural.
Create High-Converting Announcement Bars on WordPress with FooBar or FooConvert
You now have two proven methods to add announcement bars to your WordPress site. The theme customizer handles basic announcements well.
FooBar takes you further with professional notification bars that work across all themes. FooBar PRO unlocks the real power: countdown timers that create urgency, WooCommerce free shipping bars that boost order values, and advanced targeting that shows the right message to the right visitors.
For sites needing comprehensive conversion optimization beyond announcement bars, FooConvert provides popups, flyouts, and detailed analytics to track which campaigns actually drive revenue.
Your announcement bar works only as hard as the message it displays. Focus on clear value propositions, test different offers, and always include a compelling call-to-action.
Pick your method and create your first announcement bar. Your visitors are leaving in 15 seconds – make those seconds count.