
If you own or run a WooCommerce store, you’ll know that sales are key to its success – but you may be asking, How do I set sale prices that will actually work?
There are several reasons why you might want to add sale prices to your WooCommerce store:
- Sales attract new customers. When people see that your products are on sale, they are more likely to click through and check out your store, so as not to end up with FOMO.
- Sales can help you boost sales to existing customers. When you offer a discount, people are more likely to buy something they only considered buying before.
- Sometimes, ecommerce stores need to clear out slow-moving or excess inventory – sales are a great way to do this.
- Online store owners use sales to leverage holidays or special occasions, such as Christmas or Valentine’s Day. Sales are also ideal for promoting new products.
- Sales may be a necessity if your competitors are running them, in order for your WooCommerce store to retain and attract customers.
In this article, we give you step-by-step instructions on how to set sale prices for simple, variable, bulk, and grouped products to ensure your sales are a success. We also discuss how to optimize your sale price strategy and use analytics to improve your sales performance.
Setting WooCommerce Sale Prices
Setting a Sale Price for Simple Products
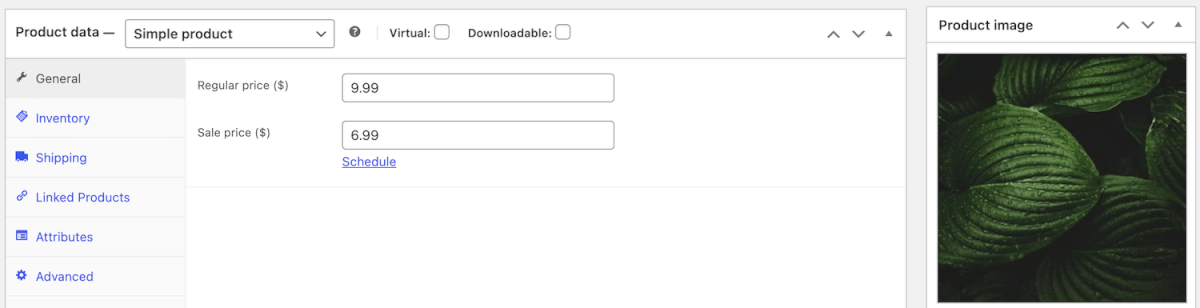
Setting and displaying a simple product’s sale price in WooCommerce is easy. First, navigate to Products -> All Products in your WordPress dashboard. Hover over any product’s title in All Products, then click on Edit. On the pane that opens, scroll down past Product description until you get to Product data.
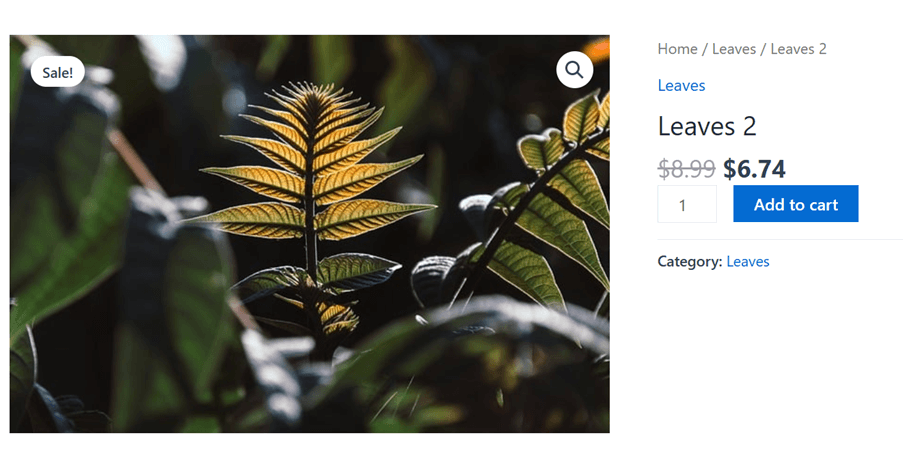
Here you can enter a sale price in the Sale price field. The regular product price for our Leaves photograph in our example photography store – shown below – is $9.99, so we’ll make the sale price $6.99.
Once you’ve entered the sale price, scroll back up the page and click Update on the right. This will add the sale price to the product page. To make sure it has been added correctly, click View Product at the top left.
Below is our leaf photograph, complete with the sale price. Note that a Sale! notification has been automatically added to the product image, at the top left.

Creating a Sale Price for Variable Products
Sometimes you might have variable products you want to discount. These are products that come in different sizes or configurations and vary in price. Variable products display a price range, so customers can click on Choose an option to select a variation from the dropdown:

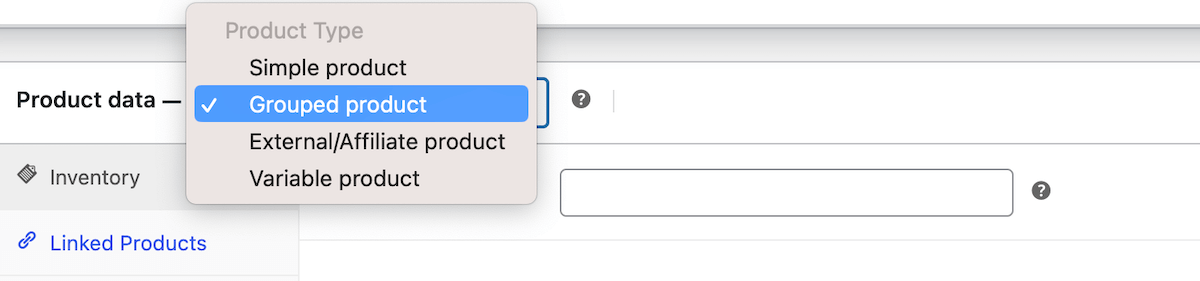
To add a variable product in WooCommerce, you would add the product as usual, but you would set the Product data to be a Variable product. You can then assign attributes to the product (such as size or color), and then generate variations based on these attributes.
For each of these variations, you can add different sizes, weights, colors, etc., along with prices and sale prices. You can do this manually for each variation, or you can set the sale price using the Bulk actions.
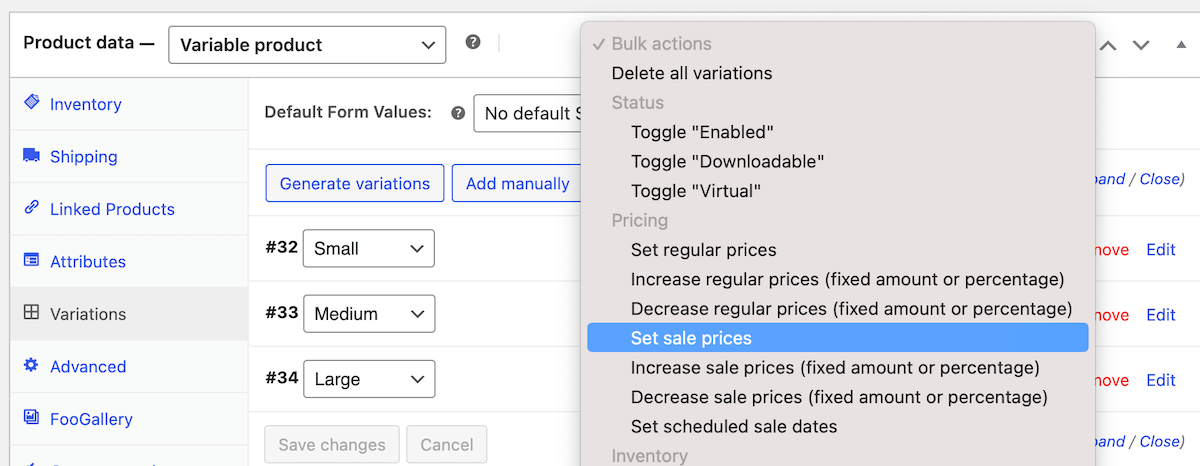
This will bring up a field asking you to enter a value. Enter the value of the sale price in the field provided. This will set the same sale price for all variations. Alternatively, you can enter the sales price manually, and then increase or decrease the sale price in bulk, using a percentage. This will change the sale price for each variable by that percentage.
Click Update to update the product page, then click View product. Instead of a price range, the product will show the sale discount.

How to Bulk Edit Sale Prices
Being able to bulk edit products is a big time-saver in WooCommerce, especially for online stores with a large inventory. It’s great for editing entire product categories at once, responding to seasonal events like Christmas, or reacting to market changes – and it reduces the chances of human error that can creep in if you’re adding sale prices to lots of products manually. Here’s how to easily set discount rules across multiple products:
First, tick the products in your product list that you want to add sale prices to. We’re selecting all In stock products.
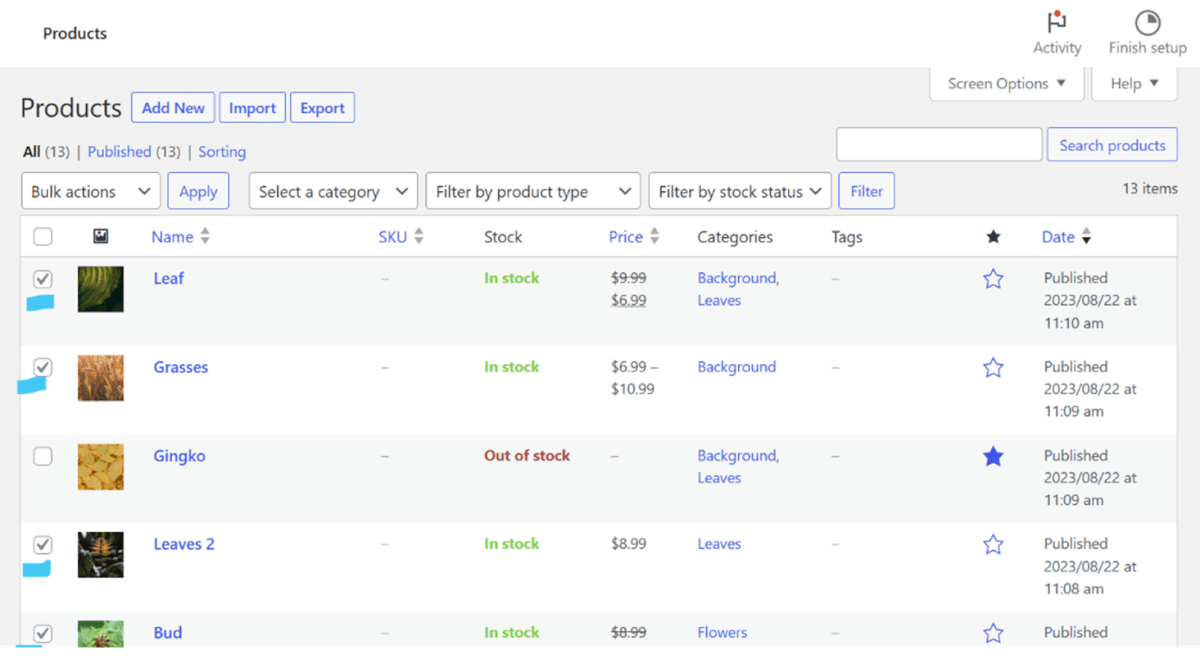
Navigate to Bulk actions at the top left, select Edit from the dropdown, then click Apply (to the right of Bulk actions).

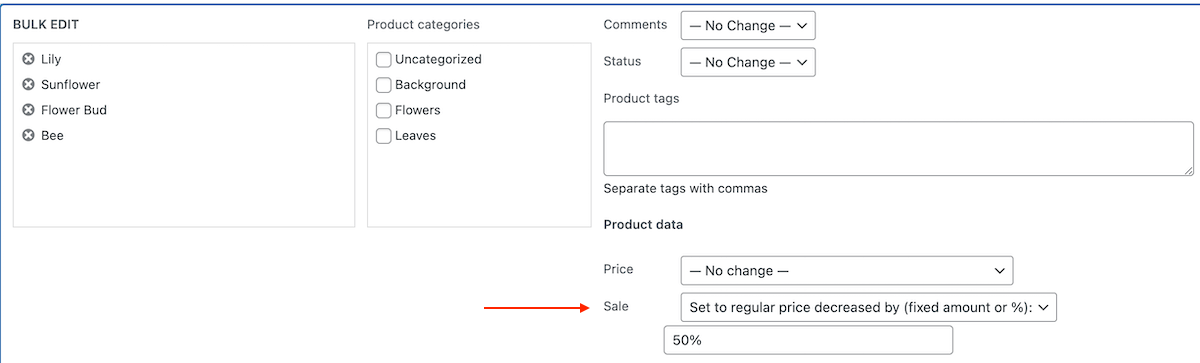
On the page that opens, go to Sale and select Set to regular price decreased by (fixed amount or %). If all products selected have the same regular price, you can simply enter a sale price figure, e.g. ($) 4.99. If they all have different prices, you can enter a % discount.
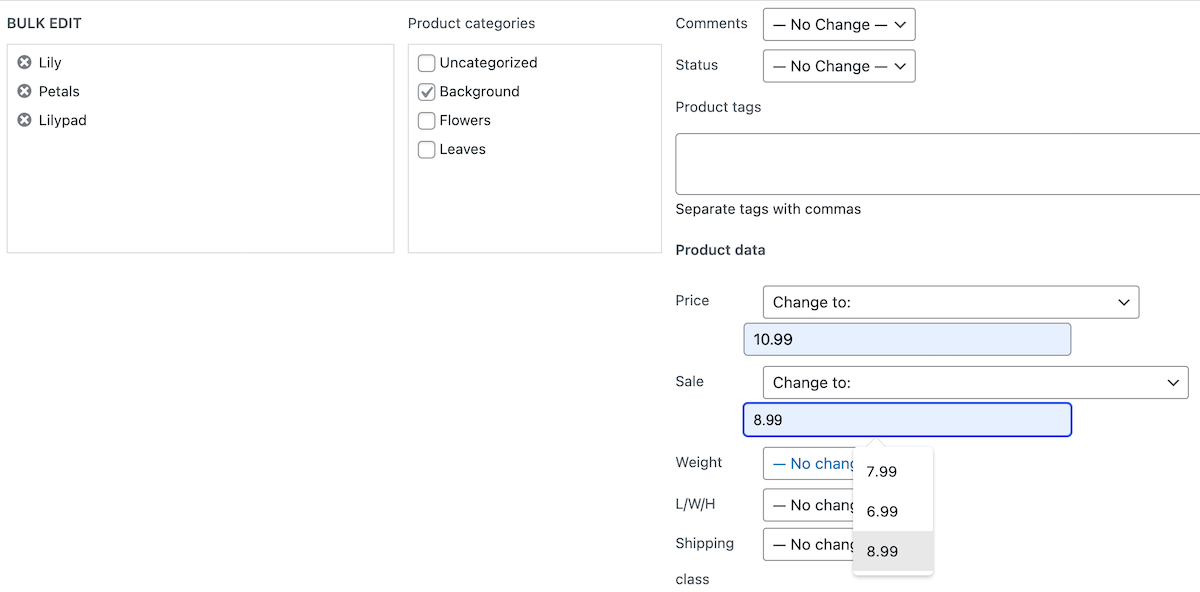
Then scroll down and click Update. Open any of your edited products and you’ll see they’re now on sale, with the discount applied:
Overcoming Challenges in Bulk Editing Prices
While bulk editing prices in WooCommerce can be particularly useful, as we’ve just discussed, there are potential risks or common mistakes that could occur. Here are some to watch out for:
- Accidentally changing the price of the wrong product. Ensure you have the correct products selected before making any changes. And if using percentages, ensure that the end result is what you wanted.
- Trying to bulk edit variable products won’t work! While you can select variable products and apply a discount, it doesn’t actually get applied. If you have a lot of variable products, you can use a separate plugin to manage sale prices.
Applying a Discounted Price to Grouped Products
In WooCommerce, you can use Grouped Products to group certain items together. If you’re selling tableware, for example, you could create a group of related products, such as placemats, coasters, and napkins. This makes it easier for customers to purchase these items and motivates more sales.
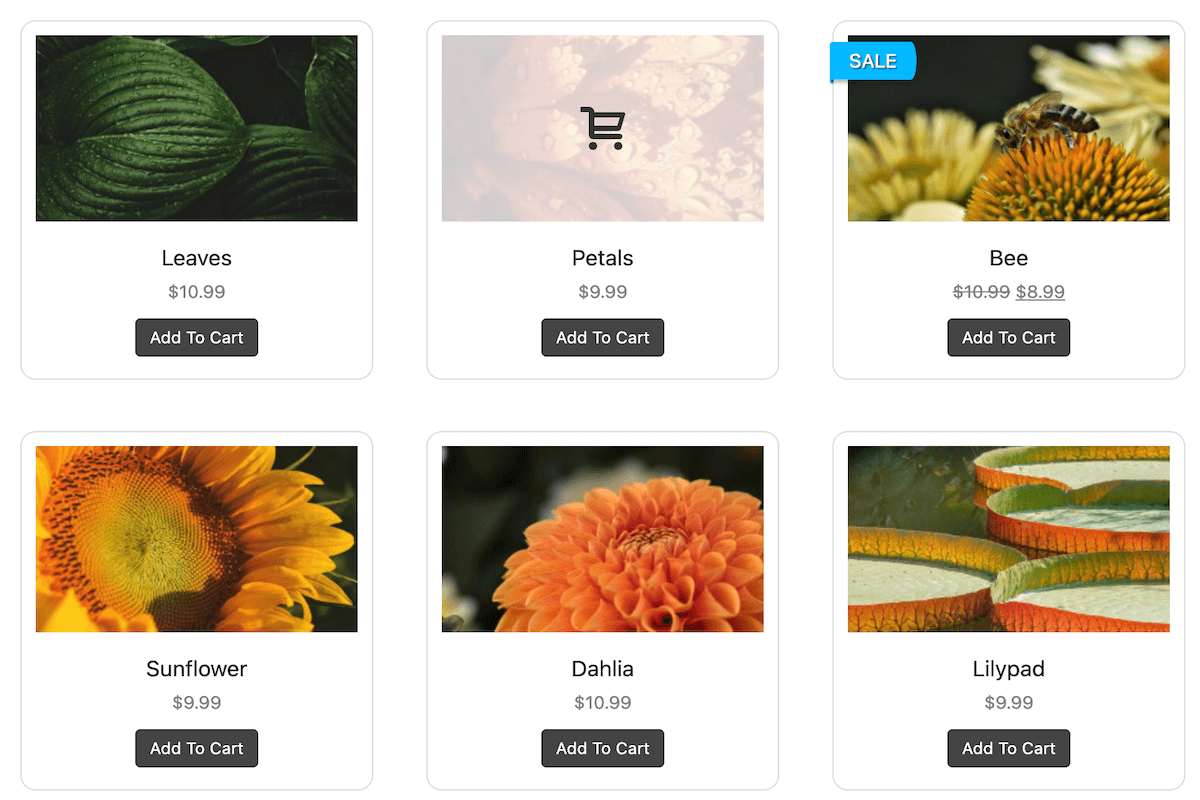
Using our example of backgrounds, here’s how a bundle of background images could appear as a Grouped Product. Customers can select which items they want to purchase and add them all to the cart in one go.
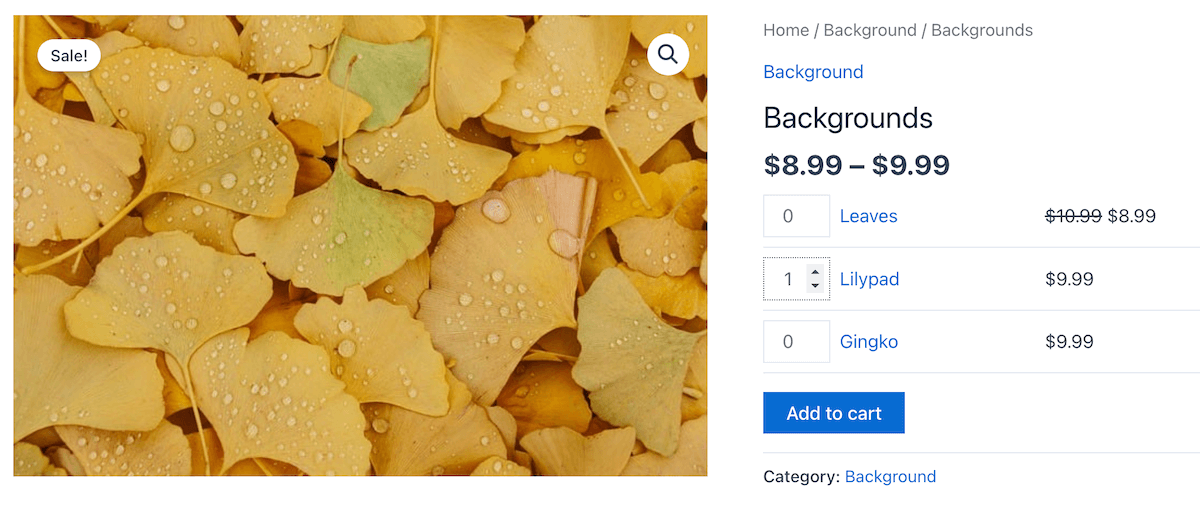
To create a grouped product, set up a product as usual, but adjust the product data to be a Grouped Product. Doing this will mean that the pricing and various other fields will fall away. For this reason, we’ve created a separate general product (Backgrounds), under which we will display our other relevant items.
Now to add items under the Grouped Product, go to Linked Products. In the field supplied, add the Single Products that you want to show up under the main Grouped Product. Save the changes and check that the relevant items are displayed on the front end.
While you can group items together, and you can offer discounted prices on individual items, you can’t apply a bulk discount to all grouped items. However, there are a few tips for managing and updating discounted prices for grouped products.
- You can make use of a separate plugin that allows you to bundle or bulk edit grouped products.
- Alternatively, use the bulk edit tool (discussed above) to apply the discounted price to the Single Products you are displaying as part of the Grouped Product. Any discounts applied to the single products will appear as sale prices on the Grouped Product as well.
How to Update Sale Prices for Specific Categories
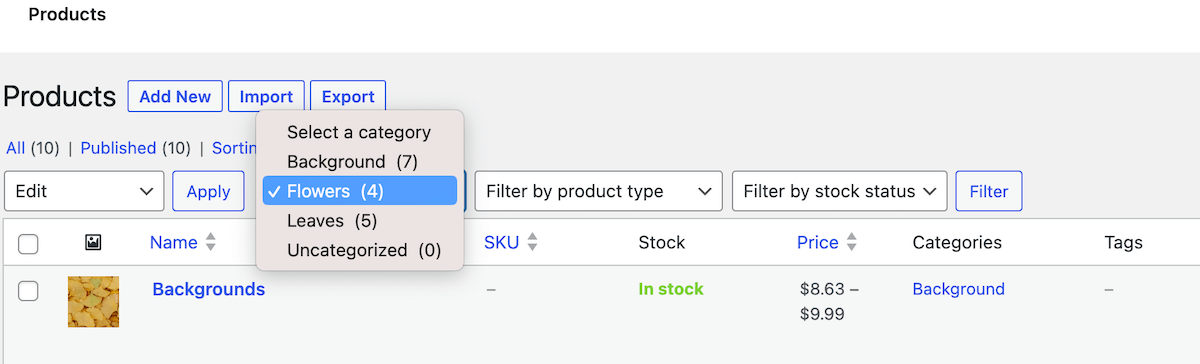
Your WooCommerce store might have single products organized into different categories. In our photography store example, we have put products into the categories Background, Flowers, and Leaves. We want to put all the Flowers products on sale.
First, click on Select a category at the top of your All Products page. Select a category from the dropdown. Then click Filter to list only that category.
Select all products in the category (or just those to which you want to apply the sale price). Click on Bulk actions, select Edit from the dropdown, then click on Apply.
In the page that opens, scroll down to Sale and select Set to regular price decreased by (fixed amount or %). If all products selected have the same regular price, you can just enter a figure, such as $4.99. If they have different prices, you can enter a % discount. We entered “50%”.
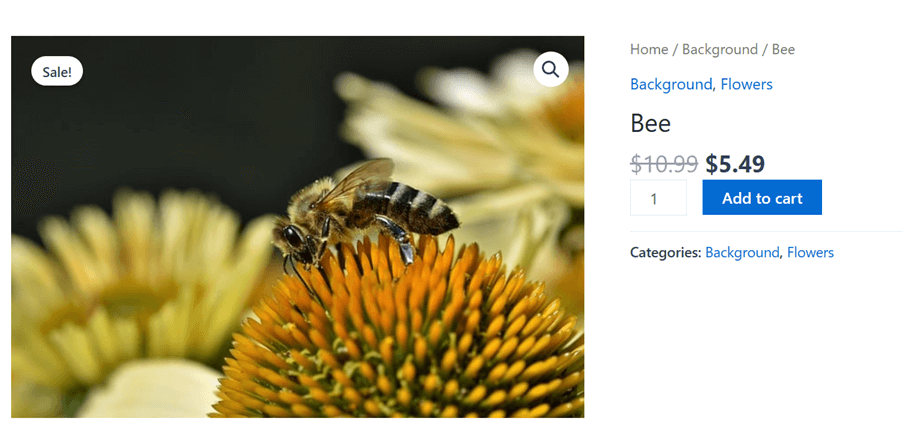
Scroll down and click Update. Now click on any of the category’s products and you’ll see they’re on sale, with the discount applied.

Here are some top tips for managing and updating sale prices for specific categories:
- Using the product filters is an effective way to manage and bulk edit products. You can filter by category (as above) or by Product Type or Stock Status.
- Bear in mind that bulk editing a large number of items has the potential for errors. For example, applying a discount percentage in bulk is useful, but items that are already on sale would see an even greater decrease in price.
- For stores with a large number of products in each category, using a third-party plugin will probably be easier and more effective.
Optimizing Sale Price Display with FooGallery PRO Commerce
When you run sales in your WooCommerce store, you want to make them as visible and compelling as possible. While there’s a lot you can do with the WooCommerce sale price functionary, anything you do is limited to your WooCommerce pages! This limits the visibility of the sales you run.
Want a highly effective way to promote sales elsewhere on your WordPress website? Introducing FooGallery PRO Commerce, a dedicated WordPress/WooCommerce plugin that allows you to create and customize (including CSS) product galleries (caption, watermark, “add-to-cart button” and more) anywhere on your WordPress site, such as on your homepage. This is great, because someone landing on your site may not even know you’re running a sale in WooCommerce. Now they will!
FooGallery PRO Commerce comes with a selection of gallery templates including grid, slider, Polaroid, masonry, carousel, and a dynamic product gallery especially created for WooCommerce users.
This plugin integrates deeply with WooCommerce, meaning you can pull products directly into your product gallery from WooCommerce. Your customers, in turn, will be able to click on the CTAs on a gallery product to visit the single product page, instantly add the product to their WooCommerce cart page, or go straight to the checkout page.
To highlight discounted products in the gallery, you can add colorful customizable sale ribbons or sale badges with FooGallery PRO Commerce:


To make ribbon application easy, the gallery automatically identifies, from your WooCommerce Product Datasource, which products are on sale – and adds your selected sale ribbons to all of them. You can also add the ribbons manually. Besides their design, you can customize the text of these ribbons to test what compels customers the most; they don’t have to just say Sale. Think Flash Sale or 25% Now Off.
With FooGallery PRO Commerce, create and populate a gallery; integrate it with WooCommerce; customize the settings, and more. Plus it comes with a Master Product feature, and File Downloads – both of which are a must for photographers selling images online.
How to Optimize Your Sale Price Strategy
Create More Compelling Offers
You want the backend (WooCommerce) of your next sale to work as effectively as the front end (your product gallery), so focus on ways to make this more compelling.
Start by setting realistic sale prices or discount percentages. Use the Google Shop filter to get a ballpark idea of which online stores are selling products similar to yours, and what prices they’re setting them to. If your sale price isn’t better than a competitor’s, you may lose customers to them.
Yet, if your sale price is too low, customers might perceive the product as being substandard and the profit margin on your sale will be tiny. Ideally, you want to discount below competitors’ prices and about 25 – 30% below the general price range for your product category.
Use descriptive and persuasive language in your product descriptions, to increase products’ perceived value. Discussing special features or how products were made can make them more appealing to customers. You can also enhance products visually, by showing off their features in greater detail via an image lightbox.
FooGallery PRO Commerce comes with a lightbox included but, if you want the same functionality for WooCommerce single product pages, check out the FooBox PRO plugin.
Set Time-limited Sales
Running sales on WooCommerce for a limited time can add a sense of urgency and instill FOMO in your customers, prompting them to make snap purchases. Let’s take a look at how to schedule your discounted products for a limited period only.
In our example, we want to timebox a few products for a one-week sale.
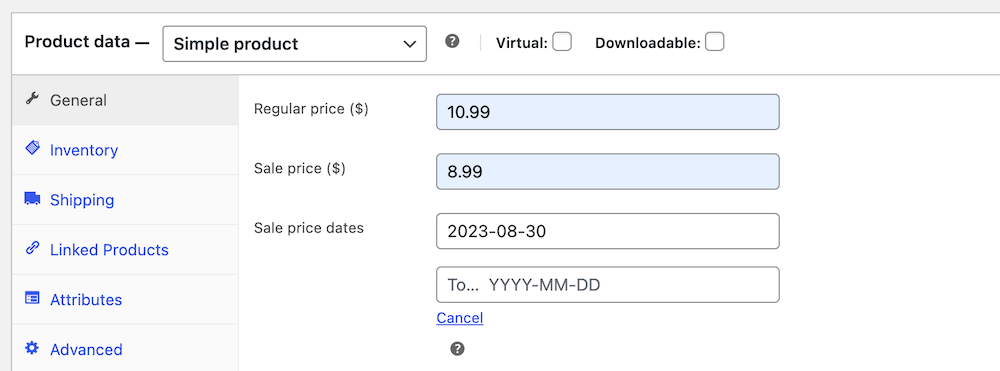
In All Products, hover over the title of your products and click on Edit. On the tab that opens, scroll down to Product data, enter your sale price (we’re giving 50% off), then click on Schedule, below it. Enter the start and end dates for your sale.
Now scroll up and click Update. On day one of your sale, check that it is running as scheduled.
Some tips for running successful time-limited sales:
- Run them at the end of the month when consumers are likely to be banking salaries or other income.
- Run them ahead of special occasions, like Black Friday. Your customers will be primed to shop for those occasions (and save) when your sale pops up.
- Consider, as an alternative to product discounts, free shipping. This too is a form of sale and online shoppers have been shown to respond well to it.
- Add urgency to your sale with a “while stock lasts” message – and use custom code to enable customers to track your remaining stock.
- Increase your sale’s visibility and urgency by displaying an eye-catching countdown timer on your home page, set to hit zero when your sale ends. The best way to do this is with a plugin like FooBar PRO, which lets you create and customize attention-grabbing countdown timers right on your home page. Here’s a demo for a Black Friday sale countdown bar:
- Consider time-limited coupons as a means to attract new customers and encourage existing ones to return.
Leverage Up-Sells and Cross-Sells During a Promotion
While working to increase sales through FOMO, you can also work on increasing customers’ basket size, through up-selling and cross-selling. Up-selling means that when customers view a product, you can show them higher-priced, similar products on sale. In cross-selling, you’d suggest other products that pair well with the one customers are looking at, making up a set.
You can have WooCommerce show products from the same category to be displayed as related products on the product page, and cross-sells can be displayed in the shopping cart.
You can also use FooGallery to display your own manually-curated up-sells and cross-sells within your product galleries, or create collections to put on sale, as in our product gallery demo.
Check Sales Results and Use Analytics Tools
It’s important to strategize your sales based on analytics. If you click on the Analytics tab in your WordPress dashboard, you can see how specific products are performing in a sale, as well as any coupons you may be running. You can track your top-selling categories and individual products, which will help you identify low-selling stock that it may be worth adding to your sales.
You can also integrate WooCommerce with Google Analytics to see which pages are generating the most traffic. You’ll also be able to see how customers are coming to your sale, for example from social media, email, Google Ads, search, or organic discovery. This could help you optimize your marketing strategy.
Using Analytics to Optimize Your Sale Prices
WooCommerce Analytics is a suite of analytics tools that can give you invaluable insights into your orders, revenue, downloads, and much more. Based on these reports, you can see which products, or which product types, are selling better. Or you can examine which price points are a better fit for your audience. You can also use the data to make informed decisions about your sales page.
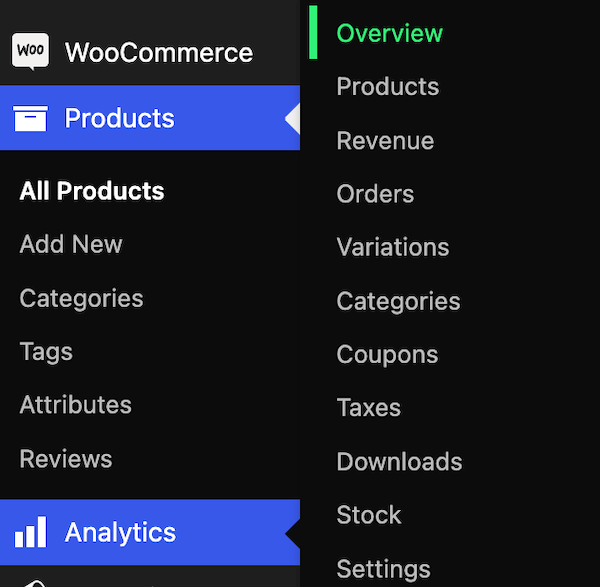
To get started, navigate to WooCommerce Analytics from your WordPress dashboard. From there, you can head to the Overview, for a snapshot of all the reports, or you can take a more in-depth look at your orders, Stock, Coupons, and so on.
Depending on the report you are looking at, you can look at data from the month to date, and from the previous year. This will let you know if orders are up, or if revenue is down. If you’ve changed your price points on downloadable products, for example, and your sales have decreased, you may want to review your pricing strategy here.
To use these analytics effectively, it is important to first understand your customer and their buying journey. This will enable you to meet customer needs while focusing on the relevant metrics. Don’t get bogged down in inventory reports, for example, if your main focus is selling downloads.
Focusing on the analytics and data relevant to your online store will allow you to optimize your ecommerce sales. You can also troubleshoot most issues in WooCommerce by searching the documentation for greater clarity on the various aspects of sale pricing.
Adding and Optimizing Sale Prices in WooCommerce
In this article, we’ve looked at the benefits of adding sale prices to a WooCommerce store. Sales are a great way to boost sales, attract new customers, reward existing customers and clear out slow-moving stock.
You can achieve all of this by adding sale prices to simple products, managing sale prices in bulk, managing them by category or applying them to grouped products. And don’t forget the effectiveness of running a time-limited sale, especially with a countdown timer added!
As we’ve discovered, FooGallery PRO Commerce is a powerful plugin that integrates directly with WooCommerce and lets you display product galleries anywhere on your site, giving your sales greater visibility. This, combined with optimized sales, and the use of WooCommerce Analytics to gain insights on what is or isn’t selling, can give your online business a competitive edge. Take your sales to the next level and create awesome product galleries with FooGallery PRO Commerce.