Are you looking for an easy way to boost your online revenue by selling images? Are you thinking of starting a side hustle to make more money online? Then this article is for you!
Selling digital downloads of photos can be a great source of passive income. Maybe you want to turn your photography hobby into an active career. A popular trend at the moment is using AI tools to generate artwork, which you can then sell online. If you want to sell digital downloads of your images, then you can do this by setting up an online store in WordPress, giving you complete control of the end-to-end process.
Selling digital files was not always an easy or quick thing to do in the past, but we have an amazing solution to accomplish this with just 2 plugins, and it only takes a couple of minutes to set up. In this article, we’re going to take you through the benefits of selling images using digital file downloads. Plus we’ll give you a step-by-step guide to doing this with FooGallery PRO Commerce.
A Simpler, Quicker Process
When selling anything online, you want to make the process as quick and easy as possible. There are several reasons for this:
- The more steps there are in the buying process, the more likely it is that customers will opt out. Cart abandonment can have a big impact on your sales, so you want to keep this to a minimum.
- A simpler, more efficient process means happier customers. Visitors to your site, who can easily find what they’re looking for, are more likely to return, tell others about the site, and/or leave a good review. Not only does this improve sales, but it also builds brand loyalty.
- And if your purchase-path is more straightforward, potential customers are less likely to need assistance or have to ask questions, putting less strain on your or your support team’s precious time.
- The longer it takes for a customer to receive their order, the more likely they will request a refund. Refunds suck! For digital products, this process should ideally be automated so that customers can download their digital goods immediately after paying. The sooner customers get their goods, the happier they will be.
There are numerous ways to improve the efficiency of your online store. Adding elements like Buy Now buttons to products, having a smooth checkout, or using notifications to keep customers informed, all improve the user experience and can also increase conversions and sales. But you also need to showcase and promote your products and, perhaps most importantly, make it easy for customers to purchase your images.
The solution? Creating product galleries on your WordPress site with an easy way to buy digital downloadable files!
Creating a Photo Gallery With Digital Downloads
To achieve all of this on your WordPress site, you need 2 plugins: WooCommerce and FooGallery PRO Commerce. With WooCommerce, you can set up your products, cart, checkout, payment methods and other ecommerce essentials. With FooGallery PRO Commerce, you can create beautiful galleries showcasing your photography, and then connect your galleries to WooCommerce and allow customers to add images to their cart at the specific image sizes that they desire. They can then checkout and pay for those images.
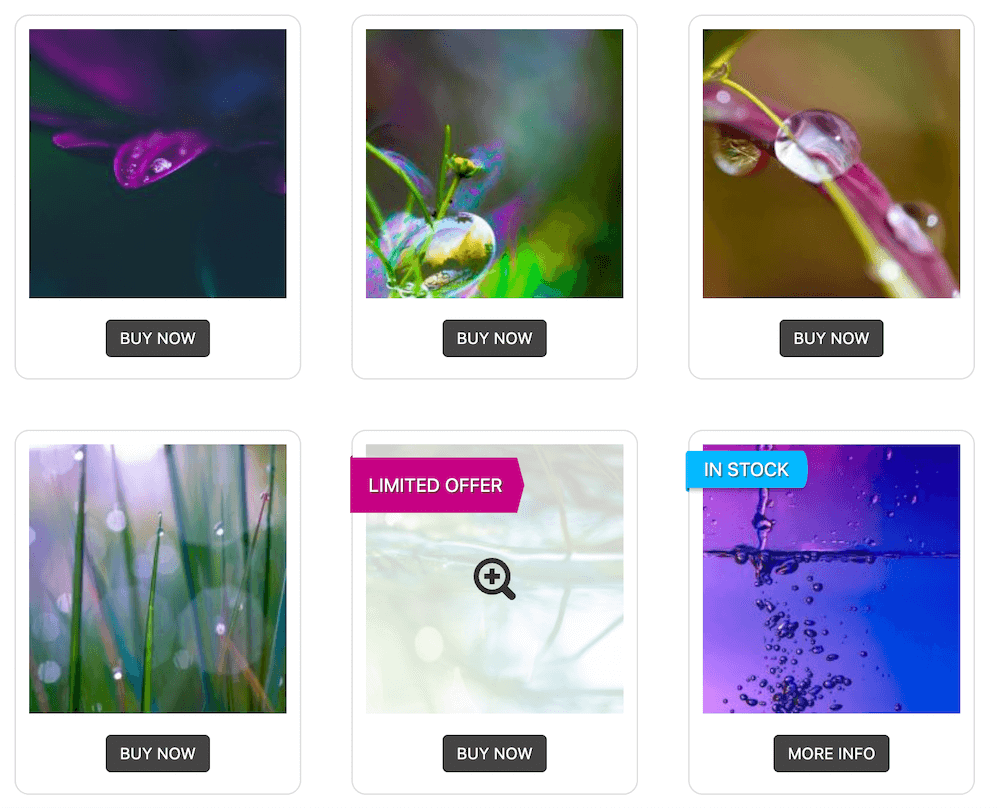
But perhaps the best way to improve the sales process and delight your customers is by utilizing the File Downloads feature. This allows you to set up a single master product for your image gallery, and use this to enable digital downloads for the photos in the gallery. It’s quick to set up, and you don’t need to add individual products for each image in your gallery (FooGallery takes care of this for you).
This makes the process quicker and easier for everyone! Customers shop, buy and then download their purchases – simple.
The Best WordPress Gallery Plugin
FooGallery is an easy-to-use WordPress gallery plugin, with stunning gallery layouts and a focus on speed and SEO.
Adding File Downloads with FooGallery PRO Commerce
FooGallery PRO Commerce has been designed to help you showcase your images or products on your WordPress site, but it also comes with various features that improve user experience and make it easier for customers to purchase your products. With file downloads, it’s also easier to purchase digital downloads through your galleries.
Let’s take a closer look at how this all works:
Step 1: Plugin Setup
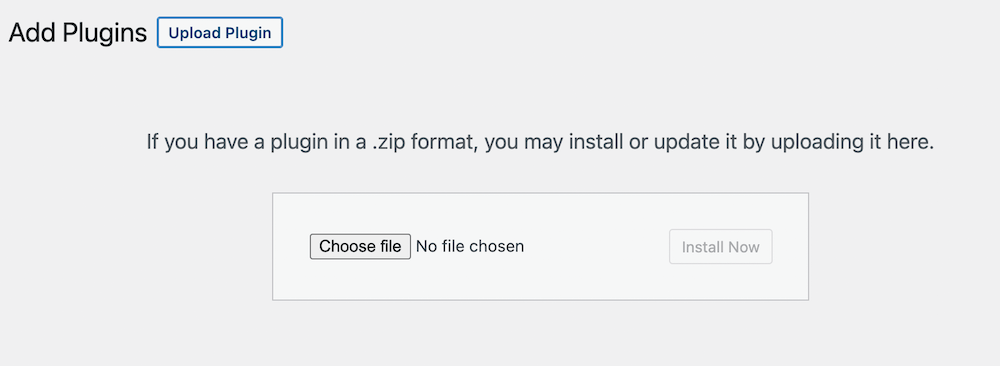
As mentioned, you’re going to need both WooCommerce and FooGallery PRO Commerce for the gallery file downloads to work. You can use the free version of WooCommerce, by downloading and installing it from your plugin page. You can then set up your preferences for your shop.
For FooGallery, you will need the PRO Commerce plan. Once purchased, download the .zip file and install it on your plugins page. You can then start creating galleries straight away.
Step 2: Create a Gallery
Next, you’ll want to create your product gallery. This will be the gallery in which you’ll set up file downloads, and sell your images. Here are the steps you’ll need to follow:
- Click on Add Gallery under FooGallery. A new gallery page will open up.
- Add a title for your gallery and add your media. Here you can select all of the images you would like to sell as downloadable files, either by uploading them or selecting from the media library. Note that the files will be available in up to 3 sizes (which you’ll set up in Step 4).
- Now choose a gallery layout. We recommend the Product Gallery template, as it is already set up with Add to Cart buttons and category filtering, but any of the layouts would work.
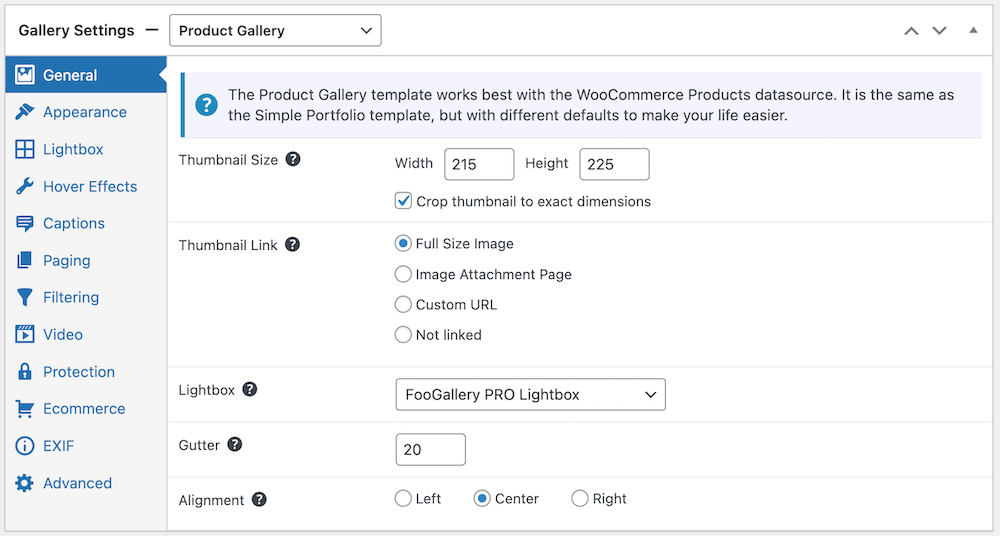
- Next, style your gallery. There are plenty of customizations that you can adjust to get the gallery looking exactly how you want it. (TIP: If you want to see how the changes will appear in the gallery, click on the Preview tab in the media items panel of your gallery.)
Step 3: Set Up a Master Product
The next step is to create a Master Product. This will govern all of the other items in your gallery, essentially allowing you to have just one product in WooCommerce. For example, if your Master Product has 3 image sizes available, such as 300×600, 600×900, and full size, then all of the images in the gallery will have these same variations that your customers can purchase.
To set up your Master Product, follow these steps:
- In your gallery settings, go to the Ecommerce tab and click on Advanced. Then select Transfer Attachment Details.
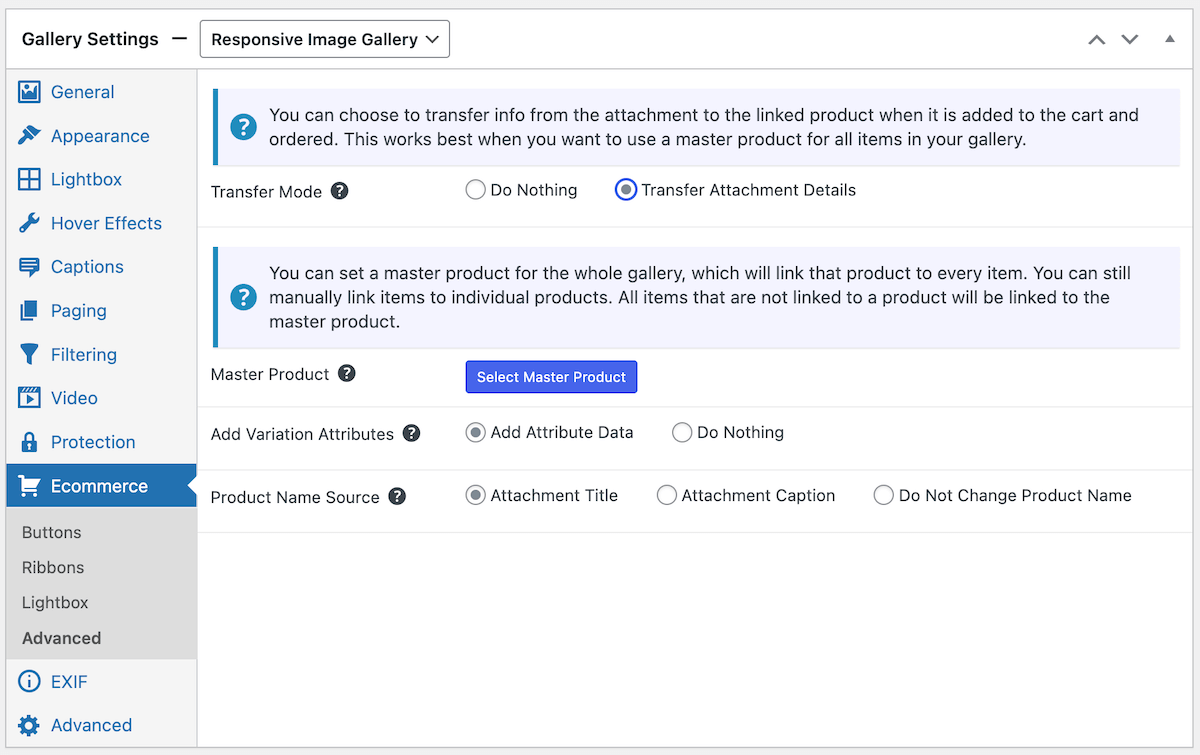
- Several additional options will now appear. Click on the Select Master Product box.
- A new panel will open up. Click on Generate Master Product – FooGallery will then set up the master product for you in WooCommerce, and attach it to your gallery. All you need to do is click on the generated master product and then click on Select Master Product in the bottom right hand corner.
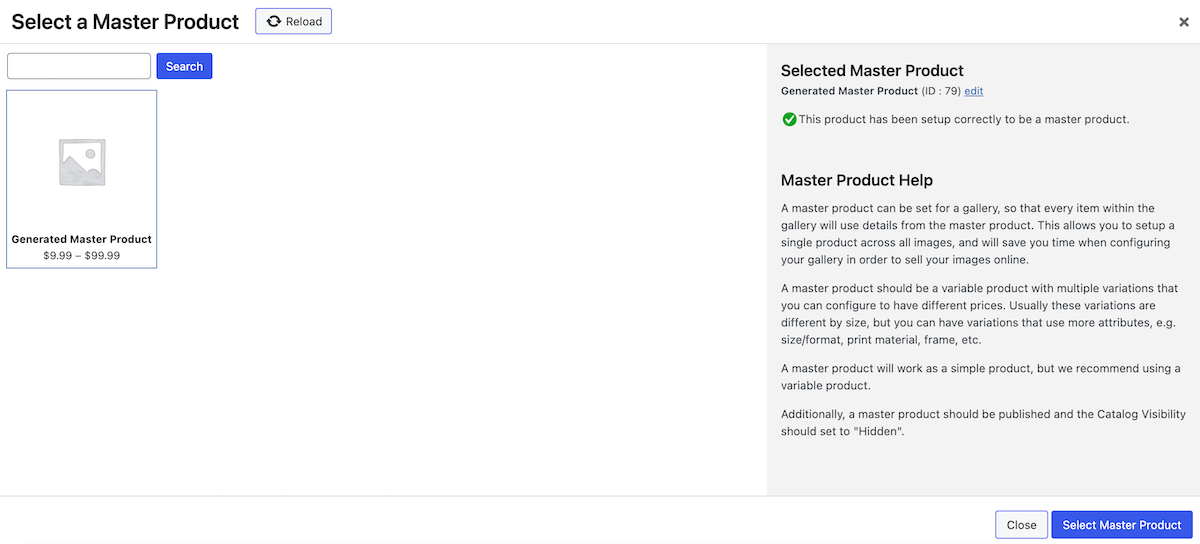
- Back in your gallery, check that you have saved the draft or published the gallery.
Step 4: Set Up the File Downloads
Your Master Product has been set up, but FooGallery simply uses default values for the sizes, so you’ll need to adjust these and make a few more tweaks to the product in WooCommerce. Here’s how:
- First go to your Products tab and locate the generated Master Product. Click on this to open it up.
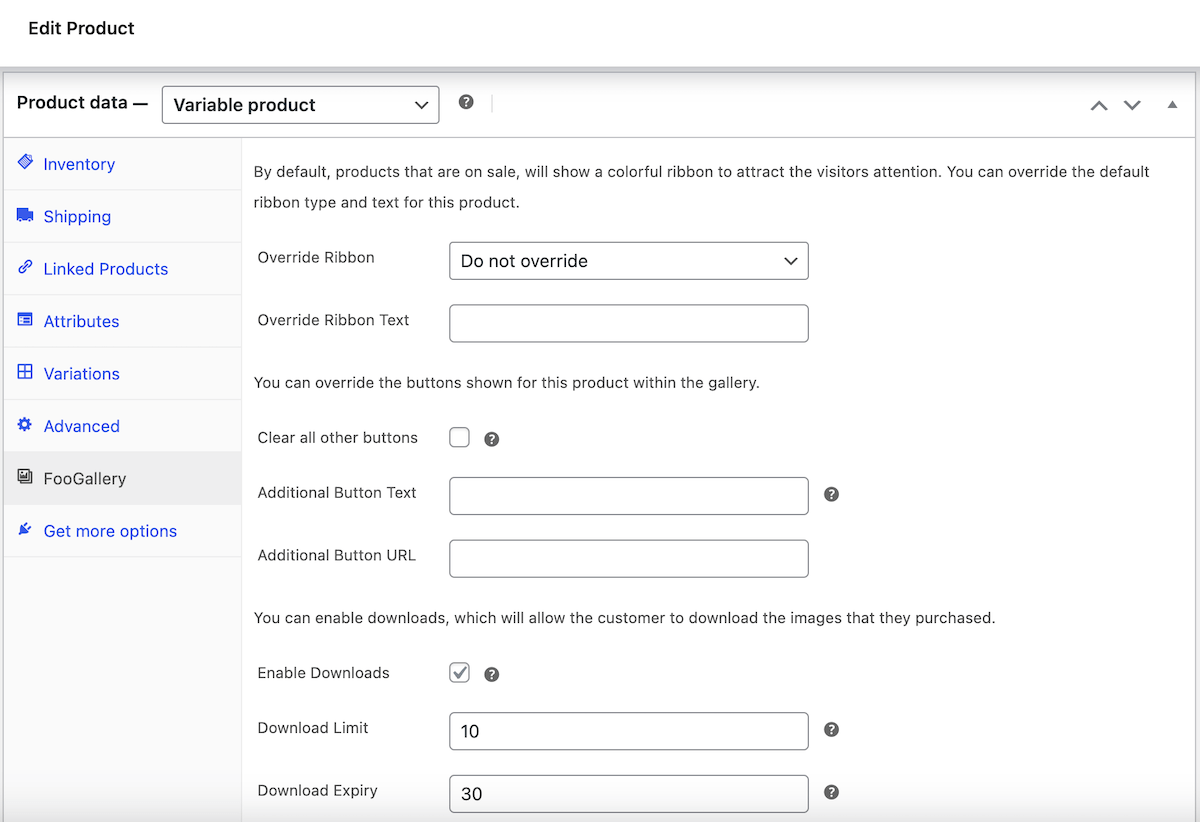
- Now go to the FooGallery tab in the product (this is a very important step!) and select the Enable Downloads option. This has to be enabled for the file downloads to work.
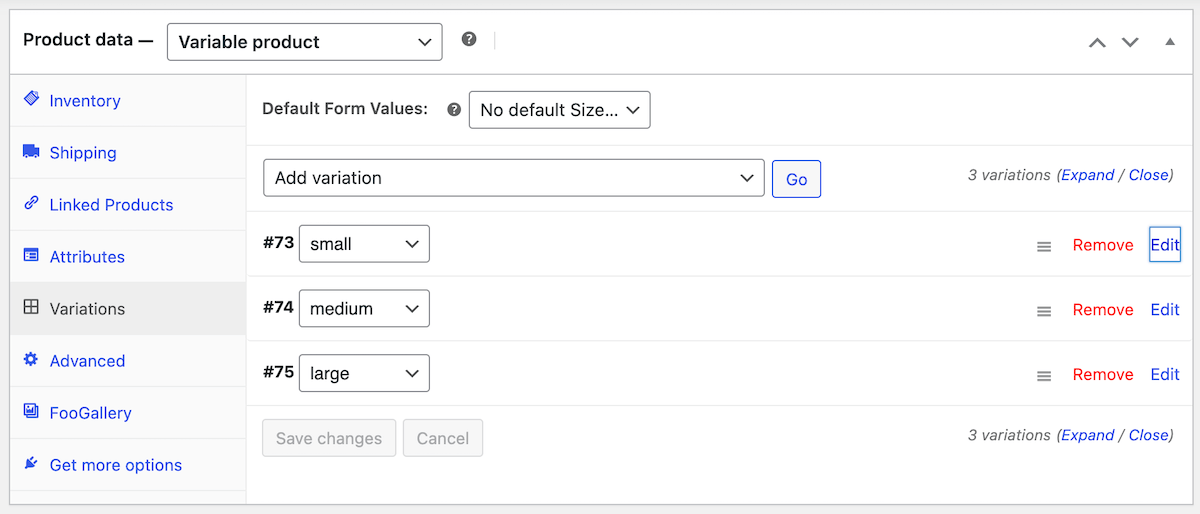
- Next, go to the Variations tab. Here you can set the dimensions and price for each of the image sizes that you want to offer. For the Large image size, leave the dimensions blank if you want to allow customers to purchase and download the full size image.
- Save your changes and head back to your gallery.
Step 5: Publish
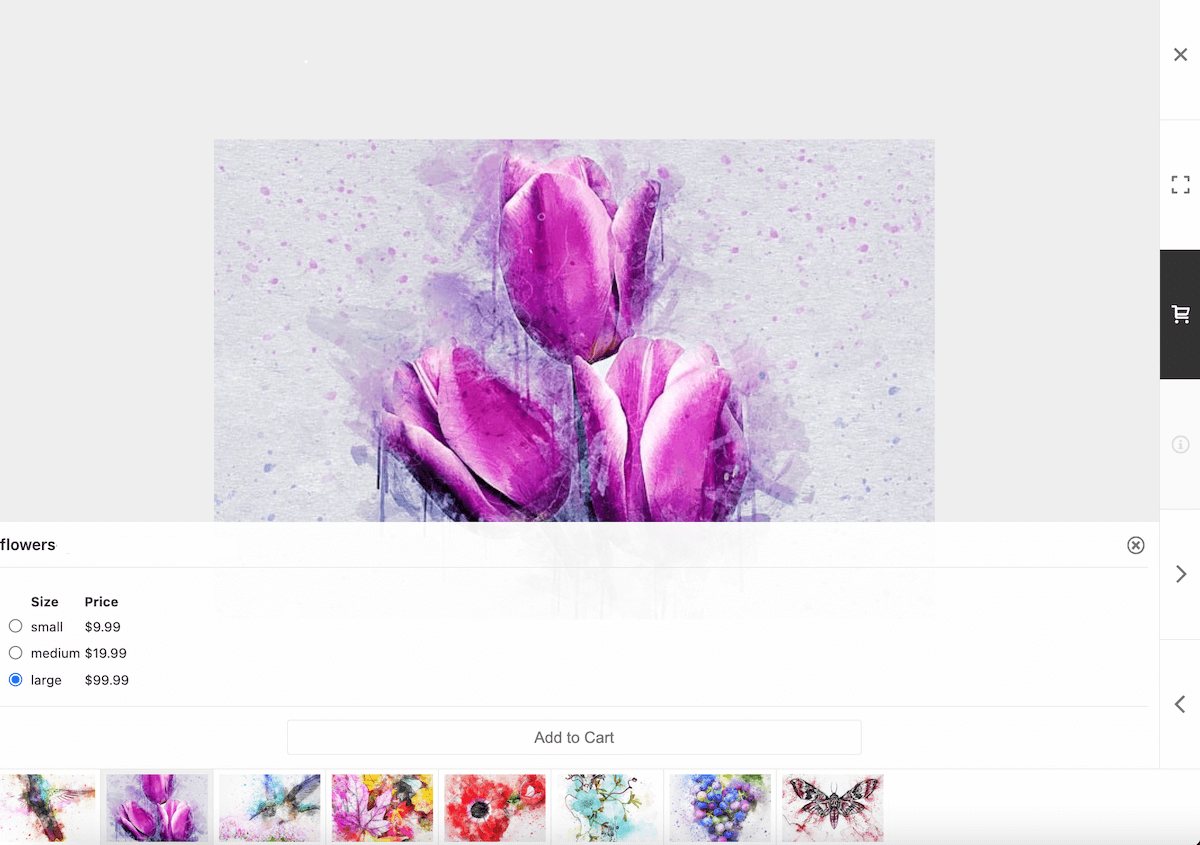
The last thing to do is check that everything is working as it should. In your gallery, you should see all of the images that you have added. When opened in the lightbox, the image variations (the different sizes) should appear next to each image and customers should be able to select the sizes they want and add these to the cart.
If you need to change the file for individual images in the gallery, you can do this by using the Advanced Attachment Modal. You’ll find the download link under the Ecommerce tab, where you can add a new link for that image.
Once you’re happy with the styling you can save and publish the gallery and insert it into your page using the gallery shortcode or the FooGallery block. Done!
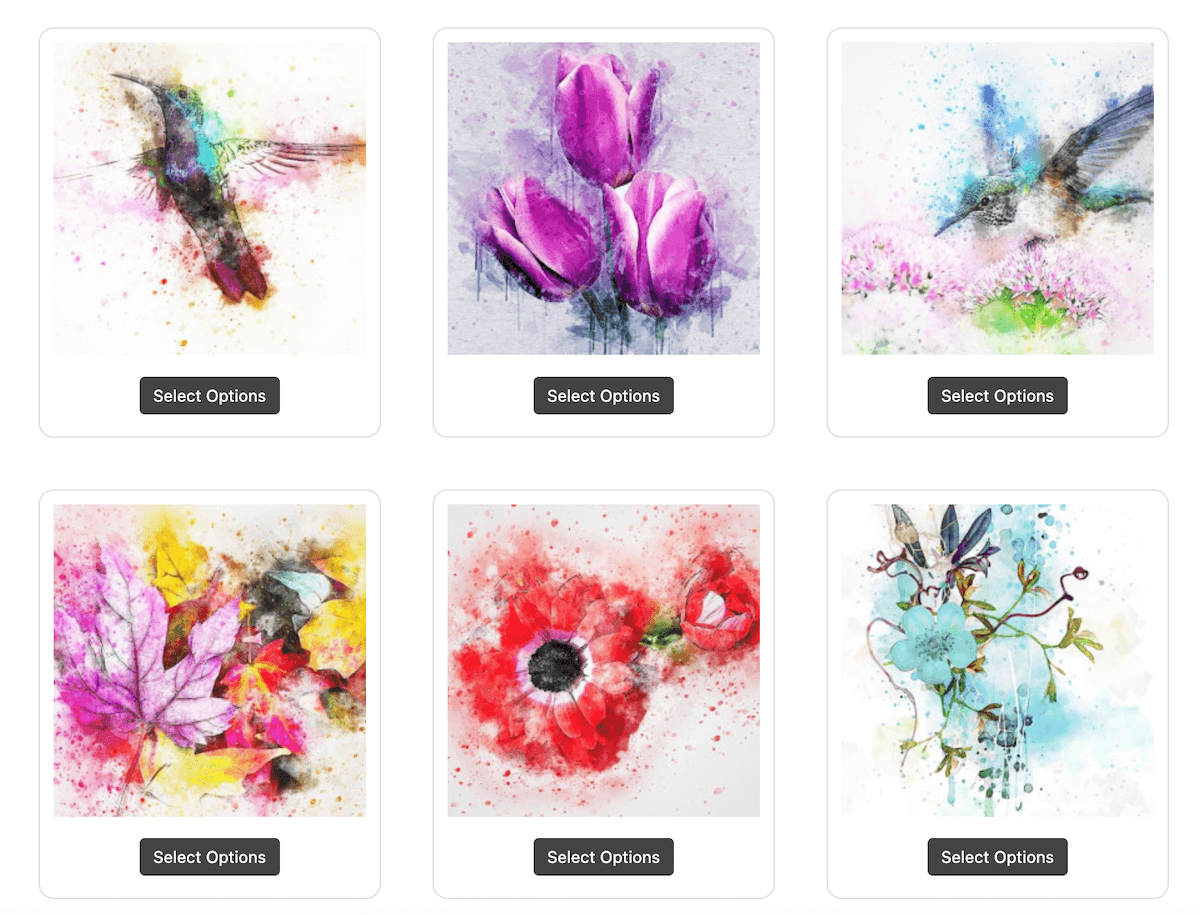
As you can see, this way of adding digital file downloads to your online store is going to be a lot less work than setting up individual products for each of the items that you want to sell.
The Best WordPress Gallery Plugin
FooGallery is an easy-to-use WordPress gallery plugin, with stunning gallery layouts and a focus on speed and SEO.
How To Protect Your Photos from Online Thieves
Selling photos online comes with some risk. Because you’re displaying top-quality photos, you open yourself up to image theft. You can, however, set up some preventative measures by using the protection features in FooGallery PRO Commerce. These include right-click image protection and watermarking.

Right-click protection is a simple measure that stops users from right-clicking on your full-size images, and thereby copying or saving the image for themselves.
Watermarking is a more comprehensive solution, overlaying a watermark across your images and ensuring that others can’t use them as their own. In FooGallery PRO Commerce, you can set up and add watermarks to your galleries; the watermarks then appear on the full-size images. They don’t show up on the gallery thumbnails, as these images are too small to be at risk. But the high-quality full-size images that appear in the lightbox are more at risk, and protecting them with watermarks is a good solution.
How the File Downloads Work
Once your gallery has been set up and added to your page, customers will be able to purchase the downloadable files. Here’s a quick look at how this works.
Firstly, customers will scroll through your gallery. Once they find an image they want to buy, they can select the size and click on the Add to Cart button. They can continue to scroll through your gallery, adding various items (in the size of their choosing) to their cart. Once they have completed their selection, they can either go to the cart, or directly to checkout.
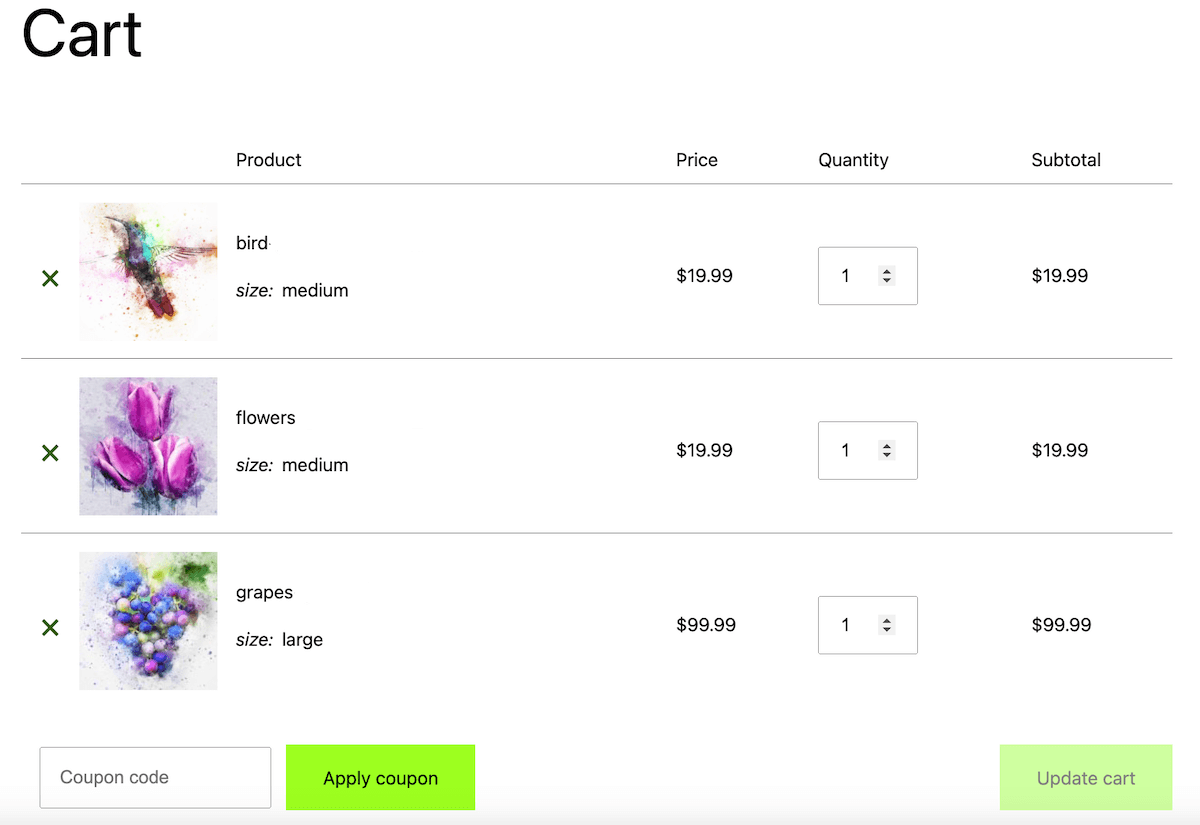
In the Cart, they will see all of the items they have selected. Here customers can increase the quantity, or remove items from their selection. They would then move on to the Checkout page.
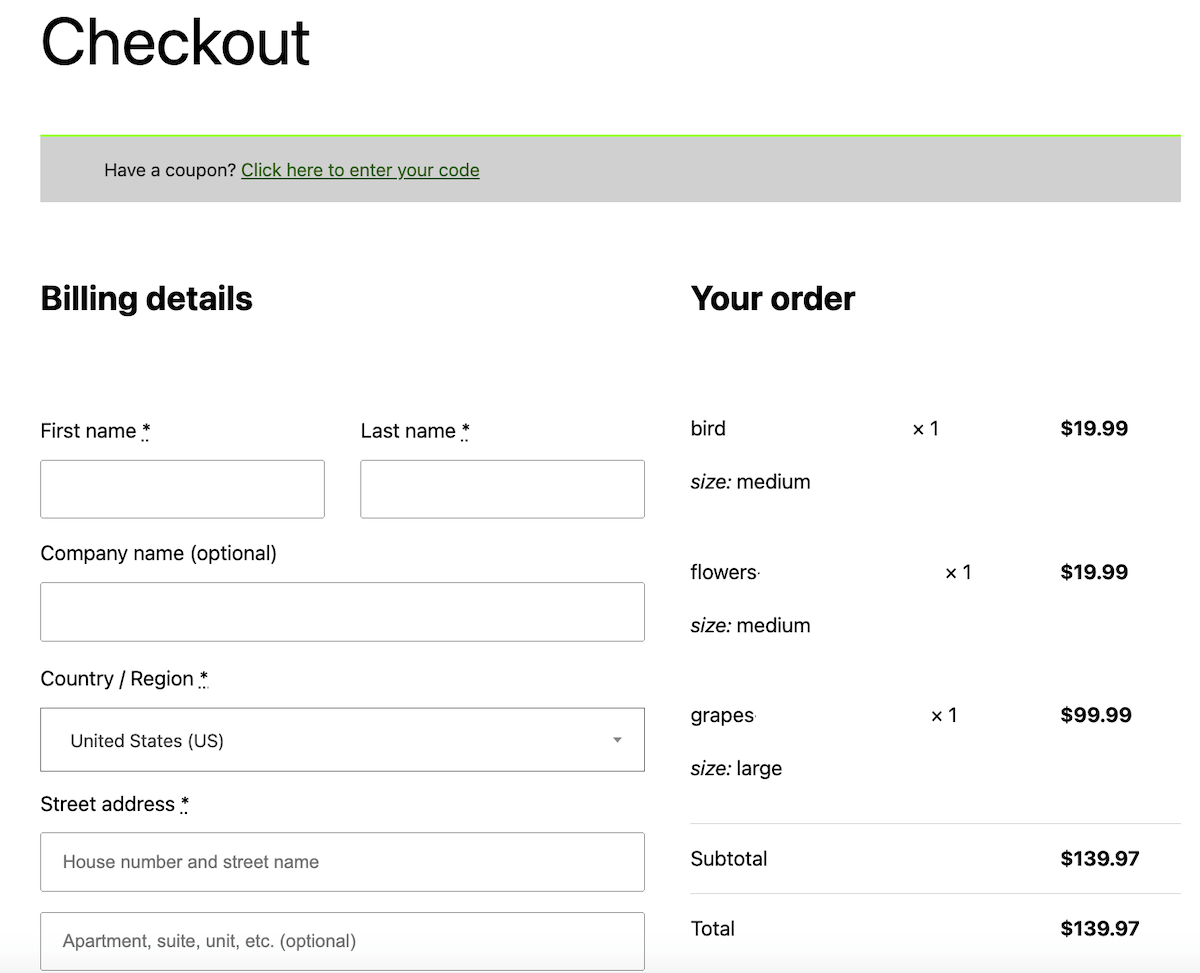
In the Checkout, they would need to fill in their details and pay for their purchase. Once a customer has paid for their images, they would then be able to download the files they have chosen. You can make these available indefinitely, or set a time period for which the files will be available.
Sell Digital Downloads with FooGallery PRO Commerce
If you want to generate additional revenue by selling your artwork or photos online, then a good place to start is with your own WordPress store. Keeping in mind, though, that you want to make the shopping process as quick and painless as possible, you’ll also need some plugins to help you. With WooCommerce and FooGallery PRO Commerce, you’re well on your way to making money.
Using these plugins, you can set up and style your product galleries in just a few steps. But more importantly, you can create a Master Product and use the File Downloads feature to allow customers to purchase digital downloads from your gallery. This is easier and less time-consuming to set up (just imagine creating each of these products individually!), and it makes for a simpler checkout process. Customers can shop, buy and download all in just a few minutes.
Make your life (and your customers’) simpler and get FooGallery PRO Commerce now.
The Best WordPress Gallery Plugin
FooGallery is an easy-to-use WordPress gallery plugin, with stunning gallery layouts and a focus on speed and SEO.