You are able to add forms to any FooConvert popup, giving you an effective way to gather valuable insights about your customers or provide a convenient way for visitors to contact you.
Using Gravity Forms as an example, here are the steps you can follow to add forms to your FooConvert popups:
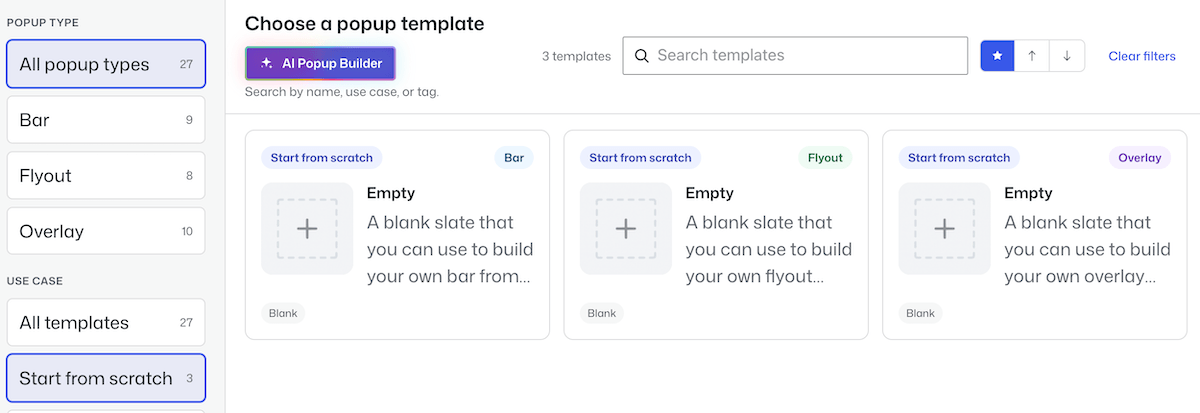
- Click on Add New Popup and choose one of the From Scratch options (we recommend using a Flyout or Overlay Popup in this scenario). You can also choose one of the predesigned templates and add your form to this.
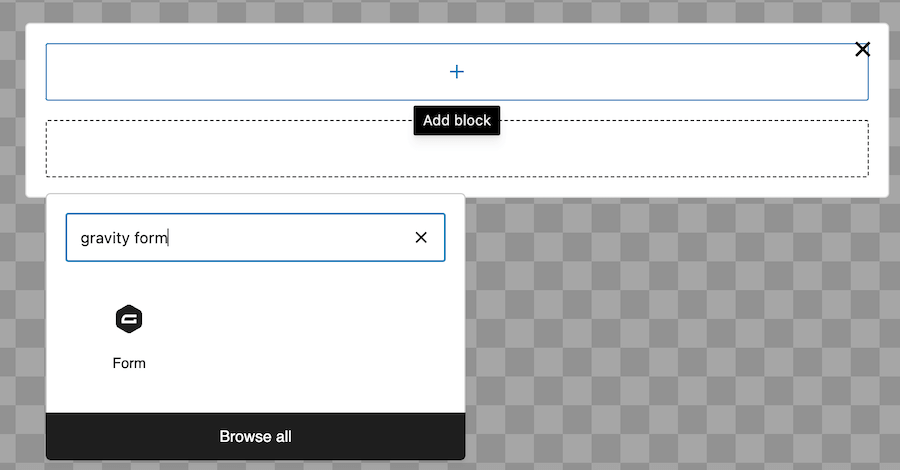
- You will now have a blank popup template, to which you will add your form.
- Click on the + icon to add your form. Search for and select Gravity Forms from the available blocks. Now select the form you wish to use from the dropdown provided.
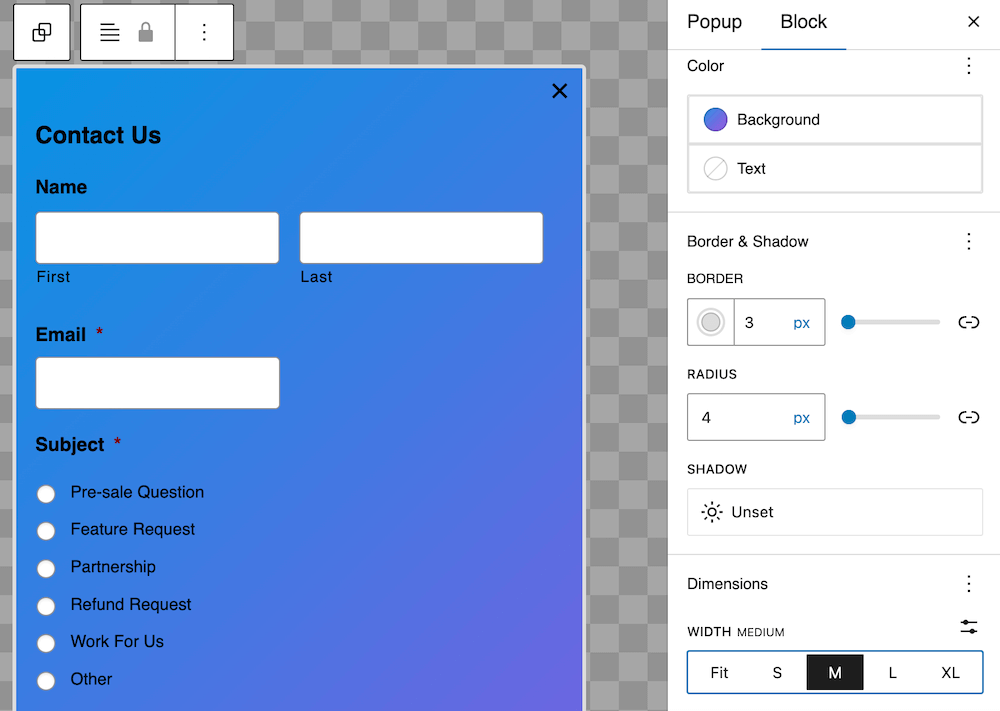
- Once your form appears in the content area, you can customize the widget. For example, you can add a background color, adjust the border, change the size of the form and so on. Note that to make changes to the form itself, you will need to edit it in Gravity Forms.
- You now need to set up the display rules for your popup. To do this, go to the general settings for the popup and click on Display Rules. Here you can set the pages / posts on which the form will display, and set the users to whom the form will be visible.
- Now set your trigger. This will determine when the popup is displayed – you can choose to show it after a certain amount of time has passed, on exit intent, on anchor click, or when a user has scrolled through a set percentage of the page. Depending on your trigger, you may need to add anchor text to your target page or post for the form to open.
- Finally, because Gravity Forms use inline script, you need to enable compatibility. Without this, the form will not display properly. In the settings for the popup, click on Compatibility and allow for inline scripts.
- Publish your popup and check that it is is displaying correctly in the right location.