
This guide prepares a gallery, creates a client-specific session, and shares its private proofing link.
Before you begin
You need an existing FooGallery gallery containing the images the client should review. An active FooGallery Client Proofing license or trial is also required to create new sessions.
1. Prepare the gallery
Edit an existing gallery or create one under FooGallery > Add Gallery. Client Proofing uses the gallery's images, ordering, captions, and visual configuration.
The optional Proofing gallery layout provides useful starting defaults for a review gallery, including:
- A 250 by 200 pixel thumbnail size.
- Filename captions.
- The FooGallery lightbox.
- Full-size and thumbnail watermarking enabled by default.
- Right-click protection enabled by default.
- Social and download buttons hidden by default.
These protections discourage casual copying, but they cannot prevent a determined visitor from capturing an image displayed in a browser.
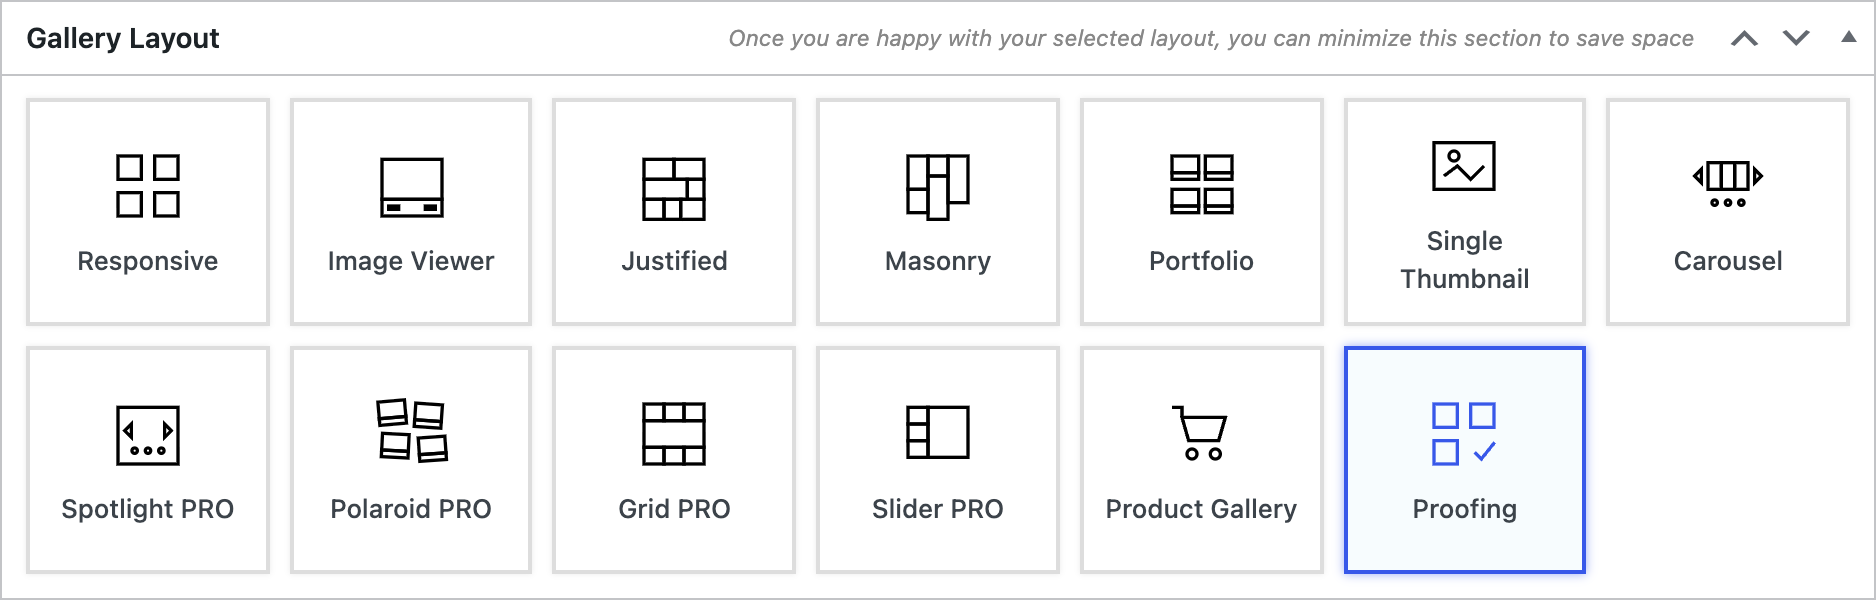
Save the gallery after changing its layout or other settings.
2. Preview the client experience
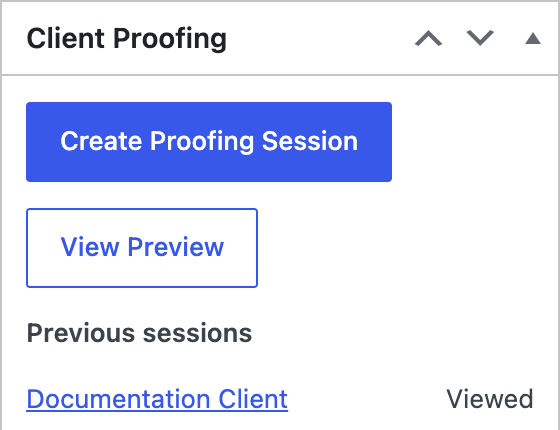
In the gallery editor, find the Client Proofing panel and select View Preview. The preview is available to administrators and opens a standalone proofing page without creating a client session.
Preview interactions do not save. The status tray displays Preview only after you select, reject, or comment.
3. Create the session
You can start from either location:
- Go to FooGallery > Proofing and use Create Proofing Session.
- Edit the source gallery and select Create Proofing Session in the Client Proofing panel. The gallery is selected automatically.
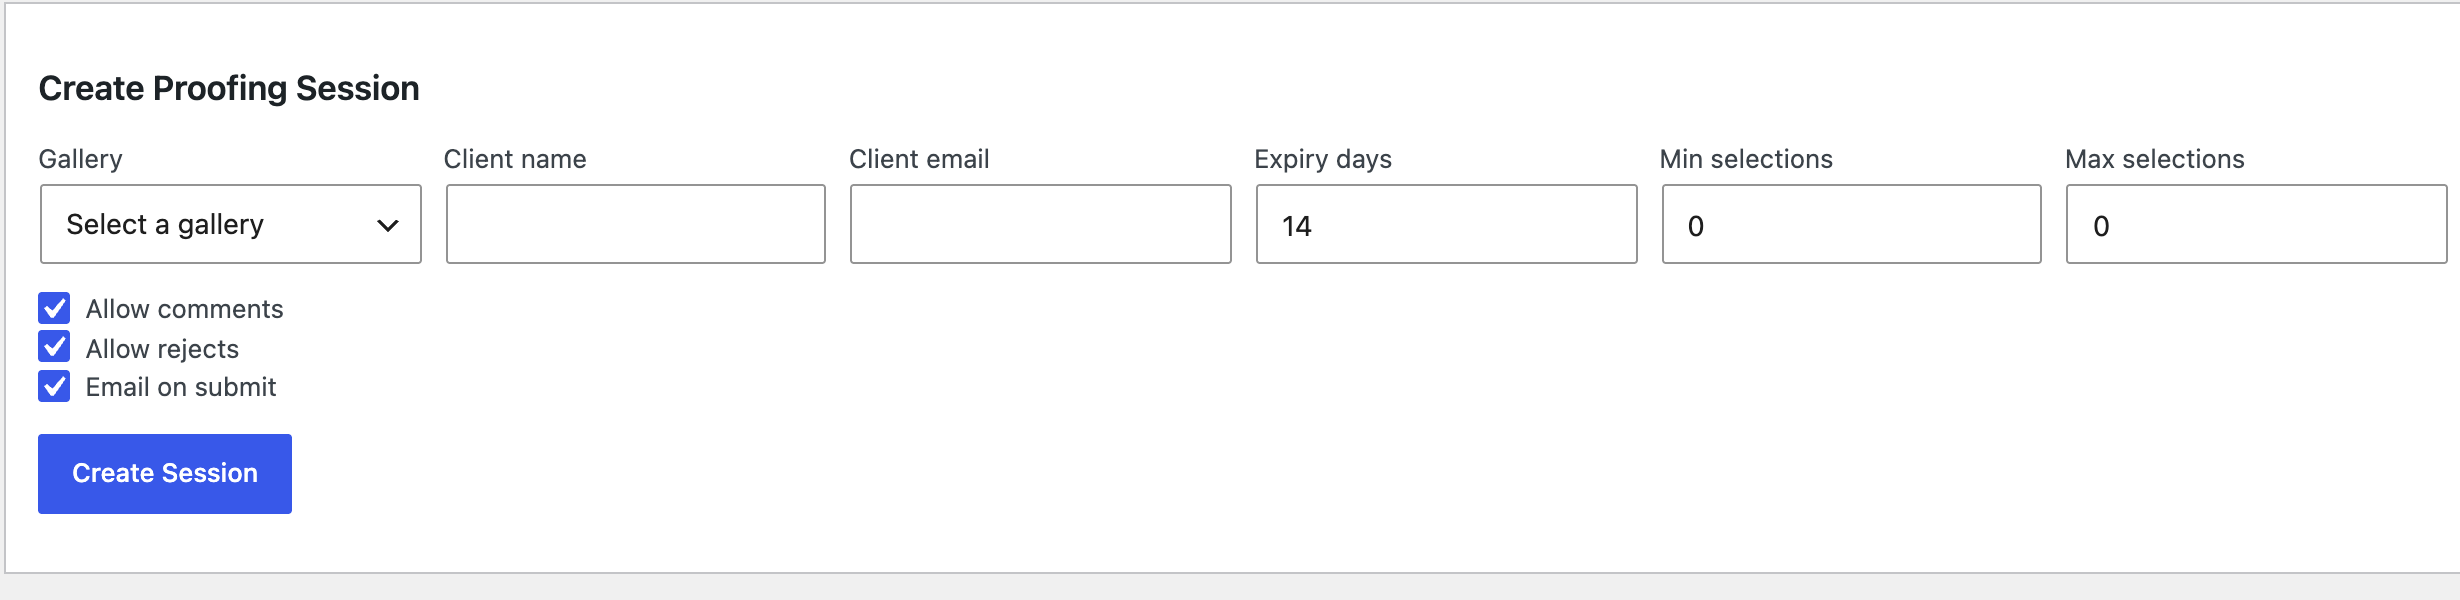
Complete the form:
- Choose the Gallery.
- Enter an optional Client name.
- Enter the required Client email.
- Set Expiry days. The default is 14. Enter
0for no expiry. - Set Min selections or leave
0for no minimum. - Set Max selections or leave
0for no maximum. - Leave Allow comments enabled if the client should be able to attach notes to images.
- Leave Allow rejects enabled if the client should be able to mark unwanted images.
- Leave Email on submit enabled to notify the configured address when the client submits.
- Select Create Session.
If the minimum is higher than the maximum, Client Proofing reduces the minimum to match the maximum.
The new session begins with the Draft status. A private link is generated and displayed once.
4. Copy or preview the private link
After creation, use:
- Copy Link to copy the URL for use in your own message.
- Preview to open the same link and verify the session.
The raw security token is not stored. Copy the displayed link before leaving the screen.

5. Send the invitation email
Select Send Invitation on the session detail screen. Client Proofing generates a fresh private link, inserts it into the configured invitation template, and sends it to the session's client email address.
Sending an invitation or selecting Generate New Link rotates the security token. Every previously generated link for that session immediately becomes invalid.
The action records its result in the Email Log. WordPress reporting a successful send means the message was accepted by the site's mail system; it does not guarantee delivery to the recipient's inbox.
Reusing a gallery
One gallery can have multiple client sessions. Each session has its own client details, private token, expiry, options, selections, comments, and status. The gallery editor lists its five most recent sessions under Previous sessions.


