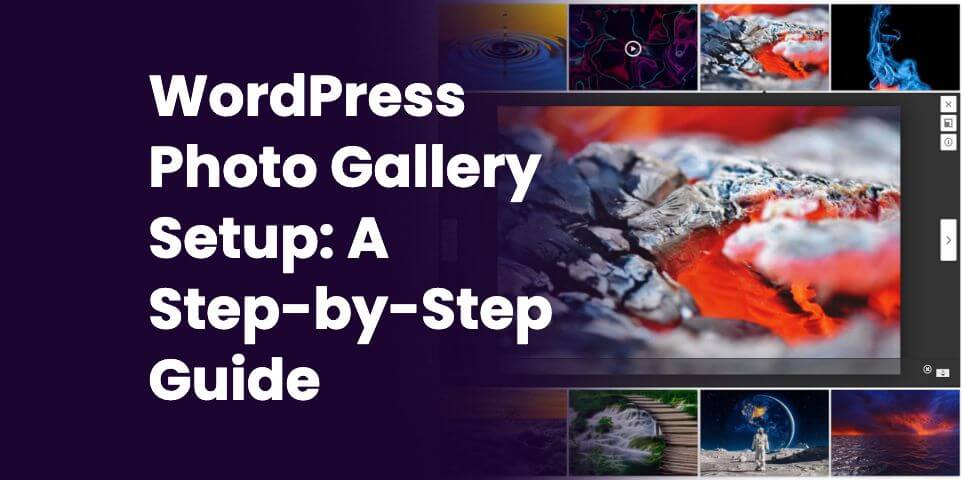
Setting up photo galleries in WordPress shouldn’t feel like rocket science, but somehow it often does. One of the many complaints we hear is that setting up a photo gallery can be frustrating, especially when it ends up looking amateur or breaking the website entirely.
The good news? Once you know the right approach, you can have professional-looking galleries up and running in less than 10 minutes. We’ve been helping customers set up galleries for years, and we’re going to walk you through the exact process that works reliably every time.
Skip the trial and error phase. Here’s everything you need to know about creating photo galleries that actually work.
Quick Setup Overview
Before we jump into the details, here’s what we’re going to accomplish:
Time needed: 10-15 minutes for your first gallery
Required tools: WordPress admin access and the FooGallery plugin
Expected result: A professional gallery that loads fast and works on all devices
You’ll end up with galleries that look polished, load quickly, and work perfectly on mobile devices. No coding required, no theme conflicts, and no headaches.
The process can essentially be broken down into four main steps:
- Install the plugin
- Organize your photos
- Create the gallery
- Add it to your website
Simple enough that anyone can do it, but with enough options to satisfy more advanced users and designers.
Method 1: Using the FooGallery Plugin (Recommended)
FooGallery consistently delivers the best results with the least hassle. It’s best for client projects because it works reliably and doesn’t slow websites down. Here’s a gallery built using the Carousel layout in FooGallery:


Why FooGallery over alternatives?
Many other gallery plugins either cripple their free versions or add unnecessary bloat to your website. FooGallery gives you professional features in the free version and handles performance optimization automatically.
Our customers have used it on photography websites, restaurant galleries, and product showcases, to create stunning galleries with optimized performance.
Step 1: Install and Activate FooGallery
Getting FooGallery installed takes about 2 minutes:
- Navigate to Plugins in your WordPress dashboard
- Click “Add New” and search for “FooGallery”

- Install the plugin (it’s the one by FooPlugins with thousands of active installations)
- Click “Activate” once installation completes
The plugin appears in your WordPress sidebar menu immediately after activation. No complex setup wizards or confusing configuration screens.
Initial plugin configuration:
FooGallery works well with default settings, but check these options:
- Lazy loading should be enabled (it usually is by default)
- Lightbox settings can be customized to match your site’s style
- Image optimization settings are typically fine as-is
Step 2: Upload and Organize Photos
Organization matters more than people realize. Messy photo libraries become nightmares to manage as your website grows, and make it harder to build galleries. However, there are some best practices and gallery features that can help.
Image optimization before uploading:
Resize photos to a maximum of 1200 pixels wide. Larger images slow down your galleries without improving quality on most screens. A plugin like Shortpixel or tools such as Photoshop’s “Save for Web” feature can be helpful.
File sizes should stay under 500KB per image for galleries. Larger files cause loading delays that frustrate visitors and hurt your search rankings.
Smart folder organization:
Create logical folder structures in your WordPress media library. Consistency in file names can be useful. For example:
- Event galleries: “2024-wedding-smith” or “conference-2024”
- Product photos: “jewelry-rings” or “furniture-tables”
- Portfolio work: “portraits-2024” or “landscape-colorado”
FooGallery PRO Expert includes category folders, which can be particularly helpful when organizing your media library. Simply add images to categories and these will appear in your media library.
These types of organization may take an extra few minutes when uploading images, but ultimately save time when you’re creating multiple galleries or need to find specific images later.
Bulk upload techniques:
WordPress handles multiple image uploads well, but don’t go crazy. Upload 20-30 images at a time to avoid timeouts or memory issues.
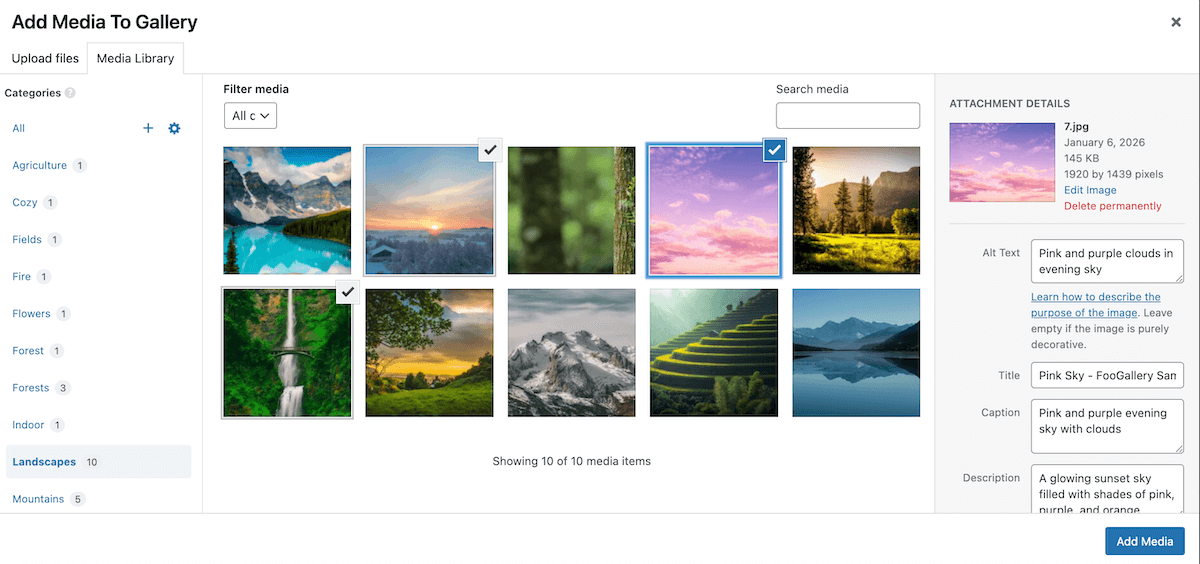
Add basic alt text during upload if possible. It helps with SEO and accessibility, plus it’s easier to do during upload than going back later.
Step 3: Create Your First Gallery
This is where FooGallery shines. The gallery creation process is straightforward while still giving you mulitple customization and advanced options.
Gallery creation walkthrough:
- Go to FooGallery > Add Gallery in your WordPress dashboard.
- Give your gallery a descriptive name (this helps with organization).
- Add images by clicking “Add Media” and uploading to the media library or selecting from your existing images.
- Choose a layout from the available templates.
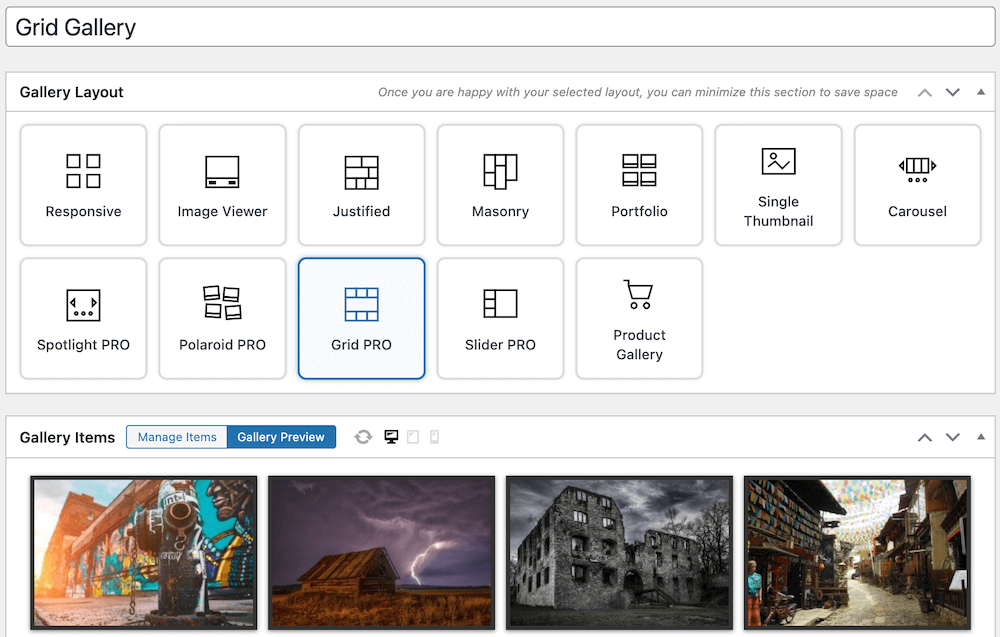
- Customize appearance using the styling options. Any changes you make will be reflected in the Gallery Preview tab so you can see how your gallery will appear without navigating away.
- Publish your gallery.
Layout selection tips:
There are various layouts to choose from (more if you have the FooGallery PRO Starter plan), so you can select the best option for your needs. Here are some of your options:
- Masonry layout: Perfect for photos with different dimensions
- Responsive: Clean look for uniform image sizes
- Justified layout: Creates flowing rows that look professionally designed
- Spotlight PRO: Good for detailed photos where people need to see specifics
Test different layouts with your specific photos. What works for one type of content might not work for another.
Mobile optimization settings:
FooGallery handles mobile responsiveness automatically, but verify these settings:
- Thumbnail sizes should be appropriate for mobile screens
- Loading animations shouldn’t be too aggressive on slower connections
Step 4: Embed Gallery in Posts/Pages
Getting your gallery onto your website is the final step, and FooGallery makes it simple.
Using the block editor (Gutenberg):
- Add a new block where you want the gallery.
- Search for “FooGallery” in the block menu.
- Select your gallery from the dropdown.
- Adjust any display settings if needed.
Shortcode method:
Every gallery gets a unique shortcode that looks like this: foogallery id=”123″. Copy this from the gallery edit screen and paste it wherever you want the gallery to appear.
Shortcodes work in text widgets, custom HTML blocks, and even theme template files – if you’re comfortable working with code.
Advanced embedding options:
You can modify gallery behavior with shortcode parameters:
- foogallery id=”123″ template=”masonry” forces a specific layout.
- foogallery id=”123″ limit=”12″ shows only 12 images.
- Multiple galleries can appear on the same page without conflicts.
Method 2: WordPress Native Gallery (Limited)
WordPress includes basic gallery functionality, but it’s pretty limited compared to dedicated plugins.
Built-in gallery creation:
- Create a new post or page.
- Add a “Gallery” block.
- Upload images directly to the block.
- Choose columns and basic layout options.
Here’s a screenshot of a gallery built using the WordPress gallery block:

Limitations compared to FooGallery:
The native WordPress gallery lacks professional features like lightbox viewing, advanced layouts, and performance optimization. It’s fine for basic image grids but falls short for anything more sophisticated.
No lazy loading, limited customization options, and poor mobile optimization make the native gallery unsuitable for the majority of professional websites.
When to use native vs plugin:
Use the native gallery only for quick, temporary galleries or when you absolutely can’t install plugins. For any serious gallery needs, FooGallery provides better results with minimal extra effort.
Advanced Photo Gallery Techniques
Once you’ve mastered basic gallery creation, these advanced techniques will make your galleries stand out and perform better.
SEO Optimization for Photo Galleries
Search engines can’t see images the way humans do, so you need to help them understand your content.
Alt text best practices:
Write descriptive alt text for every image. Instead of “img001.jpg”, for example, use “bride and groom first dance at outdoor wedding reception”. Be specific but concise.
Alt text also helps visually impaired visitors understand your content and gives search engines context about your images.
Image file naming conventions:
Rename files before uploading. “wedding-first-dance-2024.jpg” is infinitely better than “DSC_0001.jpg”, especially for SEO purposes.
Use hyphens instead of spaces or underscores. Search engines read hyphens as word separators.
Schema markup for galleries:
FooGallery handles basic schema markup automatically, but you can enhance it further with structured data for image galleries. This helps your galleries appear in rich search results.
Performance Optimization
Fast-loading galleries keep visitors engaged and improve your search rankings.
Image compression techniques:
Compress images before uploading, not after. Tools like JPEGmini or online compressors reduce file sizes without visible quality loss.
WebP format offers better compression than JPEG, but ensure your hosting supports it before switching formats entirely.
Lazy loading implementation:
FooGallery includes lazy loading by default, which means images only load when visitors scroll to them. This dramatically improves initial page load times.
Lazy loading is especially important for galleries with many images or on pages with multiple galleries.
CDN integration:
Content delivery networks serve images from servers closer to your visitors, improving loading speeds worldwide. Most CDN services work seamlessly with FooGallery.
Popular options include Cloudflare, MaxCDN, and AWS CloudFront. The setup varies by provider, but the performance improvements are worth the effort. Alternatively, check if your hosting platform includes CDN as an option.
Common Photo Gallery Issues and Solutions
Even with good planning, gallery issues can pop up. Here are the most common problems and their solutions.
Slow loading galleries:
This is usually caused by oversized images or too many images loading at once. Reduce image file sizes and enable lazy loading. Consider pagination and/or filtering for galleries with 50+ images.
Mobile display problems:
Test galleries on actual mobile devices, not just browser developer tools. Touch gestures might work differently than expected, or images might be too small to see clearly.
FooGallery’s responsive settings usually handle mobile optimization well, but complex customizations can break mobile layouts.
Gallery layout breaks:
This is often caused by CSS conflicts with your theme. Plugin conflicts can also sometimes cause gallery functionality to break. Check for JavaScript errors in your browser’s developer console.
Images not displaying:
Verify image file paths and permissions. Sometimes server configurations prevent images from loading properly. Check your media library to ensure images uploaded correctly and aren’t corrupted.
Photo Gallery Design Best Practices
Good design makes the difference between amateur-looking galleries and professional presentations.
Layout selection guidelines:
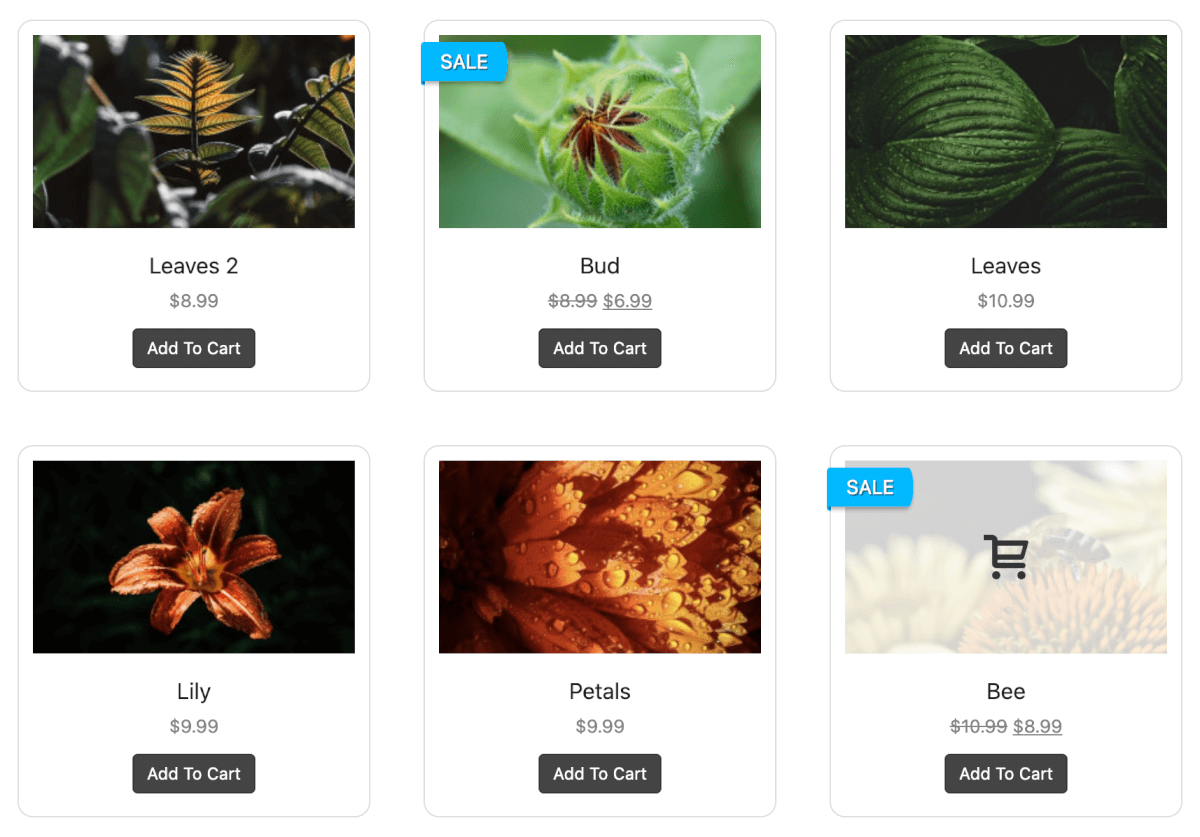
Match your layout to your content type. Product photos work well in grid layouts (as in the screenshot below) while mixed-dimension photos look better in masonry or justified layouts.
Consider your audience’s browsing behavior. Art portfolio visitors might prefer larger images, while real estate browsers want to see multiple photos quickly.
Color scheme considerations:
Gallery borders and backgrounds should complement your site’s design without overwhelming the photos. Neutral colors usually work best.
Avoid busy backgrounds that distract from the images. Let your photos be the stars of the show.
User experience optimization:
Navigation should feel intuitive. Visitors shouldn’t have to guess how to view larger images or move between photos.
Loading indicators help visitors understand when content is coming, especially on slower connections.
Keep galleries focused. A gallery about your summer vacation doesn’t need 200 photos. Curate the best images for better impact.
Get Set Up With FooGallery Today
Setting up professional photo galleries doesn’t require special skills or expensive plugins. With the right approach and tools like FooGallery, you can create galleries that enhance your website instead of slowing it down.
The FooPlugins team provides additional resources and documentation for advanced gallery customization. For more WordPress gallery insights, check out our complete gallery plugin comparison guide.
Ready to showcase your photos in galleries that actually work properly? Use FooGallery and spend your time taking great photos instead of fighting with gallery plugins.