FooGallery has had two significant updates recently. The Master Product selection in FooGallery PRO Commerce has become a lot easier to do, and with the Advanced Attachment Modal (available in Free and PRO) you can now easily edit the metadata for the images in your gallery.
Below we take a look at how these additions work.
The Master Product
Using the Master Product feature in FooGallery PRO Commerce has now become a lot easier. We’ve updated how the Master Product is set in the gallery, giving you an easy-to-follow process for creating your own master.
This works with FooGallery PRO Commerce, using the WooCommerce integration, so you will need to have both of these plugins installed. The next step is to set up your Master Product in WooCommerce, which you’ll need for your gallery. Your master product should be a variable product – this is because all of the other images in your gallery will adopt these variants.
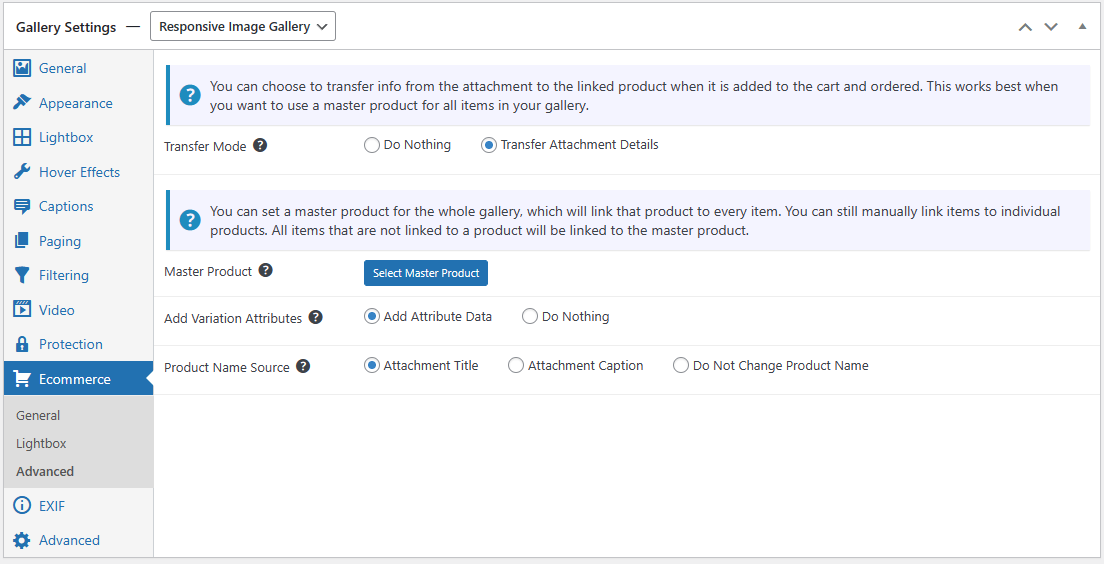
Now you can set up your gallery in just a few steps. First, add the images that you want to use (these don’t need to be set up as products first). Next, go to Advanced settings under the Ecommerce tab of your gallery settings and click on Transfer Attachment details. You’ll then see an option to Select Master Product – click on this.
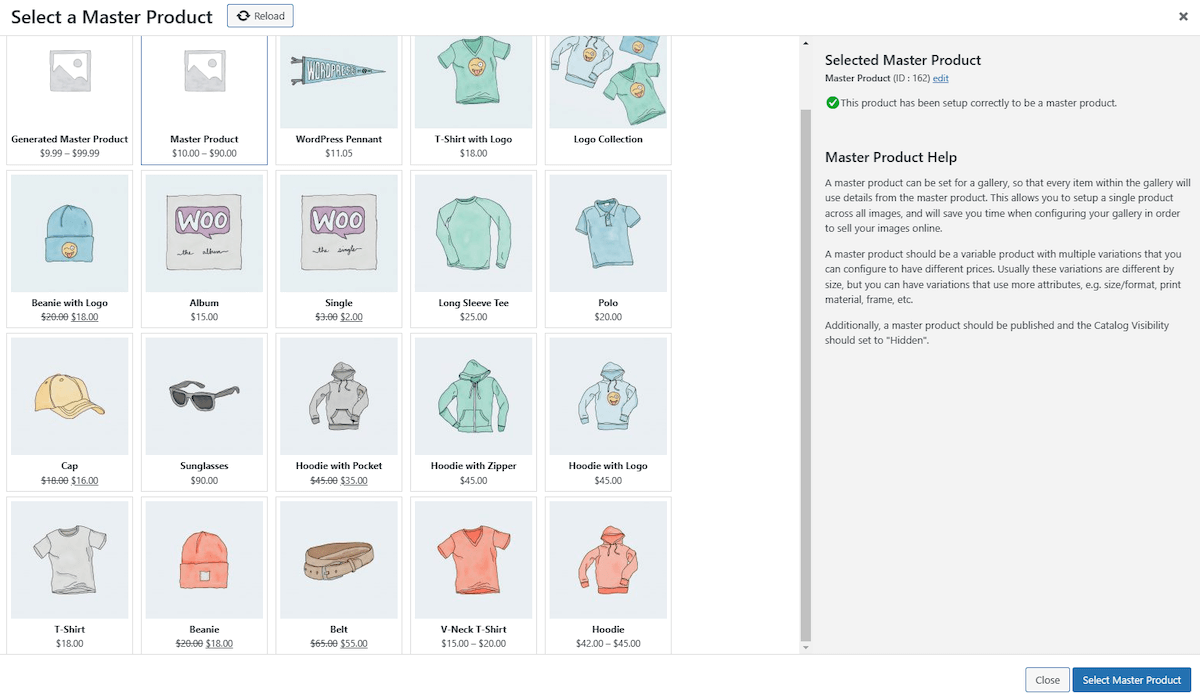
A panel will now open up, showing you all of the products you have set up in WooCommerce. You can then select the one that you want to behave as your Master Product. Simply click on the product you want and then click on the Select Master Product button in the bottom right corner.
Now all of the products in your gallery will inherit the variables you have set up for this one product, saving you the trouble of setting up each product individually.
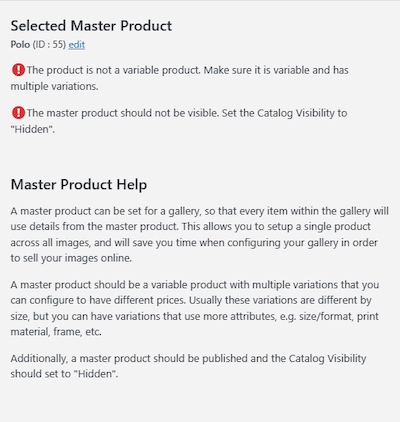
As you can see in the above screenshot, you will see a check mark and success message when you select a suitable product. You will also see some helpful text, explaining how the product should work and some of the requirements for it to work. However, if you select a product that hasn’t been set up correctly, you will see an error message saying that the product selected is not variable and/or it has not been set to hidden. In this case, you would need to edit the product first before selecting it as the master for your gallery.
This feature has been designed for selling photos, as each photo could potentially come in the same size variants. This means you would only need to set up the variables once, for your Master Product, potentially saving you hours of work. Note that you can use this on existing galleries, or any new ones that you set up.
The latest release also sees an enhanced lightbox checkout layout on mobile, for FooGallery PRO Commerce. This mobile layout gives you a better view of the product, making it easier for customers to see the product and any variable items.
Media Attachment Modal
We’ve added a more advanced way to edit your media attachments. The new Advanced Attachment Modal is available in both FooGallery Free and PRO, and gives you the ability to easily edit the metadata on your gallery attachments.
There are a range of options given to you in the new media modal, allowing you to add in titles, alt text and more to your media. But it also gives you the ability to adjust the thumbnail crop position, edit EXIF data, and more. Let’s take a quick look at how it all works:
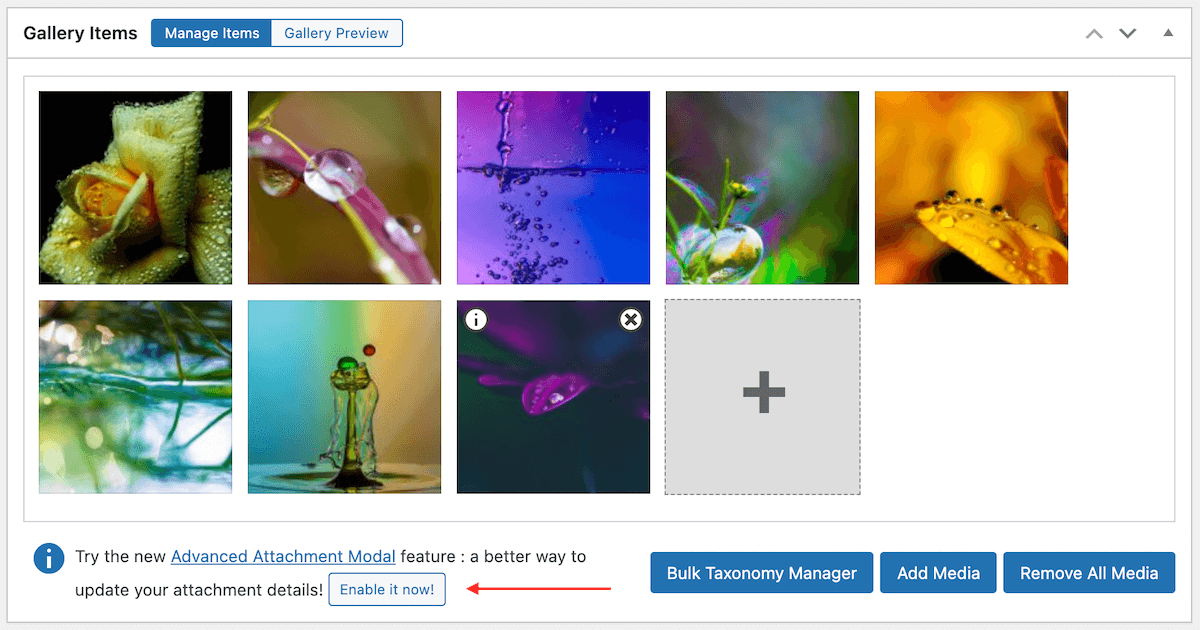
The new media modal is disabled by default, so you would first need to enable this. You can do this in your gallery – at the bottom of the Manage Items panel, you’ll see a notification about the new modal. Here you can click on Enable it now! This will enable the modal across all of your galleries. If you decide that you don’t want to use this feature, you can disable it in the same way.
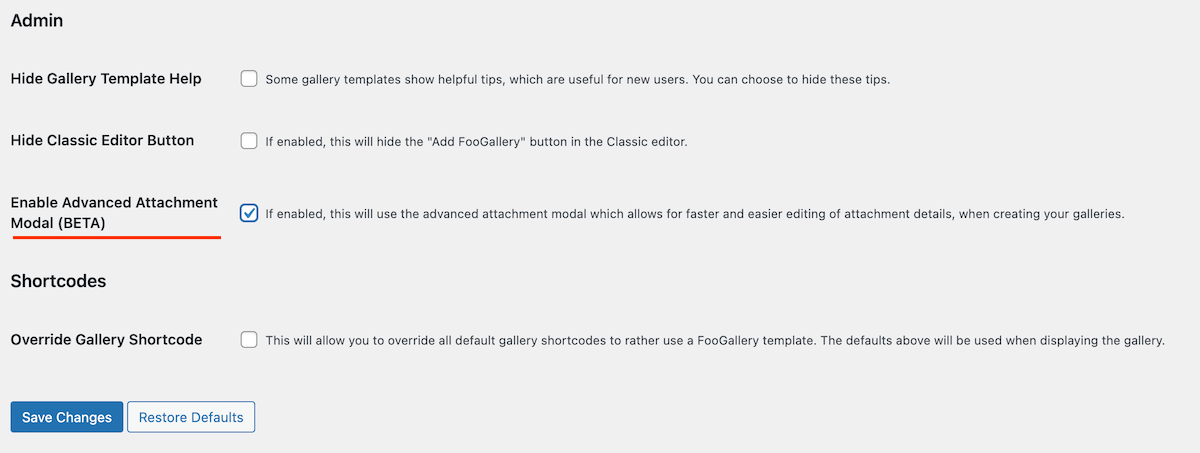
Alternatively, you can enable the modal in the global settings for FooGallery. If you scroll down under the General Tab, you’ll see a field called Enable Advanced Attachment Modal. Select this and then click on Save Changes at the bottom of the page.
Now if you go to one of your galleries, or if you create a new gallery, the new media modal will be available to you when editing images in your gallery. First, you’ll need to ensure that you are in the Manage Items view for your gallery. Then, when you hover over an image in the gallery, you can click on the ‘i’ that appears on the image.
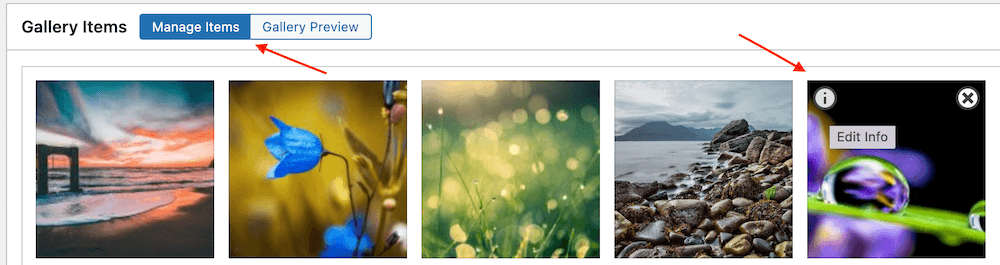
This will open the image in the new modal, allowing you to edit the data for that image.
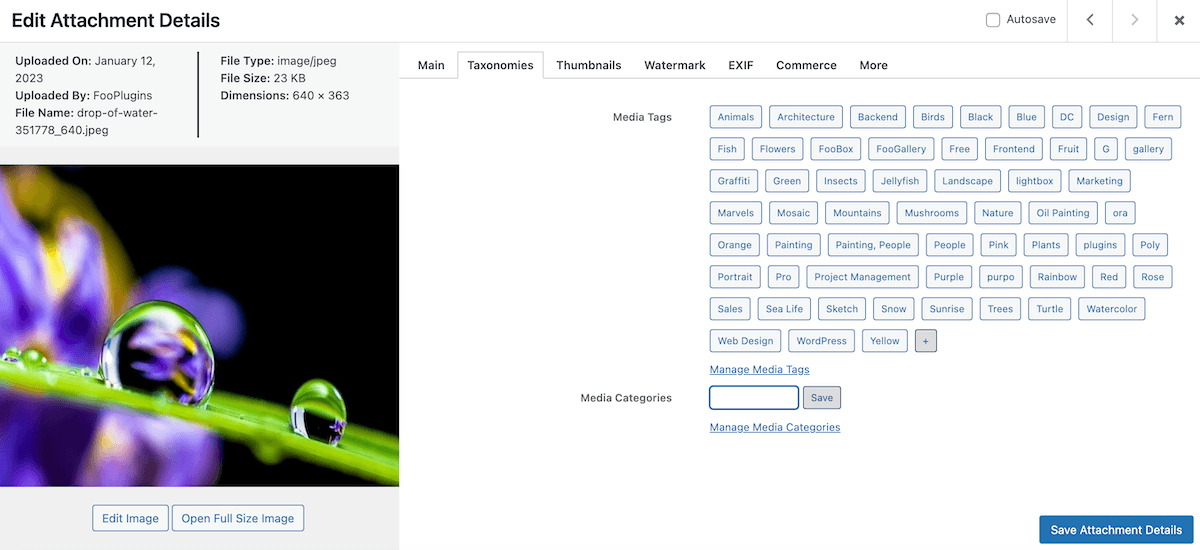
As you can see in the above screenshot, you have a range of options. In the Main tab, you can add a product description, alt text, a custom URL and so on. But you can also adjust the position of the thumbnail crop, and override several items in the More tab. Plus, using the navigation arrows at the top of the panel, you can move between all of the images in that gallery.
Some of the options, however, are only available in some of the different FooGallery PRO Plans. In PRO Expert, the Taxonomies tab lets you assign existing tags or categories to the image, or add new tags and/or categories. You can also edit or add EXIF Data to your image in the EXIF tab.
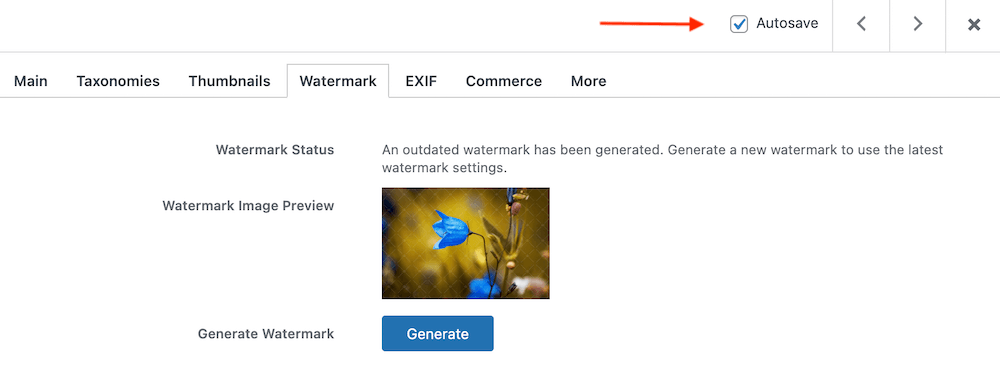
In FooGallery PRO Commerce, you’ll be able to generate a watermark for your photos. You’ll also have the ability to add buttons and ribbons to the individual images. So even if you are using WooCommerce integration, you can add other ribbons to your media attachments. And if you don’t use WooCommerce, you’ll still be able to add buttons, button URLs and ribbons to your galleries.
One handy feature of the new media modal is the Autosave, which you can enable by clicking the Autosave box in the top right corner of the modal. With this enabled, any changes you make to an image will be automatically saved when you click through to the next image.
Note that any changes you make in the Advanced Attachment Modal are applied to the images in the media library, so if you use these images in other galleries, the changes will reflect there as well.
Learn more about the Advanced Attachment Modal here.
As you can see, these new additions can help make it easier and more efficient to set up your galleries. Plus, the latest FooGallery release includes various other updates and improvements. If you want to find out more about the different FooGallery plans, take a look at our FooGallery plan comparison.