
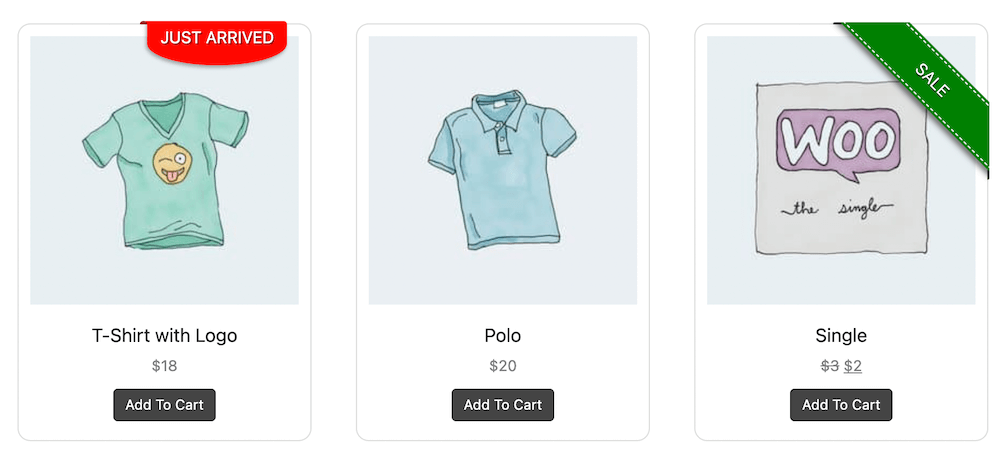
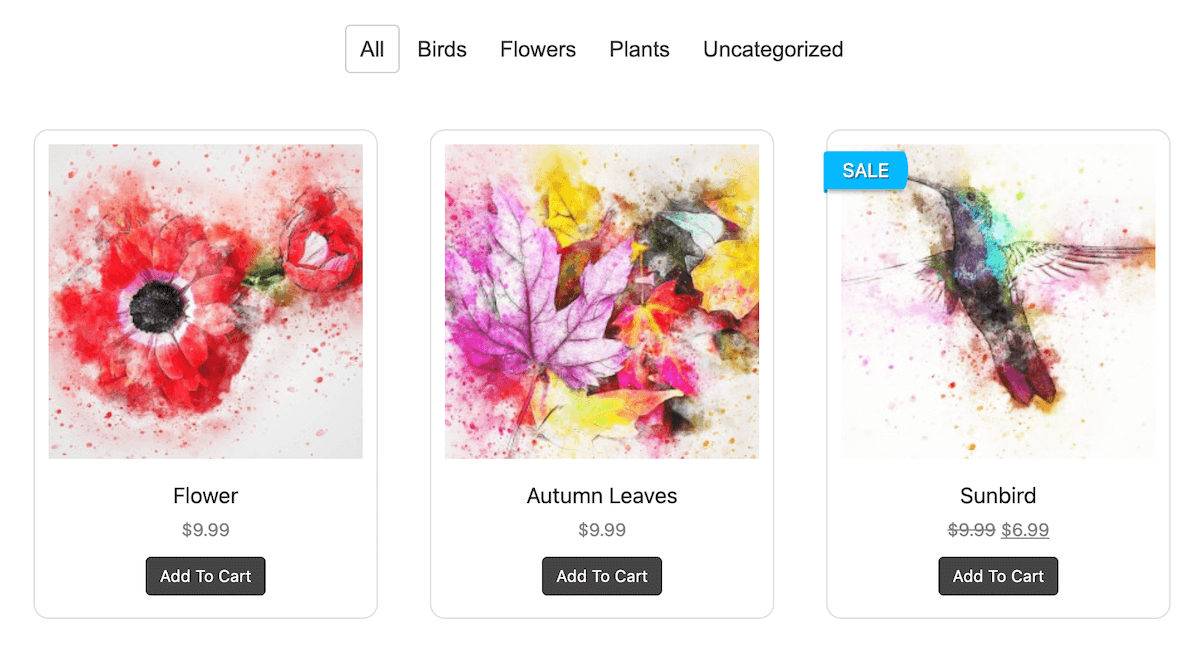
A simple “Sale” badge catches the eye immediately when customers browse your products. These visual signals guide attention to exactly what you want customers to see, whether that’s a flash
sale, a new arrival, or your bestselling item.
Disclosure
Relationship disclosure for FooGallery.
FooGallery is owned and maintained by FooPlugins. When we mention or recommend FooGallery in this article, that relationship may influence how the product is covered; product details should be checked against current documentation, demos, pricing, and release notes.
However, WooCommerce‘s built-in sale badges only scratch the surface. You can’t customize their appearance, add different badge types like “Staff Pick” or “Almost Gone,” or position them strategically to match your store’s design. If you’ve ever wanted to create badges that actually reflect your brand and marketing goals, you’ve probably felt this frustration.
That’s why we’ve put together three different methods to create custom badges that work the way you need them to. Whether you’re comfortable diving into code, prefer the simplicity of plugins, or want to get creative with product galleries, we’re covering all approaches to get you the results you’re looking for.
How to Add Product Badges in WooCommerce
You have three ways to add custom badges to your WooCommerce products:
- Custom Code Solutions: Write PHP functions and CSS styles to create exactly the badge designs you want.
- Dedicated Badge Plugins: Install specialized plugins that provide pre-built badge templates, drag-and-drop positioning, and user-friendly admin interfaces.
- Gallery-Based Badges: Create strategic product showcases throughout your site using gallery plugins that support WooCommerce integration.
How do you know when to decide between each option? Well, custom code works best if you have development skills and need unique badge designs. Badge plugins are ideal for most store owners who want a quick setup with professional results. Gallery badges are ideal for showcasing featured products beyond standard shop pages.
The complexity of each of these methods ranges from basic plugin installation (five minutes) to custom development (several hours), so consider your timeline and technical comfort level when deciding.
Method 1: Custom Code Solutions
Custom code gives you complete control over badge appearance and functionality. This approach requires PHP and CSS knowledge but offers unlimited design possibilities and doesn’t add plugin overhead to your site.
Adding Custom Badge Text with PHP
Here’s a basic code snippet to add custom badges based on product conditions:
add_action('woocommerce_before_shop_loop_item_title', 'add_new_badge_no_styling', 5);

function add_new_badge_no_styling() {
    global $product;

    if (!$product || !is_a($product, 'WC_Product')) {
        return;
    }

    // Get the product's publish timestamp
    $post_date = get_the_date('U', $product->get_id());
    $current_time = current_time('timestamp');

    // Show "New" badge if published within the last 30 days
    if (($current_time - $post_date) <= (30 * DAY_IN_SECONDS)) {
        echo '<span>New</span>';
    }
}Code language: PHP (php)
Load up your shop and here’s what you should see:

Styling Badges with CSS
The code above gives us a solid enough foundation, but there’s definitely room for improvement. With a bit of inline CSS, though, we can achieve a much better look:
add_action('woocommerce_before_shop_loop_item_title', 'add_new_badge_minimal_styling', 5);
function add_new_badge_minimal_styling() {
global $product;
if (!$product || !is_a($product, 'WC_Product')) {
return;
}
$post_date = get_the_date('U', $product->get_id());
$current_time = current_time('timestamp');
if (($current_time - $post_date) <= (30 * DAY_IN_SECONDS)) {
echo '<span style="
position: absolute;
top: 8px;
left: 8px;
background: #222;
color: #fff;
padding: 2px 6px;
font-size: 12px;
border-radius: 3px;
">New</span>';
}
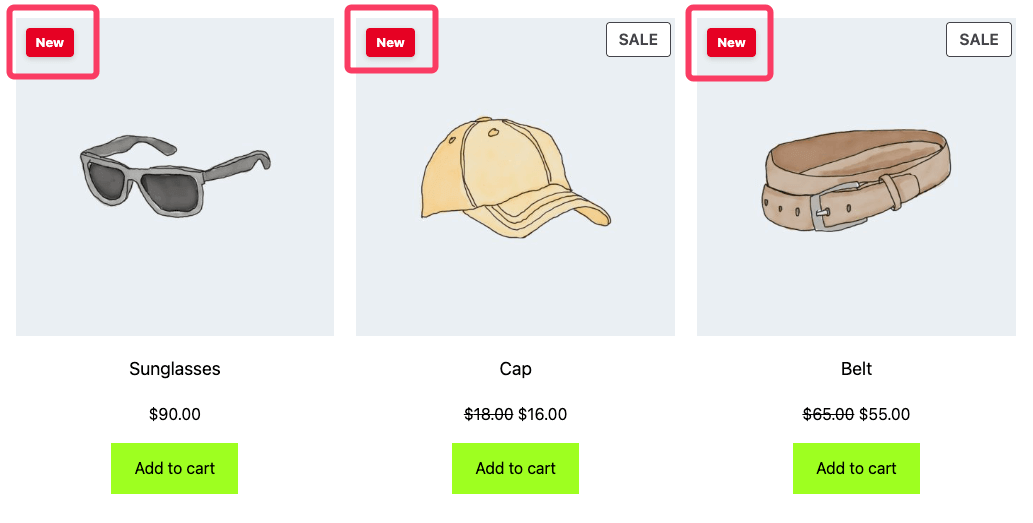
}Code language: PHP (php)And here’s what that should look like:
Custom code has clear pros and cons to consider.
Pros:
- It gives you complete design freedom without any plugin dependencies.
- Your badges will load fast and integrate with your theme since they’re built directly into your site’s code.
Cons:
- This approach requires solid coding knowledge and can be time-intensive to develop.
- You’ll also need to manually update your code when adding new badge types, and there’s always a risk of something breaking when you update your theme.
This method is most suitable for developers who require custom badge behaviors that aren’t available in existing plugins.
Method 2: Dedicated Badge Plugins
Badge plugins offer the easiest way to add professional-looking badges without coding. Most plugins include preset designs, conditional display rules, and user-friendly interfaces that make badge management simple.
When choosing a WooCommerce badge plugin, you’ll want to consider the following:
- Badge design variety and customization options.
- Conditional display rules (categories, tags, stock status).
- Mobile responsiveness and theme compatibility.
- Performance impact and loading speed.
- Price point and ongoing support.
Here’s how the top badge plugins compare:
| Plugin | Free version | Price | Badge type | Custom CSS | Best for |
| YITH Badge Management | Yes | $85/year | 60+ library, unlimited builder | Yes | Advanced users |
| Advanced Product Labels | Yes | Starts at $34/year | 50+ templates (CSS, image, advanced) | Yes | Budget-conscious users |
| Advanced Product Labels for WooCommerce | No | $49/year | 6 types + custom images | Yes | Automation features |
YITH WooCommerce Badge Management
YITH Badge Management handles complex badge scenarios well. The plugin includes 60+ seasonal badges for Black Friday, Christmas, and holidays.
When these don’t work, the drag-and-drop builder creates custom designs with a live preview. You can target badges incredibly precisely. For example, you would be able to show “Low Stock” only on specific product variations instead of the entire product line.
Other targeting options include categories, user roles, shipping classes, and scheduled time periods. WPML compatibility covers multilingual stores, and integration with YITH Dynamic Pricing automatically displays promotional badges.
The free version offers basic text badges. Premium costs $85/year (€79.99) for the badge library, automatic calculations, scheduling, variation targeting, and advanced rules.
Advanced Product Labels
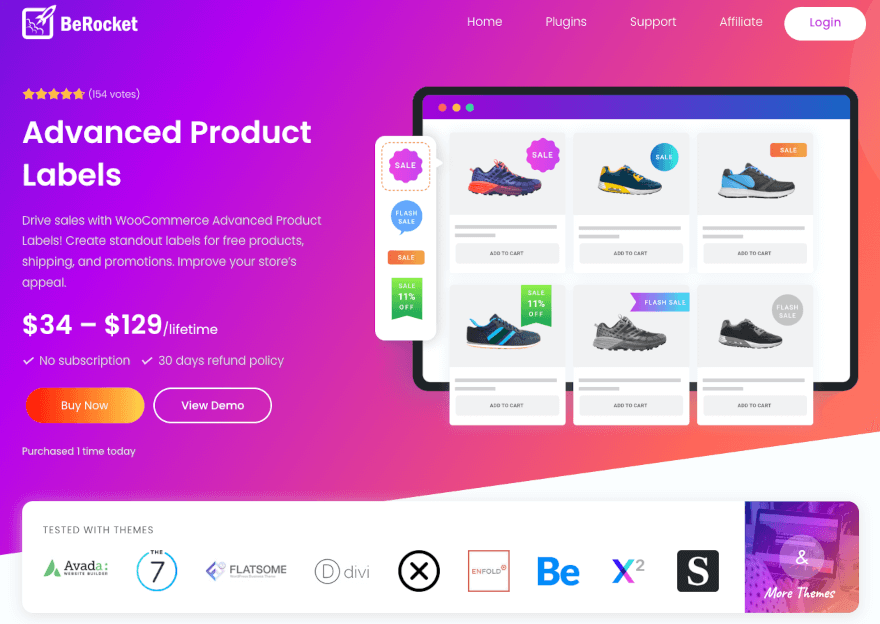
Advanced Product Labels offers 50+ templates across CSS, image, and advanced designs with multiple text lines. Unique features include discount countdown timers with seven styles, tooltips for extra product info, and clickable badges that link to other pages.
Badge positioning works on images, underneath them, or inside product titles. Styling options include Google Fonts, gradients, shadows, opacity, and a size multiplier (10x smaller to 3x larger). The plugin targets products by categories, tags, stock status, sale status, and price ranges.
The conditional system covers most common scenarios, and special hooks ensure compatibility with 99% of themes. Setup takes about 10 minutes through an intuitive interface.
Lifetime pricing starts at $34 for one site, scaling to $129 for 10 sites. No yearly subscriptions required.
Product Labels for WooCommerce

This official WooCommerce extension focuses on automation and smart label features. “Smart labels” automatically fill in discount percentages and savings amounts without manual updates. When you change product prices, labels like “30% OFF” or “$5 OFF” update automatically.
The plugin offers both global labels (targeting multiple products) and single labels (product-specific). Global targeting uses 13 conditions: categories, sale status, bestsellers, product age, price ranges, stock status, and more. You can create rules like “show ‘New’ on products added in the last 30 days.”
Six different label types are available, plus custom image uploads. The interface includes live previews and individual alignment controls for each label. Both global and single interfaces work the same way.
The extension costs $49/year and requires an active WooCommerce.com account for updates and support.
Method 3: Product Gallery Badges with FooGallery PRO Commerce

FooGallery PRO Commerce takes a different approach to product badges by focusing on strategic gallery placement rather than shop page integration. Instead of only adding badges to product pages or shop listings, you create dedicated product showcases with badges that can appear anywhere on your site.
The Best WordPress Gallery Plugin
FooGallery is an easy-to-use WordPress gallery plugin, with stunning gallery layouts and a focus on speed and SEO.
Why a Gallery-Based Badge Strategy Works
Most visitors land on your homepage or key landing pages before browsing your shop. Gallery badges capture attention at these critical first touchpoints rather than waiting for customers to find your shop page. When someone sees a “New Arrivals” gallery with eye-catching badges on your homepage, they’re more likely to explore further.
FooGallery PRO Commerce automatically syncs with your WooCommerce database. Mark a product as “Featured” in WooCommerce, and it immediately displays your chosen badge design in connected galleries. This automation keeps promotional content current without manual updates.
The plugin includes a dedicated product gallery template optimized for WooCommerce products, complete with Add to Cart buttons and category filtering. Customers can shop directly from galleries, reducing steps between product discovery and purchase. This streamlined experience often leads to higher conversion rates than traditional shop page browsing.
FooGallery PRO Commerce Badge Features
FooGallery PRO Commerce offers four main badge types that sync automatically with WooCommerce product settings:
- Sale Ribbons appear on discounted products and can display both original and sale prices when enabled.
- Featured Ribbons show on products marked as “Featured” in WooCommerce, perfect for highlighting bestsellers, seasonal items, or special promotions.
- Out of Stock Ribbons prevent customer frustration by clearly marking unavailable products.
- Backorder Ribbons indicate when products will be restocked, keeping potential sales alive rather than losing customers to stock shortages.
Each badge type includes multiple design templates with customization options for colors, text, icons, and positioning. You can use preset designs that work with most themes or create completely custom badge styles that match your brand.
The plugin automatically integrates badges with WooCommerce product status. Set up ribbon styles once, then mark products as featured, on sale, or out of stock in WooCommerce. The gallery badges will update automatically.
Beyond badges, galleries include category filtering, customizable Add to Cart buttons, lightbox product views, and hover effects. This creates a complete shopping experience where customers can browse, compare, and purchase without leaving the gallery. Button behaviors are customizable: add to cart, go to checkout, buy now, or visit product pages.
This plugin does so much without being too bulky! I like how there are many options to choose from and yet it’s very simple to set up. Plus, customer service is spot on!
Jenvasko42
Setup Process for Gallery Badges
Setting up gallery badges takes about 15-20 minutes and involves connecting FooGallery to WooCommerce products, then configuring badge display rules.
- Install and Create Gallery: After installing FooGallery PRO Commerce, create a new gallery from the FooGallery menu. Choose the Product Gallery template, which includes optimized spacing for badges and Add to Cart buttons. You can customize gallery appearance, including hover effects, borders, and lightbox styling.
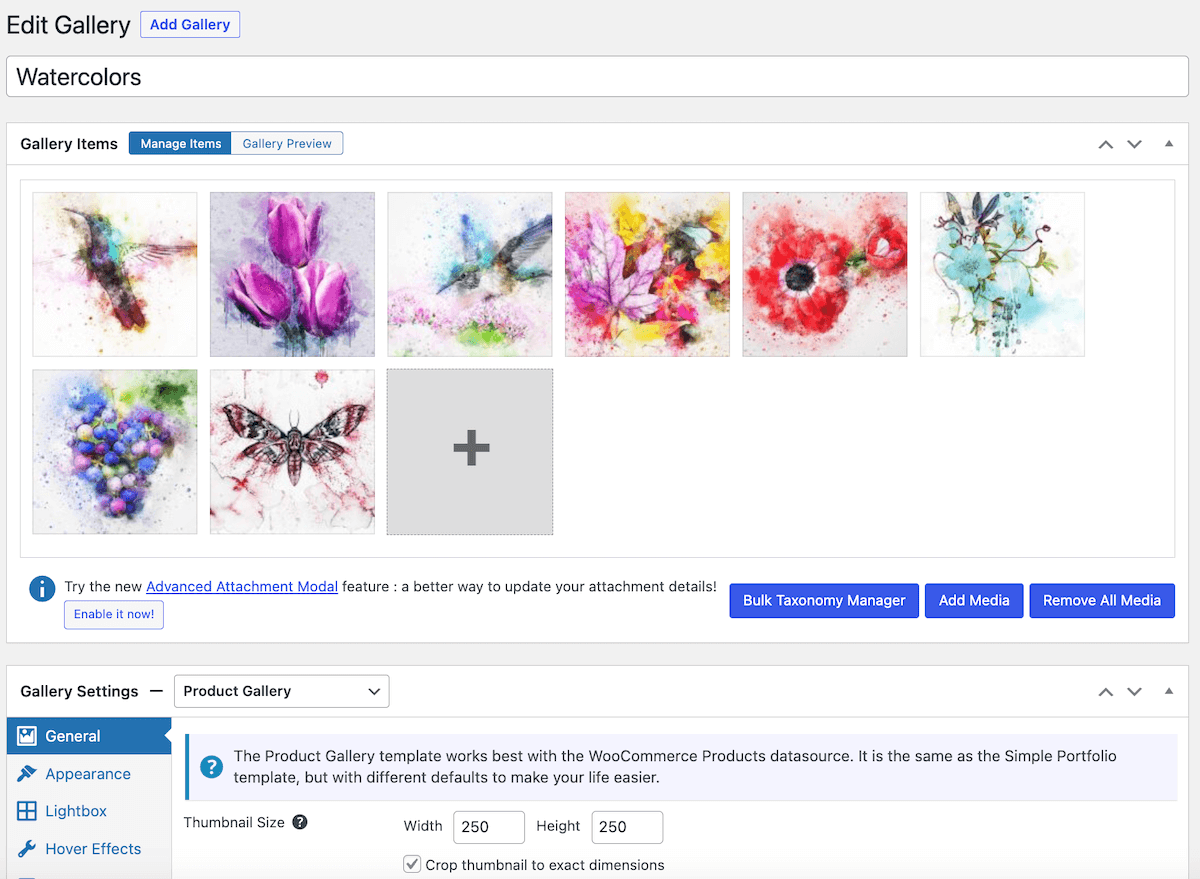
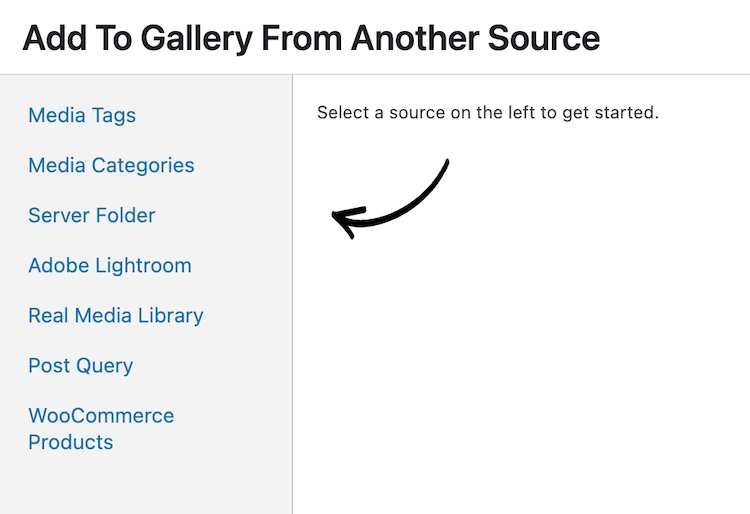
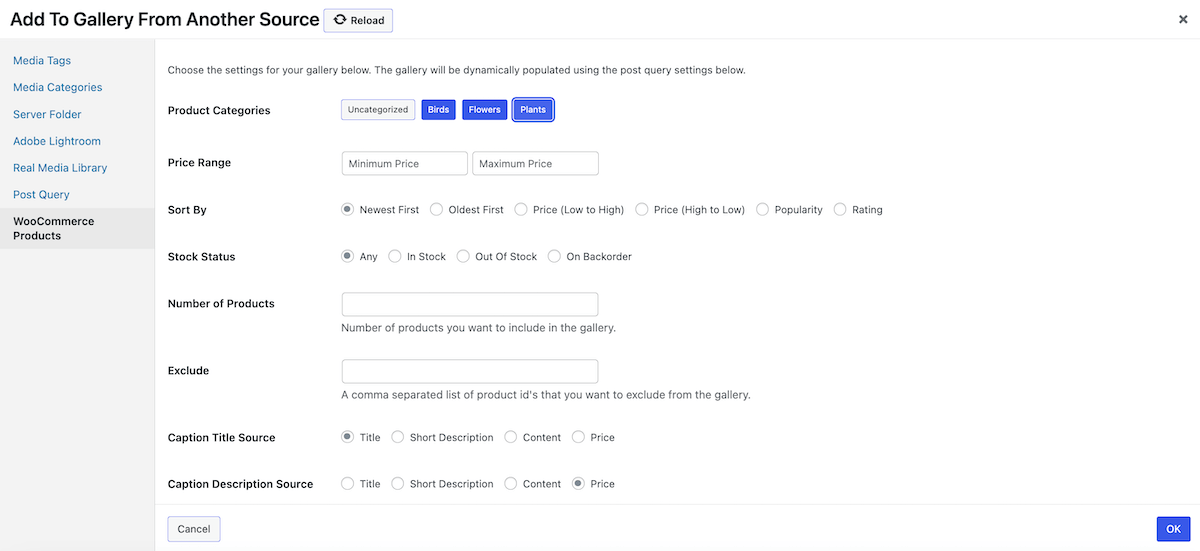
Connect WooCommerce Products: In Gallery Items, click “Add from Another Source” and select “WooCommerce Products.” Configure which products appear using filters like categories, tags, featured status, or specific product IDs. Set the number of products to display and sorting options (date, popularity, price, etc.). The Gallery Preview tab shows your product selections immediately.
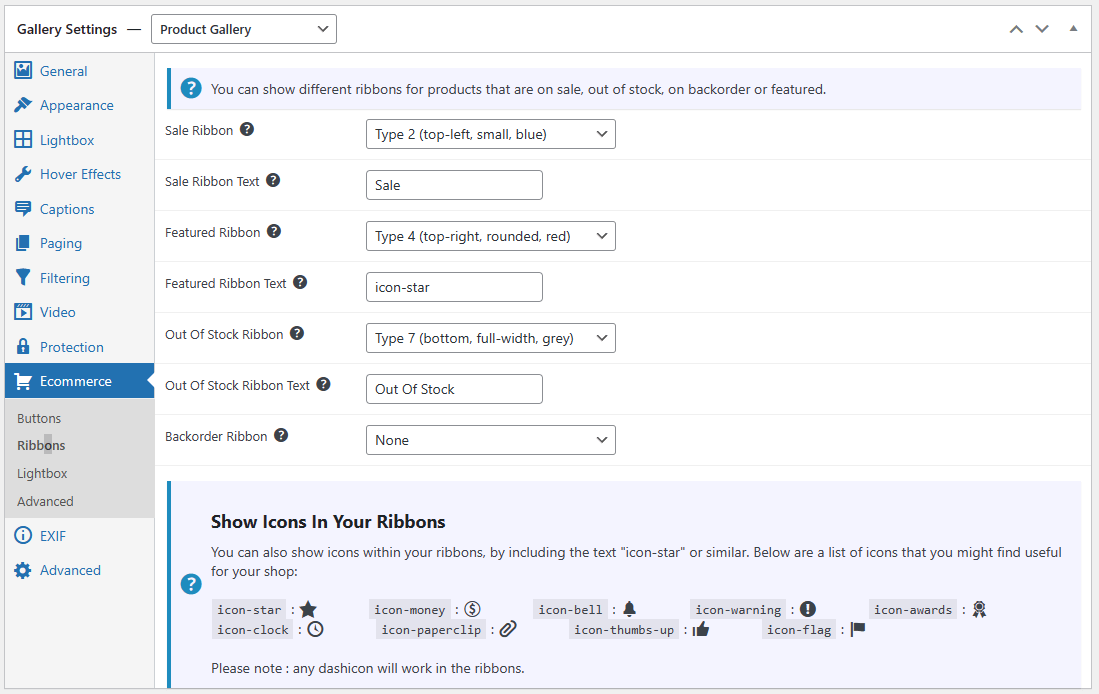
- Configure Badge Settings: Navigate to the ecommerce tab in gallery settings. Each badge type (Sale, Featured, Out of Stock, Backorder) has separate controls. For a “New Product” badge using Featured Ribbons:
- Select your preferred ribbon design from the dropdown.
- Change the text to “New,” “Just Arrived,” or “Latest.”
- Customize colors and positioning if needed.
- Save your settings.
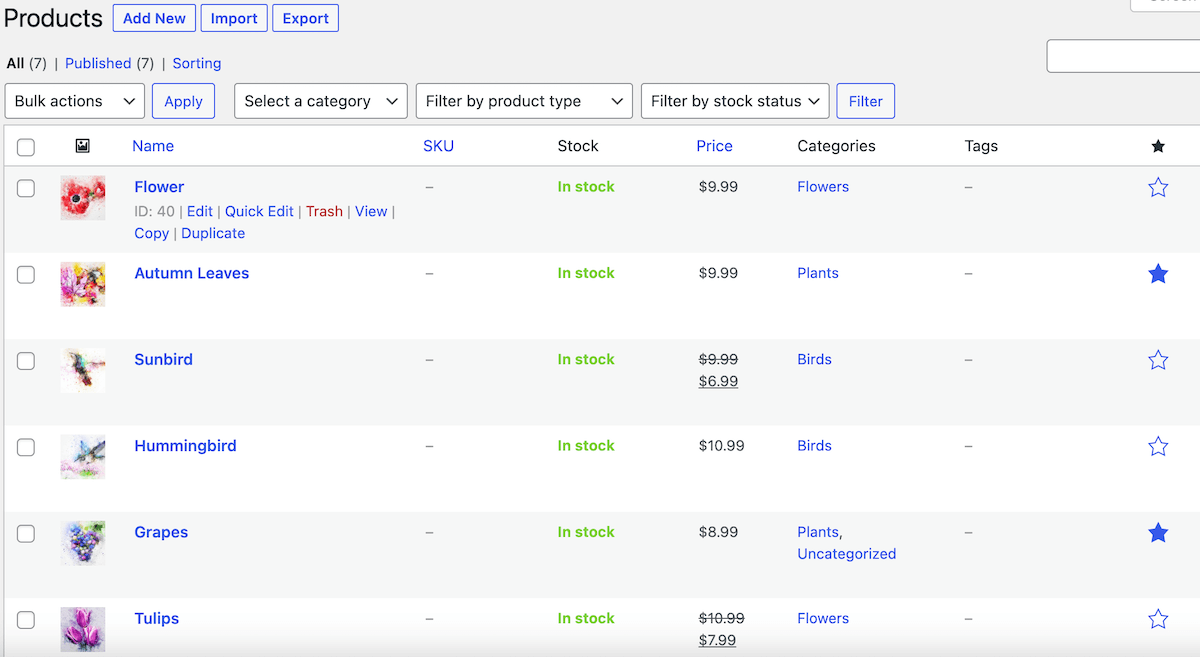
- Mark Products in WooCommerce: In your WooCommerce product admin, mark relevant products as “Featured” using the star icon. These products automatically display your configured badge in connected galleries.
- Manual Alternative: For non-WooCommerce galleries, add badges manually through the Advanced Attachment Modal in Gallery Items > Manage Items. Click the “i” icon on any image, select the eCommerce tab, and configure ribbon settings individually.
Choosing the Right Badge Solution
The best badge method depends on your skills, budget, and what you want to achieve.
Decision Framework
Think about where you want badges to appear. For product pages only, use plugins. For promoting products across your entire site, galleries work better. Custom code is only worth it if you need something very specific that plugins can’t do.
Also, consider your team. Custom code needs a developer and ongoing maintenance. Plugins are much easier but might not do everything you want. Galleries are somewhere in the middle.
Technical Requirements
Custom code requires solid PHP and CSS skills. You’ll spend time building, testing, and updating badges when something breaks. Only choose this if you’re comfortable coding WordPress sites.
Most badge plugins are pretty easy to set up. Basic ones take a few minutes to configure. Advanced plugins like YITH need more time to understand their targeting rules. They handle updates automatically and include support.
Gallery badges need basic WordPress skills and knowledge of how WooCommerce products work. Easier than coding but more involved than basic plugins.
Budget Considerations
Custom code requires initial development time and maintenance effort for future changes, but eliminates recurring subscription fees.
Plugins range from free to $99/year. YITH costs $85 yearly ($425 over five years), while Advanced Product Labels is $34 once and you’re done forever.
FooGallery PRO Commerce costs $99/year but gives you badges plus powerful gallery features, making it valuable if you need both product promotion and gallery functionality.
Best Practices for Product Badge Implementation
Following these guidelines will help your badges look professional and actually improve conversions rather than cluttering your store.
1. Design and Consistency Guidelines
Keep your badge designs consistent across your entire store. Use the same fonts, colors, and styling for similar badge types. For instance, all “Sale” badges should look identical, and all “New” badges should follow the same design pattern.
Badge positioning should follow a standard system. If you place “Sale” badges in the top-left corner, keep that position consistent throughout your store. Customers learn to look for badges in specific spots, so changing positions creates confusion.
Your badge text should sound like it comes from the same brand. Don’t mix casual language (“Super Deal!”) with formal text (“Recommended Product”) on the same page. Pick a tone and stick with it.
2. Badge Quantity and Placement
Less is more with product badges. One or two badges per product is usually the maximum before they start competing for attention. If everything has a badge, nothing stands out.
Prioritize your most important messages – “50% Off” is probably more valuable than “Featured Product” for driving immediate sales. Choose badges that directly influence purchase decisions.
Place badges where they won’t cover important product details. Avoid covering product names, prices, or key visual elements in product images. The top corners usually work best for most product layouts.
3. Performance and Mobile Considerations
Badge images and CSS effects can slow down your site if not optimized properly. Use lightweight badge designs and avoid complex animations that consume processing power. Test your page loading speeds with badges enabled to ensure they don’t hurt your site performance.
Mobile devices display badges differently from desktop screens. Test how your badges appear on phones and tablets; text that’s readable on desktop might be too small on mobile. Many badge plugins include mobile-specific sizing options.
Touch interfaces need larger badge areas if you’re making badges clickable. What works for mouse clicks might be too small for finger taps. Consider mobile-first design when planning badge placement and sizing.
4. Testing and Optimization
Track which badges actually drive sales using your analytics tools. Look at conversion rates for products with different badge types to see what works best for your customers.
Test different badge messages to find what resonates. “Limited Time” might work better than “Sale” for your audience, or “Almost Gone” could outperform “Low Stock.” Small wording changes often make big differences.
Monitor customer behavior around products with badges. If people click on badged items but don’t buy, the badge might be misleading, or the product may not match customer expectations. Adjust your badge strategy based on actual purchasing patterns, not just click-through rates.
Troubleshooting Common Badge Issues
Display Problems and Solutions
If badges don’t appear, check that your products meet the display conditions you’ve set. Verify that sale products are actually marked as “on sale” in WooCommerce, or featured products have the featured star enabled. Clear any plugin caches after making changes.
Badge positioning problems often relate to theme CSS conflicts. Most badge plugins include positioning controls or custom CSS options to override theme styles. Try different positioning methods (absolute, relative, or fixed) if badges appear in the wrong locations.
Caching Issues
Caching plugins can prevent badge changes from appearing immediately. Clear your site cache after updating badge settings or changing product statuses. Some caching plugins need badge-related pages excluded from caching to show real-time badge updates.
WooCommerce object caching can also delay badge updates. If badges show incorrect sale percentages or outdated stock status, clear WooCommerce transients through your caching plugin or database.
Theme Compatibility Issues
Some themes modify product display areas where badges appear. Check if your theme includes custom WooCommerce templates that might conflict with badge positioning. Most badge plugins provide theme-specific hooks or positioning options to handle compatibility.
Mobile Responsiveness
Badge text might be too small on mobile devices, or badges might overlap product information. Test badges on actual mobile devices, not just desktop browser inspection tools. Many plugins include mobile-specific sizing options or CSS media queries for responsive badge display.
Ready to Set Up Product Badges? Get Started with FooGallery PRO Commerce
You now have three solid methods to add custom badges to your WooCommerce store. While custom code and dedicated plugins each have their place, FooGallery PRO Commerce delivers the most strategic advantage for growing your sales.
FooGallery PRO Commerce solves the fundamental problem other badge solutions miss: visibility. Traditional badge plugins only add badges to product pages and shop listings, but most customers never reach those pages. They land on your homepage, browse category pages, and explore featured content sections. FooGallery lets you place badged product galleries exactly where customers actually spend their time, dramatically increasing promotional impact.
The automatic WooCommerce integration eliminates ongoing maintenance that kills most badge strategies. Mark products as featured, on sale, or out of stock in WooCommerce, and gallery badges update instantly across your entire site. This automation saves hours monthly while ensuring your marketing stays current.
Beyond badges, you get powerful gallery functionality that transforms how customers discover and purchase products. Direct checkout buttons, category filtering, and lightbox views create a complete shopping experience that often converts better than traditional product pages.
Ready to transform your product promotion strategy?
- Install FooGallery PRO Commerce and create your first badged product gallery.
- Place galleries on your homepage and key landing pages for maximum visibility.
- Start with “Featured” or “Sale” badges to see immediate impact.
- Track which gallery placements drive the most conversions.
Stop limiting your badges to product pages where few customers venture. Try FooGallery PRO Commerce today and watch your promotional content finally reach the customers who need to see it.
Best gallery by far that we’ve tested and deployed. Very happy for the end results. Would definitely recommend.
Neil Wiessler
The Best WordPress Gallery Plugin
FooGallery is an easy-to-use WordPress gallery plugin, with stunning gallery layouts and a focus on speed and SEO.