Jess, a PPC (pay-per-click) manager, watches CPC (Cost Per Click) for an ad jump 22% after Google flags a Below-Average Landing-Page Experience. Now she needs answers before the next budget review. Her nightmare might just be your reality!
In the world of landing page optimization, speed equals survival. Research from Think with Google shows 53% of mobile visitors bail after 3 seconds of load time, turning every extra second into wasted ad spend.
Disclosure
Relationship disclosure for FooConvert.
FooConvert is owned and maintained by FooPlugins. When we mention or recommend FooConvert in this article, that relationship may influence how the product is covered; product details should be checked against current documentation, demos, pricing, and release notes.
This results in a first-impression squeeze. This means that you must earn trust quickly, so your headline, hero image, and CTA must hit hard and instantly, delivering the message that you need users to receive.
Many ecommerce website owners will know this pain. Whether you’re escaping a Quality-Score penalty, racing a launch deadline, or chasing a competitor’s conversion rate, you need fixes that work tonight, not next quarter.
In this landing page guide, we’ll be delivering a five-step, problem→solution roadmap that adds an optimization layer to pages you already have. No rebuilds, no migrations, just changes that compound.
Step 1: How to Optimize Your Landing Page in Minutes With Templates
Landing Page Optimization (LPO) is the process by which you improve the content, layout, and/or design of a page to increase conversions. This could include updating headings, visuals, copy, CTAs, or other design elements, in order to encourage better engagement.
The simplest way to approach this is to focus on one page at a time – identify a single goal for the page, strip the navigation down, and keep a single CTA on the page for absolute focus. It is also imperative that you work on achieving your goal from the get-go. Within 50ms of landing on a page, users should see a benefit-led headline and a tight hero shot that locks in attention fast.
Meet FooConvert! FooPlugins’ free, block-editor plugin adds conversion-focused bars, fly-outs, and popups from right within the WordPress Admin. Additionally, it loads only the CSS/JS that each widget needs, so you can add overlays without slowing the page.
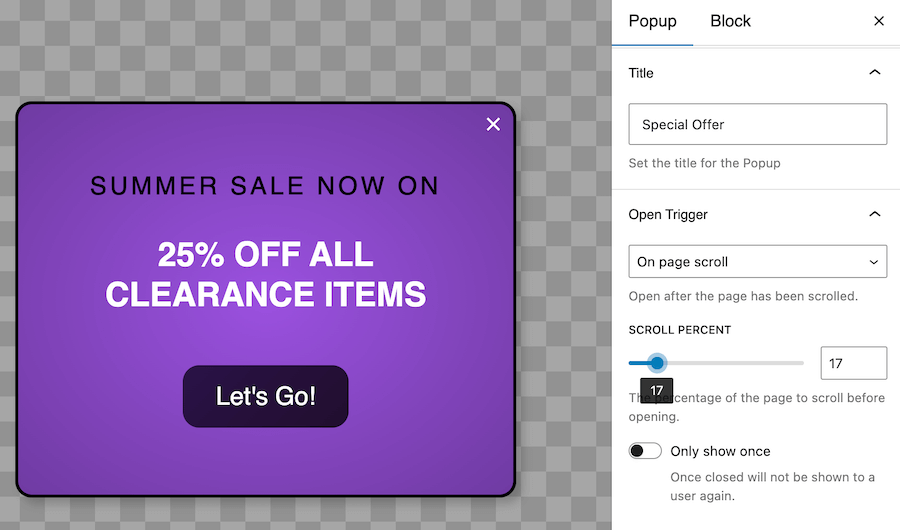
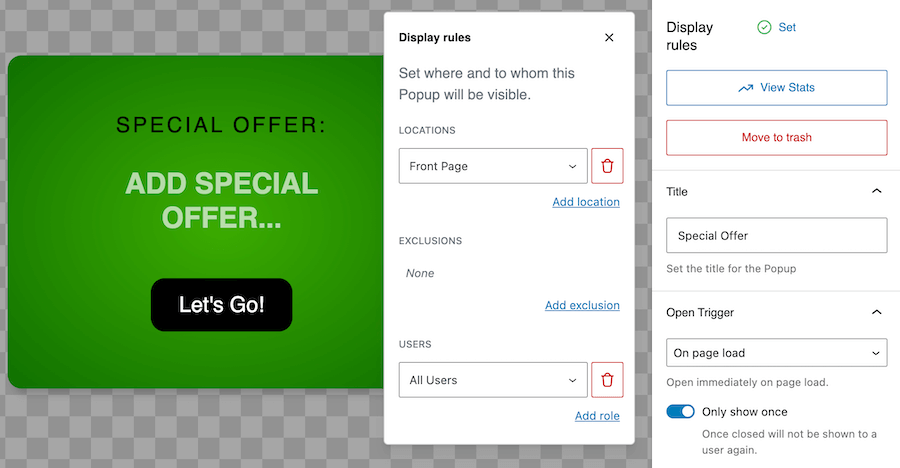
The process to add a CTA is also a simple one. Use one of the predesigned FooConvert bar or popup templates (as shown in the above screenshot), and add your copy or adjust the existing text to suit your needs. Then set your location/s, user roles, and triggers. It is advisable to also enable the Only Show Once feature.
Hit publish for instant deployment! You can then check that the widget displays on the correct pages, using the expected trigger behavior.
Hypothetically, a quick win for a PPC manager could be seen by replacing a heavy header with this bar. The result? Faster LCP on the same day (depending on the assets used), which would translate to better user experience and higher potential for conversions.
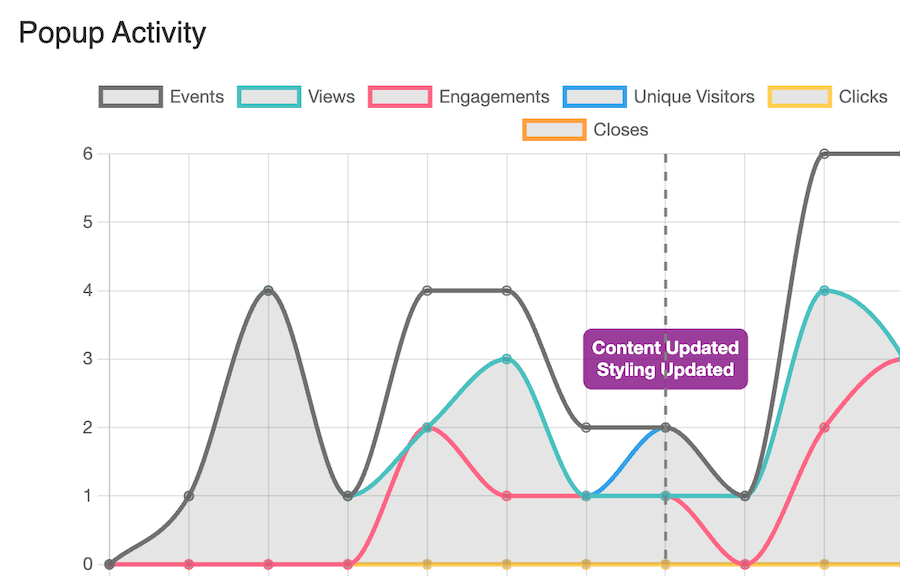
Finally, measure the impact. Built-in widget analytics display views, clicks, and conversions in a single dashboard, so you can track and assess how each widget is performing over days or weeks.
Step 2: How Page-Speed Triage Protects Quality Score
The next step is to triage your Core Web Vitals. This ensures that your page performs as well as possible, while maintaining high standards for search engines – speed beats out aesthetics for ad efficiency.
Here you can:
- Compress images (we recommend using a plugin for this)
- Defer third-party scripts
- Disable autoplay in any sliders.
For WordPress users, disabling unused plugins is another quick win for improving performance. You can also optimize your database before measuring your baseline speed.
If there are any heavy assets on your page, now is the time to swap them out. A lightweight FooConvert countdown bar can achieve the same urgency and visual impact as an autoplay slider, for example, and it will use fewer kilobytes. Lightweight by design, FooConvert loads assets only when triggered, keeping your Vitals green.
Step 3: How to Measure Landing-Page Changes Without Complex Tools
Landing pages can only be optimized if you know where and how to optimize them. As such, you need to monitor and assess your page to obtain actionable insights, allowing you to make changes that will have an impact on performance and conversions.
First off, activate any built-in analytics that can help you track views, clicks, conversions, and engagement – this is enabled by default in FooConvert. You can also carry out manual split-testing, where you duplicate widgets with variant CTAs, alternate Display Rules, and compare metrics using A/B testing methodology.
As with any tracking, you should wait for a significant amount of time to pass before making changes – this will give you statistical significance, ensuring the changes are, in fact, needed. Sites with fewer than 1,000 monthly visits will require longer testing windows, so test one change at a time. Once numbers begin to point to a winning strategy, you can use GA or a heat map to confirm this.
Promote the winner, and archive the rest. It is preferable to stay lean and avoid adding too many elements or components to your page. In this way, you can focus on compound gains, where you make small improvements over time, each adding to the overall impact of your landing page.
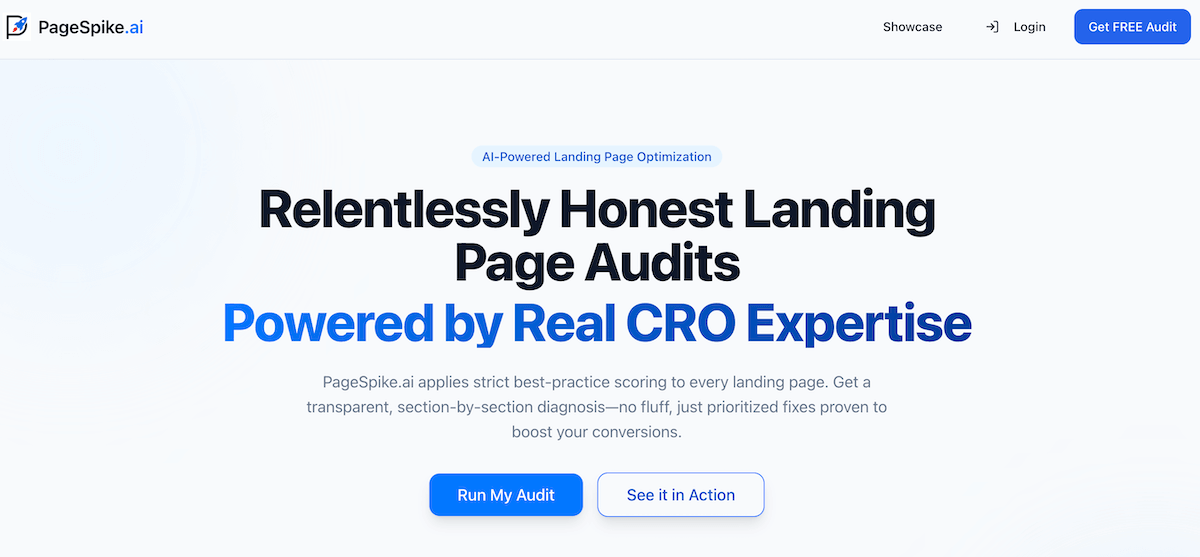
Run quick diagnostics with PageSpike.ai, a landing page optimization tool that identifies potential pitfalls and fixes for them. Paste any landing-page URL into PageSpike.ai to get an AI audit that scores your hero section, CTA placement, social proof, feature/benefit blocks, and navigation. It returns a prioritised checklist of fixes plus A/B-test ideas you can ship the same day.
Finally, turn these insights into experiments. Map PageSpike’s top suggestions to FooConvert widgets, for example, replacing a generic hero banner with a Countdown Bar. Then track views, clicks, and conversions with FooConvert’s built-in analytics to see the uplift.
Step 4: Target the Right Visitor With Display Rules & Triggers
Display rules and triggers are mechanisms that control when, where, and how specific elements appear on a page. They set the conditions that must be met in order for an element to appear, which could include the location, the users, or taking an action (like clicking on something).
When setting up your display rules or triggers, it is best to start with personas, rather than the actual widgets. Map your primary audiences to journey stages, then decide which widget suits their goal:
- Researching readers: These are Top of the Funnel (TOFU) users, who are still looking for information about your product or service. A newsletter popup on blog posts is a good fit.
- Comparing shoppers: Feature-comparison flyouts on product guides, or bars showing similar products, can be useful for MOFU (Middle of the Funnel) customers, who may just need a slight nudge before committing to a purchase.
- Ready-to-buy visitors: Target your BOFU (Bottom of the Funnel) users with free-shipping popups or flash-sale bars on the cart or checkout. This can help reduce hesitation and convert hesitant buyers.
With FooConvert, you can configure the placement of each widget in minutes by adding the relevant pages, or entire post types, to the widget’s Display Rules panel. Native WordPress synergy is possible here as targeting lives in the WP Admin. This gives you page-level precision that most SaaS CRO tools charge extra for, without you having to leave the editor or add third-party dashboards.
It’s also a simple process to set up triggers to fire at the most persuasive moment. Combining rules with FooConvert’s built-in triggers, such as scroll-depth, timer, exit-intent, or anchor-click, means that you surface CTAs exactly when engagement peaks. This will help you target visitors at the right point in their purchase journey.
You can use this same approach to earn instant trust. Drop short reviews or testimonial snippets into top-of-funnel bars to echo real customer language and reduce friction before the click.
You can avoid potential frustrations with persistent or aggressive popups by enabling the ‘Only Show Once’ setting to avoid overwhelming repeat visitors. Additionally, dynamic-text personalisation (for example, “Hey {name}”) isn’t supported yet; deep segmentation will arrive alongside server-side testing on the 2025 roadmap, so it is best to keep copy evergreen for now.
Step 5: Layer Psychology – Social Proof, Trust & Urgency
As the last step in your landing page optimization, you can build on the psychology of your page. This will consist of social proof, trust, and urgency; below are some pointers for achieving this without overwhelming or distancing users:
- Social proof on tap: drop testimonial blocks or logo strips into slide-in fly-outs to help build credibility. You can add to this by including social proof in other widgets, for example, including audience numbers in a sign-up bar (Join 5000 others…), or product reviews in special offers.
- Trust signals for skimmers: show SSL badges, guarantees, and GDPR icons in persistent bars. This can help reassure on-the-fence buyers and build trust in your brand.
We use a ‘Secure payments by Freemius’ badge for this:
- Scarcity that self-expires: use countdown bars that auto-hide after the deadline to help protect trust.
- Directional cues: a subtle arrow or pulse on a CTA grabs attention and keeps audiences focused without harming Core Web Vitals.
- Exit-intent rescue: triggering a coupon popup on exit can ensure that you catch hesitant buyers and reduce cart abandonment. It is advisable to ensure that exit-intent widgets are supported on desktop and mobile (as with FooConvert) to avoid frustrating users and potentially increasing bounce rates.
- Single-offer focus: fewer CTAs result in clearer decisions and higher conversions. Limit your page to displaying one primary CTA – for longer pages, you can repeat this once or twice more, but ensure it is the same CTA throughout.
Pick Your Next Move
Landing Page Optimization is a weekly habit, not an annual overhaul; small, measured tweaks can compound, giving you better results over time. But this is a continual process that requires frequent assessment and action:
- Start with quick-win templates and page-speed triage to stabilise your Quality Score fast.
- Then track every change. FooConvert turns opinion into evidence, giving you actionable insights into widget performance.
- Personalize messages by URL or role to stay relevant without heavyweight stacks.
- Layer social proof and urgency only after the technical basics are solid.
Once you have your data, you can assess, make changes, and track again. This iterative process, changing and tracking one element at a time, can provide you with real results and better conversions.
Ready to act? Install FooConvert, launch your first bar in minutes, and watch tomorrow’s metrics outpace today’s.
Prefer to prep? Try our AI Analyzer PageSpike.ai for a rapid self-audit before you push “Publish.”