Have you been requested to grant temporary access to your WordPress admin dashboard by either our development team or support advocates?
If you manage a WordPress website and are having some technical issues with any of our plugins, you may be requested to give us temporary access to your site as we investigate the issue and look for a working solution to the problem.
However, when it comes to this, we do understand that you may find it risky because of the security and privacy concerns that you may be having. It may also be a hassle to you as well, if you consider that you’ll have to delete the account after work is done.
This may discourage you from granting us the temporary access we may need to be able to assist you to successfully resolve the issue you are going through.
So to mitigate the risk and hassle related to creating temporary users within the WordPress community, our friends at StoreApps developed the Temporary Login without Password plugin which you can use to create temporary WordPress accounts that automatically expire after a given time.
Creating WordPress Temporary Logins without a Password
Temporary Login Without Password is a free plugin that will allow you to create temporary accounts for different user roles, including Admin, Developer, Subscriber, Editor and more. You will not have to worry about the security vulnerability of generating a lot of new accounts since they will be disabled after a certain time period, which is set by you.
The following 3 steps show you how to install, activate and use the plugin to create and manage temporary access to your WordPress dashboard, which you can then share with our development or support team when requested for temporary login credentials:
Step 1: Install and activate the Temporary Login Without Password plugin
First, log into the WordPress admin dashboard of your site and navigate to Plugin -> Add New.
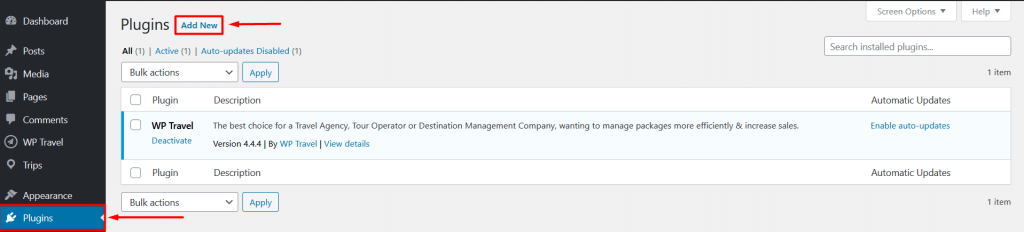
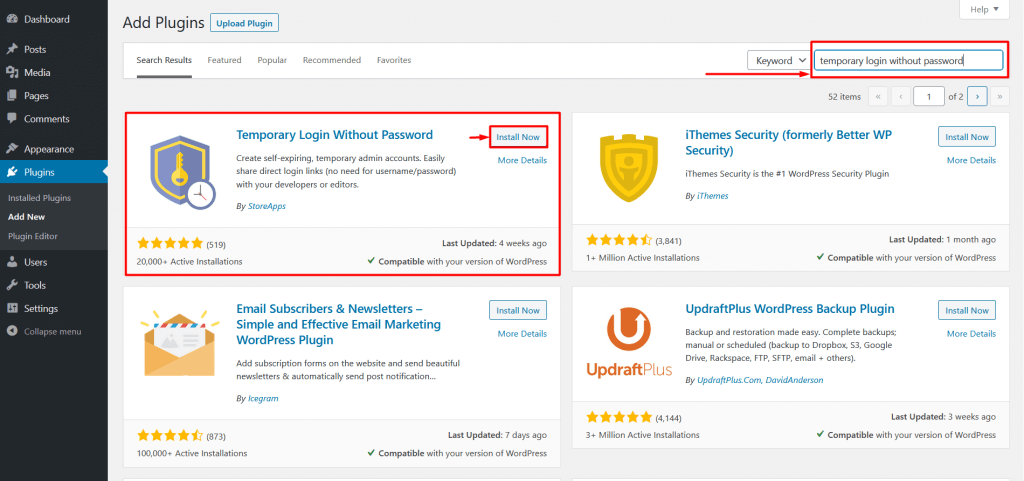
Type in “temporary login without password” in the Search box after that and click on the “Install Now” button as shown in the image below:
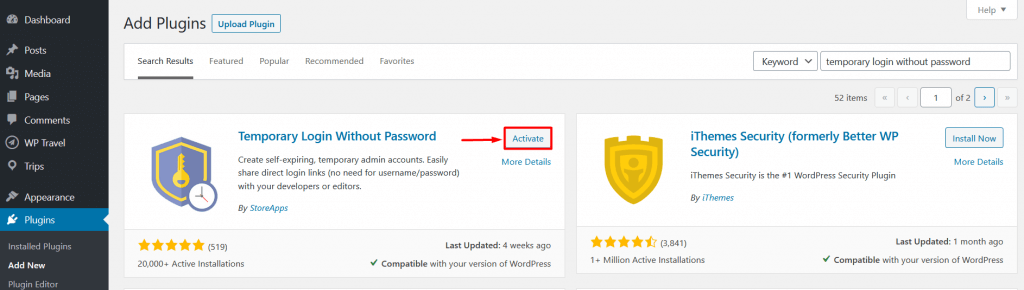
After installing the plugin, click on the ‘Activate’ button after downloading the plugin for creating WordPress temporary login.
Step 2: Create a new temporary login account
Once activated, the plugin will be inserted directly into your WordPress dashboard sidebar under the Users section. Navigate to Users -> Temporary Logins and then click Create New (as shown in the image below) to add a new temporary login account.
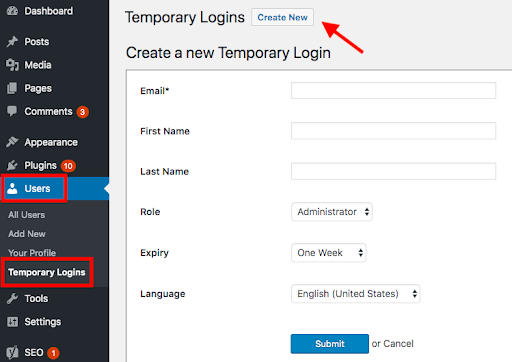
Once in this section, fill out the form with the following information for the new temporary account:
- Enter the email address, and first and last names of the user you’ll be creating the account for. When creating a temporary account for us, you can use the email address support@fooplugins.com
- Choose a role for that user. Make sure that the User Role is set to ‘Administrator’ when creating a temporary account for us – this is necessary so that we are able to access all the resources that we need.
- Set the expiration time. The default time period is usually one week from the date when you create that particular temporary login account. You can choose a custom date too.
- Set the Language to English (United States).
Once you have filled in all of the fields stated above, hit the Submit button to save your changes.
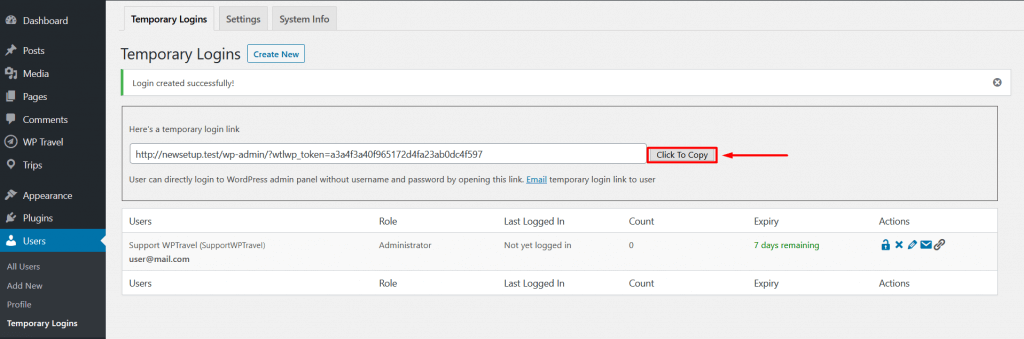
Step 3: Copy the temporary login link and share it with us
Once you have created the temporary account, kindly click the ‘Click to Copy’ button shown in the image below after submitting the form and share the link with us. We will be able to log in with the URL shared with us without any passwords.
The Admin account will then be automatically deleted after the expiry date you selected. Now your WordPress temporary login is all set.
How to Manage The Temporary Accounts
The plugin makes it really easy for you to manage all of the temporary logins you have created.
To do so, navigate to Users ->Temporary Logins, and you will see the list of temporary logins you have added to your site displayed on that page, as shown in the image below.

For each account, you will be able to see the user’s name and email address along with the role assigned to them, their last login date, and the time period remaining before the account expires.
There are different icons in the Actions column that you can use to manage a login account:
- You can disable the account by clicking on the lock icon.
- You can delete the account by clicking on the cross (x) icon.
- You can edit the account information by clicking on the pencil icon.
- To send the login links to users embedded in emails, click on the mail icon.
- Copy the login URL to your clipboard by clicking on the hyperlink icon.
Keep in mind that once a temporary account is permanently deleted, all the content created by that user, like posts or pages, will show the administrator account as the author.