In this post, we’ll show you how to exactly how to create a staff listing or team directory using our free FooGallery plugin with WordPress.
Whether you’re building sites for clients or for your own business, giving visitors an option to see the people behind the business is important. Not only is great for personalizing your product or service, but it’s also a great morale builder for your team or that of your clients.
Step 1 – Install and Activate FooGallery
Install FooGallery if you haven’t already. It’s free. You can search for FooGallery from within your WordPress Dashboard -> Plugins -> Add New -> Search
Or download it from the WordPress.org repository here.
Step 2 – Gather your Staff or Team Photos
This should really go without saying, but obviously you’ll need some actual images of your staff or team;)
It’s probably best to use headshots and you’ll want the dimensions large enough to give you some wiggle room when you start defining the thumbnail sizes in the FooGallery settings.
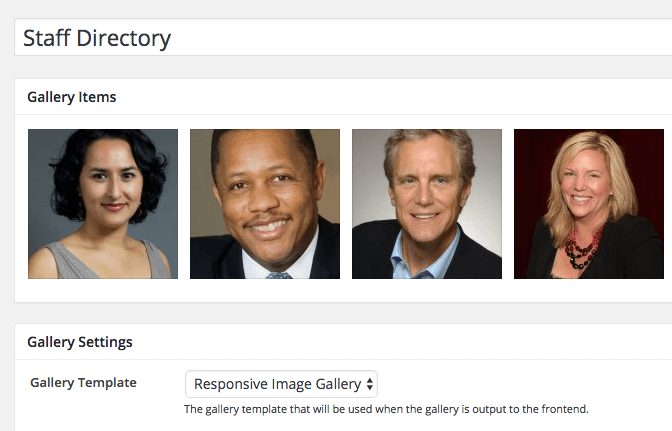
Step 3 – Create a New FooGallery
Navigate to FooGallery -> Add Gallery and click the familiar Add Media button.
Choose your headshot images and click Add Media and you’ll see the thumbnails displayed in your new staff or team directory FooGallery.
Step 4 – Add Captions and Descriptions to your Images
In this step, you’ll be adding Captions and Descriptions to the images you’ve just uploaded.
When hovering over an image, you’ll see the “i” icon.
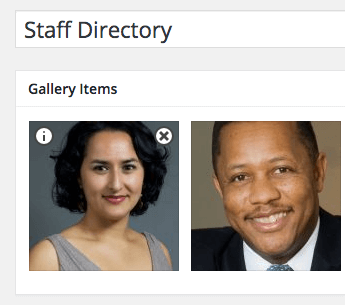
Click that icon and you’ll be taken to the WordPress Media Library image attachment edit screen. This is where you can add your Captions and Description.
Step 5 – Choose Whether to Display Titles, Descriptions, or Both
In your FooGallery settings, scroll down to the Hover Effect Type setting and choose Caption.
This will tell FooGallery you want it to display captions and/or description text from the media attachment details you entered for each image earlier.
You’ll now see two additional settings – Caption Effect and Caption Content.
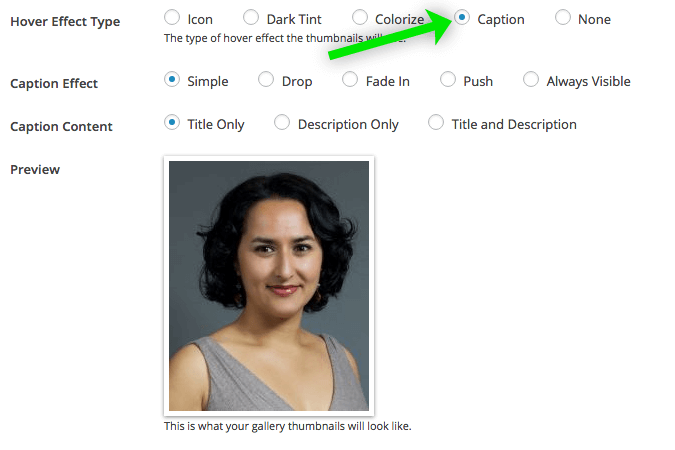
Choose whatever mix of Caption Effects and Caption Content you desire. Feel free to play with these settings, they give some nice options.
Step 6 – (Optional) Activate FooBox Free or FooBox Pro
If you’re currently using our FooBox responsive lightbox plugin, you already know that you can tell FooGallery to open images in FooBox for a better user experience.
But if you’re using FooBox Pro and you’d like to display only the Caption on hover, but the full description when opened in FooBox, you can do that too.
Adding FooBox capability to your staff listings in WordPress is an easy way to add style and professionalism to your team directory.
Step 7 – Experiment with Different Gallery Templates and Thumbnail Sizes
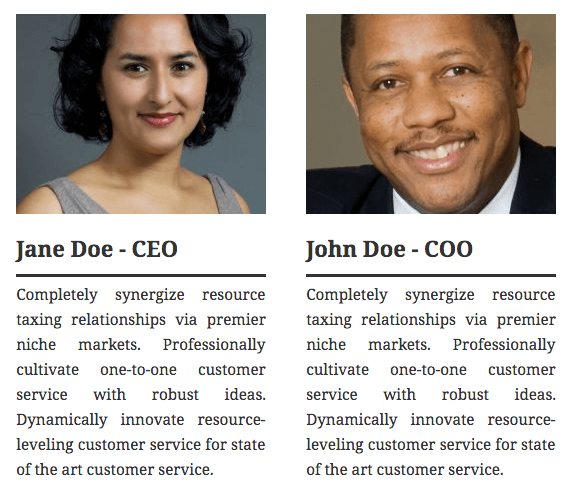
The examples above were created using the default FooGallery display template and thumbnail sizes but you can use any of the built-in display templates and even add your own custom CSS styles to perfectly match your site’s branding and layout needs.
Here are a few screenshots of this same gallery using different gallery display templates.


Staff Listing in WordPress Summary
As of this writing, FooGallery has more than 40,000 active installations with more than 60 5 star reviews. I hope you’ve learned that FooGallery can be used for much more than just image galleries.