Scenario: you have an existing gallery of images in FooGallery. You now want to sell those images. You decide to buy the FooGallery PRO Commerce plan to do this.
One of the best and most powerful features within PRO Commerce is the ability to link all images in the gallery to a master product. Below are the steps needed to get this all working. It will take a few minutes to set up, but it will save you hours of work, as you will NOT need to create a different product per image in your gallery. If you have already created your WooCommerce products, you can easily pull this into a gallery using the WooCommerce Product Datasource.
First, check out a working demo of a gallery using a master product. That is what we are going to replicate in this article.
Step 1 : Create Your Master Product
Obviously, you will need to install and activate WooCommerce first 🙂
You need to create a single master product, that all your gallery images will be linked to. If you are going to sell all your images for the same price, then you can set up a very simple product and give it a price. But if you want to use a variable product and have different prices for different sizes that you sell, then that is also possible. We will set up a variable product in this example below, because we want the visitor to be able to choose which size image they want to buy:

Once you are logged into the WPAdmin, under Products, click Add New to add a new product. You can call this product anything you like and you do not need to add a description.
Scroll down to the Product Data metabox and choose Variable Product. Then click on the Attributes tab and add a new attribute like below:

You can choose different values for the sizes you want to sell, but make sure you check “Used for variations”. Click Save attributes.
Next, click on the Variations tab. Then from the dropdown, choose “Create variations from all attributes” and click “GO”! This will create variations for all the sizes you added. You can then set a price for each of the sizes, and set a special price if you want to. Below is a screenshot of all the variations created for the master product:

The last thing you need to do is make sure your product is not visible in any other product listings on your site. Just before you publish the product, in the Publish metabox, next to “Catalog visibility” click the edit link. Then choose “hidden” from the options that show:

Click OK, then click Publish and your master product is created and ready! You just need to get the ID of the new product you created, because you need that when you edit your gallery. You can find this in the product listing: when you hover on the product, the ID is shown:

Step 2 : Edit Your Gallery
Now go to FooGallery -> Galleries and edit the gallery. Scroll down to Gallery Settings and click on the Ecommerce tab. Make sure you set all the features settings. You might need to try different settings out until you get it working as you like:

Next, under the Ecommerce tab, click on the Lightbox child tab, and set those settings. If you have variations, then you will want to set Lightbox Product Info to Right Panel:

Then click on the Advanced tab under Ecommerce:
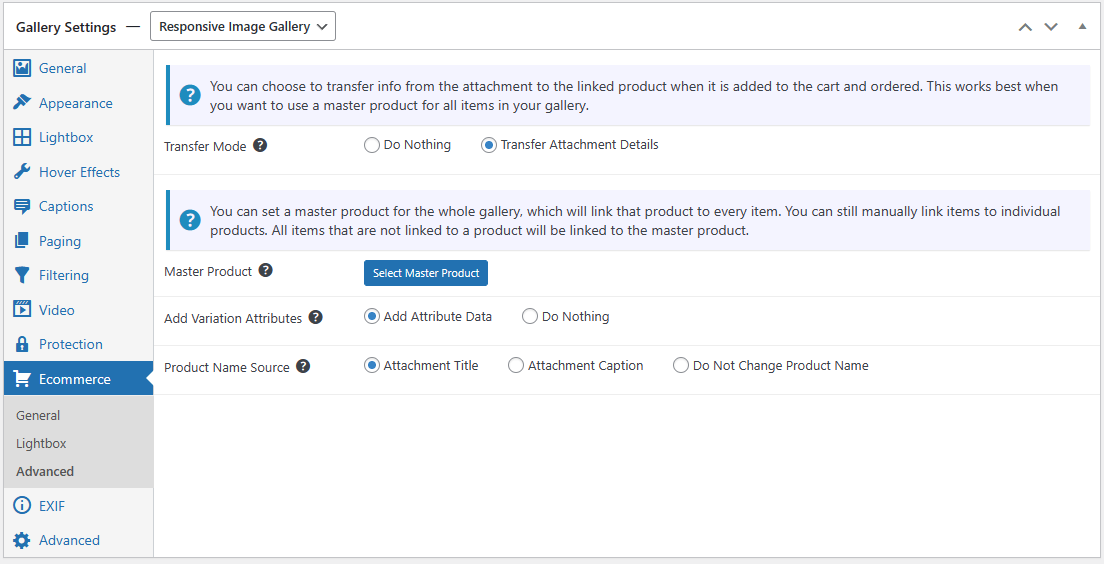
Now select the Transfer Mode of Transfer Attachment Details. You will now see a button to Select Master Product; if you click on this a panel will open up, allowing to choose the product which you set up earlier.
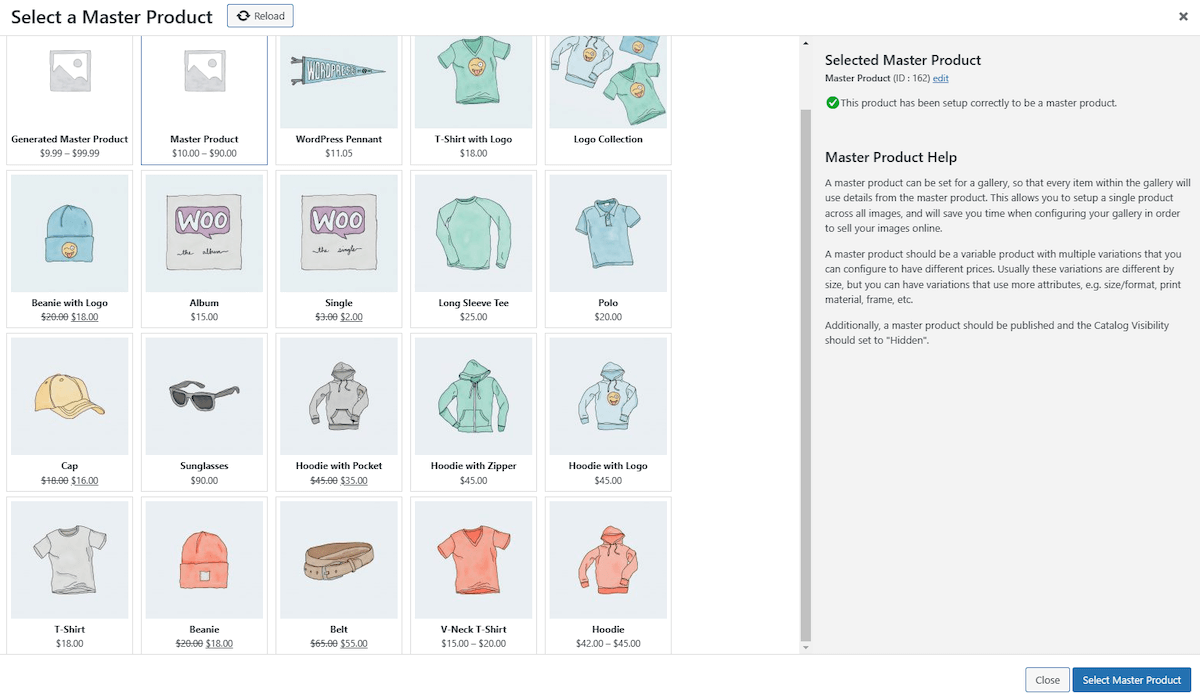
Note that you will see a Master Product Help sidebar when selecting your master product. If the product you select meets the requirements, you will see a green check in the panel. However, if there is a problem (if the product has no variables and/or it not hidden), then you will see an error message explaining the problem.
If you do see an error, you can return to the WooCommerce product and add variables and/or set the Catalog Visibility to hidden. You can then return to the gallery and select the master product.
You Are Done, Now Start Selling!
And that is it! Now all your images will be sellable, and when the customer adds the image to your cart it will pull the info for the image:

The best part about this, is that when you view the products in the cart, it will pull in the actual image thumbnail and also the variation info that was chosen:

This info also pulls into the order, when the order is placed, to make things easier when it comes to fulfilling the order.